The Tool Desk
Outbyte Driver Updater FREEFix the driver behind crashes, sound loss and screen glitchesFind Drivers →Outbyte PC Repair FREERepair Windows errors before they cause bigger problemsFix Now →The easiest backyard landscape designs are not the ones with the most features. They are the ones built around one clear use: a place to sit, dine, walk, garden, cool the house, or reduce maintenance. Start with that use, solve drainage first, choose one durable surface, and then frame it with plants, mulch, lighting, or edging.
For most homeowners, five straightforward backyard designs make the most sense: a gravel patio with border planting, a paver or concrete seating pad, mulch beds with perennial planting islands, a lawn-reduction or xeriscape zone, and a simple fire-pit or dining area with a path. Each can be built in phases, each has a realistic budget range, and each can be scaled to a small suburban yard or a larger lot.


In 2026, simple professional landscaping for a standard lot commonly lands in the low thousands, while full backyard renovations can run roughly $15,000 to $50,000 or more. Patio surfaces vary widely: gravel or decomposed granite often runs about $5 to $10 per square foot installed, general patio installation often falls around $5 to $40 per square foot, and paver patios commonly run $8 to $25 per square foot installed. The numbers change with access, slope, excavation, base depth, drainage, labor rates, and material choice.
On our job sites, the designs that hold up are the ones that respect grade, water, and daily use. A good-looking backyard that drains toward the house is not a good design. A patio without a compacted base will move. A planting bed full of nursery impulse buys will outgrow itself fast. The goal is a yard that looks intentional, works after rain, and does not become a maintenance project every weekend.
Do these 3 things before closing this tab:
1Repair Windows errors before they cause bigger problems2Scan for outdated or missing drivers - takes under a minute3Clear out junk files and repair common Windows errors#1 Best Overall
Start With the Yard, Not the Materials
Before choosing gravel, pavers, mulch, or plants, walk the backyard after a heavy rain. Look for standing water, muddy paths, roof runoff, erosion, soft soil, and areas where water moves toward the foundation. Hardscape should generally slope away from the house and toward an approved drainage area. For patios and paths, a common target is about 1/8 inch to 1/4 inch of fall per foot, depending on the surface and site conditions.
Next, mark the functions. Most backyards need some combination of dining, lounging, play space, pet space, garden beds, storage access, and circulation. A 10-by-12-foot pad can hold a small dining table. A 12-by-12-foot patio works for a compact lounge setup. Walkways should usually be at least 3 feet wide, and furniture areas need about 30 to 36 inches of clearance where people pull chairs out or walk behind seating.
Call 811 before digging for edging, posts, lighting, drainage, planting, or patio excavation. Utility conflicts are one of the cheapest problems to prevent and one of the most expensive to ignore. Also check HOA rules, setback requirements, impervious-surface limits, drainage rules, and local permit requirements before ordering material.
As a broad rule, small at-grade patios, mulch beds, and planting upgrades may not need a building permit in many areas, but rules vary by city and county. Retaining walls, covered structures, electrical work, gas lines, drainage changes, raised decks, and walls near property lines or structures are different. Many jurisdictions use height thresholds for retaining walls, often around 3 to 4 feet, but surcharge loads, slopes, fences, and nearby structures can trigger engineering even at lower heights.
What’s actually slowing this PC down?
Pick the symptom - the matching free tool is one click away.
| Design option | Best for | Typical 2026 installed cost | DIY difficulty | Maintenance level |
|---|---|---|---|---|
| Gravel patio with planting border | Budget seating, casual lounge areas, side yards | About $5-$10 per sq. ft.; 200 sq. ft. often $1,500-$2,500 after prep | Moderate | Low to moderate |
| Paver or concrete seating pad | Dining, grills, durable outdoor rooms | General patios about $5-$40 per sq. ft.; pavers commonly $8-$25 per sq. ft. | Moderate to hard | Low |
| Mulch beds with shrubs and perennials | Fast visual improvement, lawn edges, foundation transitions | Mulch often $50-$150 per cubic yard installed; plants vary widely | Easy to moderate | Moderate |
| Lawn reduction or xeriscape zone | Lower watering, less mowing, sunny yards | Basic work about $4-$12 per sq. ft.; complex designs $15-$30+ per sq. ft. | Moderate | Low after establishment |
| Fire-pit or dining zone with path lighting | Evening use, entertaining, defined destination areas | Often starts in the low thousands; gas, electrical, walls, and structures raise cost quickly | Moderate to hard | Low to moderate |
Option 1: Gravel Patio With Border Planting
A gravel patio is often the most practical entry point for an easy backyard landscape design. It gives you usable space without the cost of a full paver or stone installation, and it can fit awkward corners, side yards, or informal seating areas. A typical starter size is 10 by 12 feet for two chairs and a small table, or 12 by 16 feet for a larger lounge group.
For 2026 budgeting, gravel or decomposed-granite patios commonly run about $1 to $4 per square foot for materials only and about $5 to $10 per square foot installed. A 200-square-foot pea gravel patio often reaches about $1,500 to $2,500 once excavation, base preparation, edging, fabric where appropriate, delivery, spreading, and labor are included. Metal edging, stabilizer grids, poor access, drainage correction, or hauling out old material can push the number higher.
Layout That Works
Keep the shape simple: rectangle, square, or a broad radius curve. Avoid skinny strips that are hard to furnish and hard to maintain. For seating, plan at least 30 inches behind chairs and 3 feet for any primary path through the space. Border planting should usually be at least 18 to 24 inches deep, but 3 to 5 feet is better if you want shrubs, ornamental grasses, or layered perennials.
Use a compacted base where the soil is soft, clay-heavy, or poorly drained. Install firm edging, because gravel without restraint migrates into lawn and beds. Decomposed granite can feel more stable than loose pea gravel, especially under chairs, but it still needs the right base and drainage. Pea gravel looks relaxed and drains well, but narrow furniture legs can sink into it unless you choose appropriate furniture or add stabilizer grids.
Where This Design Fits Best
Choose this design for a casual seating area, a secondary lounge zone, a budget-friendly patio, or a backyard corner that does not justify a more expensive surface. It is also a good phased project: build the gravel pad first, add border planting next, then install lighting or furniture later.
Do not use loose gravel where someone needs a smooth rolling surface for mobility, strollers, or serving carts. Also be careful on steep slopes. Gravel on a slope tends to creep, wash, or rut unless the design includes terracing, containment, and drainage.
Rank #2

- Used Book in Good Condition
Option 2: Paver or Concrete Pad With Seating
If you want the backyard to function like an outdoor room, a paver or concrete pad is the cleanest anchor. It supports dining tables, grills, sectionals, planters, and storage boxes better than loose gravel. It also makes the yard feel organized because every other feature can relate back to the patio.
In 2026, general patio installation often runs roughly $5 to $40 per square foot depending on surface, size, prep, and region. Brick or concrete paver patios commonly cost about $8 to $25 per square foot installed, with higher-end stone or complex patterns costing more. A 280-square-foot paver patio is often estimated around $2,275 to $6,950, with a national average near $3,350. Natural stone can reach $35 to $65 or more per square foot in expensive markets or complex installations.
Crashes, No Sound, or Screen Glitches?
Random freezes, missing sound and display glitches usually trace back to one bad driver. Find and replace yours safely.Free scan · under a minuteWindows Errors? Fix Them Before They Spread
Repair common Windows errors and clear accumulated junk for a smoother, more stable PC - no reinstall needed.Free scan · no reinstallGood Starter Dimensions
For a dining pad, 10 by 12 feet is a practical minimum for a small table and chairs. A 12-by-14-foot or 12-by-16-foot patio is more comfortable for four to six people. For a lounge area, 12 by 12 feet works for a compact sofa and two chairs, while 14 by 16 feet gives more breathing room. If the grill is on the patio, leave working room around it and keep it a safe distance from siding, railings, overhangs, and combustibles according to the grill manufacturer’s instructions.
For pavers, the parts you do not see matter most: excavation depth, compacted aggregate base, bedding layer, edge restraint, joint material, and drainage slope. On our job sites, paver problems usually trace back to base shortcuts or water. If the patio base holds water, the surface will shift, settle, heave in freeze-thaw climates, or grow weeds faster than expected.
Pavers vs. Concrete
Concrete is often a cleaner choice for a simple, modern pad, especially when the access is good and the layout is rectangular. Pavers offer more texture, repairability, and design flexibility, but they require careful base work and edge restraint. If a paver settles, you can lift and reset a section. If a concrete slab cracks, repair is usually more visible.
Choose a surface based on use, not just appearance. Dining chairs move better on smooth concrete or tight paver joints. A grill zone benefits from a stable, cleanable surface. A pool-adjacent area may need slip resistance. A shaded, damp yard needs extra attention to drainage and algae-prone surfaces.
Free tools Windows power users keep installed
One-click scans. No signup required.
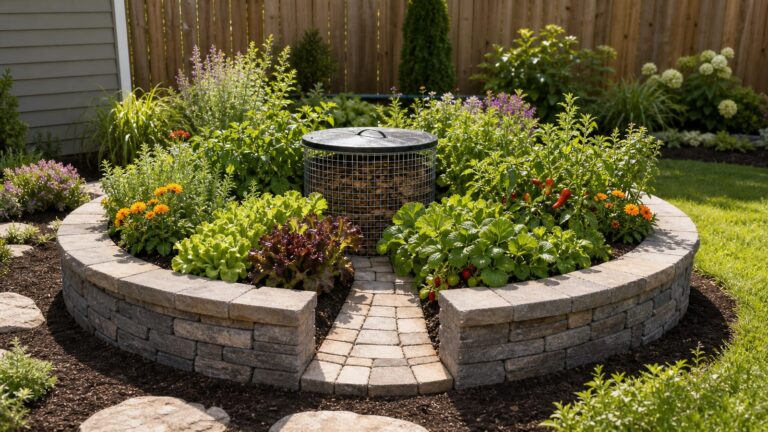
Option 3: Mulch Beds With Native Shrubs and Perennial Islands
Mulch beds are one of the fastest ways to make a backyard look designed without rebuilding the whole yard. They clean up fence lines, soften patios, reduce mowing edges, and create room for shrubs, perennials, small trees, and seasonal color. This option works especially well when the lawn is basically functional but visually flat.
Professional mulch installation commonly runs about $50 to $150 per cubic yard installed. Some 2026 project averages are around $180, with many typical mulch projects falling around $100 to $350 for smaller refreshes. By square foot, national calculator ranges commonly land around $0.71 to $1.38 per square foot for installed mulch, depending on material, depth, labor, and site conditions. Plants are the variable: small perennials are relatively inexpensive, while mature shrubs, specimen trees, delivery, soil amendments, and irrigation changes can raise totals quickly.
How to Lay It Out
Use planting islands where they solve a real design problem. Good locations include the outside edge of a patio, a bare fence line, a transition between lawn and hardscape, or a low-traffic corner where mowing is awkward. Avoid tiny isolated beds in the middle of the lawn unless they have enough size to look intentional. A bed that is 3 to 6 feet deep is usually more useful than a narrow 12-inch strip.
Plant by mature size. A shrub sold in a 3-gallon pot may be 18 inches wide at the nursery and 5 feet wide in a few seasons. Leave enough spacing so the design fills in without becoming a pruning chore. Put taller shrubs toward fences or property edges, medium plants in the middle, and low perennials or groundcovers along the front edge.
Rank #3

- Used Book in Good Condition
Mulch helps reduce evaporation, weeds, soil temperature swings, erosion, and mud splash. Keep mulch a few inches away from trunks and stems. A thick pile against bark can hold moisture and invite decay. For many beds, a 2- to 3-inch mulch layer is enough after soil preparation and planting.
Native and Adapted Planting
Outdoor water use is a major part of residential demand in the United States. Nationally, outdoor water use is about 30% of average household water use, and landscape irrigation accounts for nearly one-third of residential water use, around 9 billion gallons per day. That is why plant selection matters.
Use native or adapted plants that match your hardiness zone, sun exposure, soil moisture, and maintenance tolerance. Group plants by water need, a practice often called hydrozoning. Put thirstier plants together where irrigation can reach them efficiently, and keep drought-tolerant plants in separate zones. Drip irrigation is usually better for beds than overspray from lawn heads, especially near fences, siding, and patios.
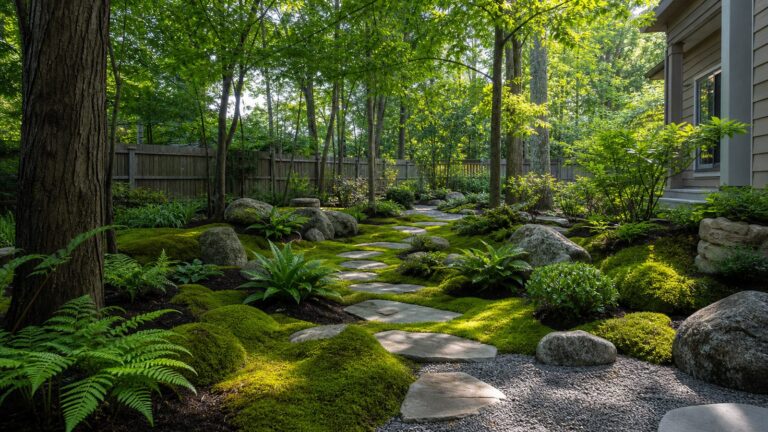
Option 4: Lawn Reduction or Xeriscape Zone
Reducing lawn is one of the most useful backyard design moves for homeowners who want less mowing and less watering. This does not mean turning the whole yard into rock. A good lawn-reduction plan keeps turf where it serves a purpose and replaces weak, hot, or awkward lawn areas with planting, mulch, gravel, paths, or groundcovers.
Recommended Free Tools
For 2026 budgeting, basic landscaping often runs roughly $4 to $12 per square foot. More complex lawn-reduction projects with hardscape, irrigation changes, grading, mature plants, and drainage work can approach $15 to $30 or more per square foot. Whether it saves money over time depends on local water rates, rebates, the amount of turf removed, and how irrigation is modified.
Where to Remove Lawn First
Start with turf that performs poorly: narrow side strips, hot slopes, deep shade, soggy corners, areas under trees, fence edges, and spots cut up by roots or utilities. These areas often consume water and labor without giving much usable space back.
A simple layout might remove a 6-foot-wide strip along the back fence and turn it into a mixed native border. Another might replace a 12-by-20-foot patch of struggling lawn with a decomposed-granite sitting area and drought-tolerant planting. In a family yard, keep a central lawn panel for play and reduce turf around the perimeter.
Water-Smart Details
Water-smart landscaping is a system, not one product. Use native or adapted plants, group them by water need, mulch beds properly, reduce overspray, and consider smart irrigation controls or WaterSense-labeled irrigation professionals. If existing sprinklers were designed for wall-to-wall turf, they usually need adjustment when part of the lawn becomes planting bed. Otherwise, you may overwater drought-tolerant plants or spray hardscape.
In dry regions, check local turf-removal rebates and plant-list requirements before work begins. In wet or clay-heavy regions, xeriscape details still need drainage planning. Drought-tolerant does not mean tolerant of sitting in water all winter.
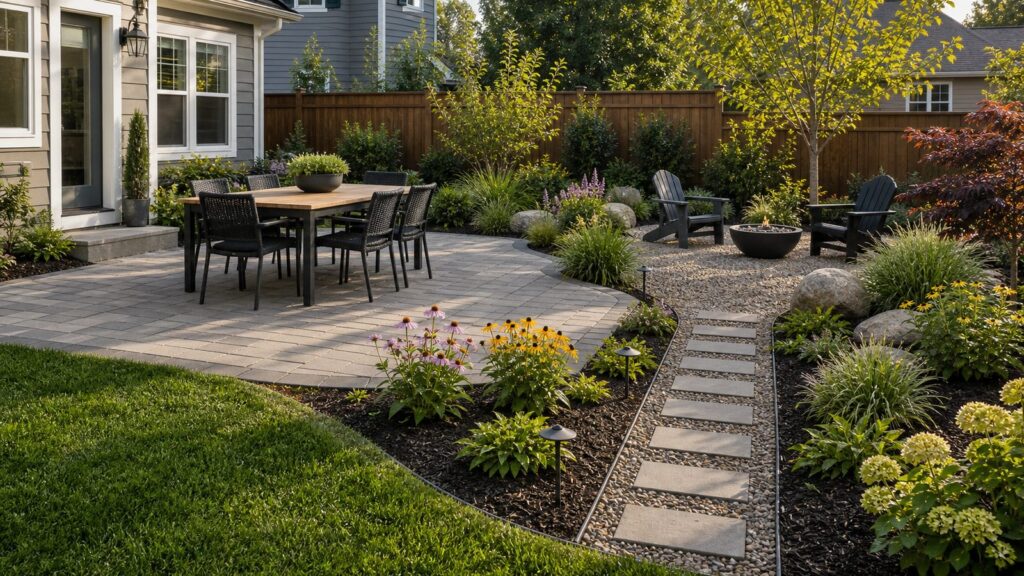
Option 5: Simple Fire-Pit or Dining Zone With Path Lighting
A destination zone gives the backyard a reason to be used after work and on weekends. The simplest version is a small gravel or paver pad with chairs, a portable fire pit or dining table, and low-voltage path lighting from the house to the seating area. This design works well when the main patio is too small or when the best shade, view, or evening breeze is farther out in the yard.
A modest gravel or paver pad often starts in the low thousands. Costs jump quickly when the design adds gas lines, electrical work, built-in seating, retaining walls, covered structures, or outdoor kitchen components. Outdoor kitchens are a separate budget category, commonly around $6,000 to $25,000, and they require more planning for utilities, clearances, appliances, and weather protection.
Fire-Pit Planning
Keep the fire area level, open, and away from combustibles. Follow the fire-pit manufacturer’s clearance requirements and local fire rules. Many areas restrict open flames during dry conditions, and some HOAs or municipalities regulate fire-pit type, fuel, setbacks, smoke, or spark screens.
For seating, a 12-by-12-foot pad can work for four chairs around a small fire feature. A 14-by-14-foot or 16-by-16-foot area is more comfortable. Leave enough room for people to move behind chairs without stepping into planting beds or off the patio edge. If using a wood-burning fire pit, plan a practical location for wood storage that does not trap moisture against the house.
Lighting and Paths
Low-voltage path lighting makes a backyard feel finished and improves safety. Space fixtures based on the beam spread instead of placing them in a rigid runway. Many residential path lights land roughly 6 to 10 feet apart, but the fixture output and path shape matter. Avoid shining lights into neighbors’ windows or directly into seated eye level.
Paths should be at least 3 feet wide for comfortable walking. Stepping stones can work for occasional use, but a primary path to a dining or fire-pit area should be stable, predictable, and visible at night. If guests will carry food, drinks, or firewood, do not make them cross uneven lawn in the dark.
Independent reader supportYour contribution helps us test, update, and keep practical guides available for everyone.When to DIY and When to Hire a Pro
DIY can make sense for cleanup, simple bed layout, planting, mulch, small gravel areas, container gardens, and furniture placement. A careful homeowner can often install a small mulch bed or refresh an existing planting area over a weekend. A 200-square-foot gravel patio may be realistic for a capable DIYer with good access, simple soil conditions, and a willingness to excavate, haul, compact, and edge correctly.
Hire a pro when the work affects drainage, grade, structural stability, utilities, or safety. That includes drainage corrections, retaining walls, paver base installation on difficult soil, concrete flatwork, gas lines, electrical circuits, significant excavation, large tree work, covered structures, and patios near foundations where water movement matters. Also bring in help for steep slopes, heavy clay, walls near structures, utility conflicts, poor access, or any project where failure would send water toward the house.
Labor often makes up 40% to 65% of total landscaping cost, so DIY can reduce the invoice. But the wrong DIY scope can cost more after rework. We have seen patios rebuilt because the base was too thin, beds replanted because mature sizes were ignored, and drainage corrected after new hardscape trapped water against the foundation. Save money where mistakes are easy to fix. Pay for skill where mistakes are buried under stone, concrete, wiring, or grade.
A Practical Build Sequence
The right sequence prevents rework. First, decide how the yard needs to function. Second, observe drainage and grade. Third, call 811 and check permit or HOA requirements. Fourth, handle demolition, cleanup, grading, and drainage. Fifth, install the hardscape anchor: gravel, pavers, concrete, or path. Sixth, adjust irrigation. Seventh, plant and mulch. Last, add lighting, furniture, planters, and accessories.
Keep a 10% to 20% contingency in the budget. Backyard projects often uncover roots, buried debris, irrigation conflicts, poor soil, old concrete, drainage problems, or access issues. A simple $5,000 project can become a $6,000 project when the crew has to haul out unexpected material or correct a low spot. Planning for that range keeps decisions calm when the site tells the truth.
Quick wins for a faster PC:
Scan for outdated or missing drivers - takes under a minuteDriver Scan →Clear out junk files and repair common Windows errorsFree Scan →Fix the driver behind crashes, sound loss and screen glitchesFind Drivers →For a small yard, one strong anchor is enough. A 12-by-14-foot paver patio with a 4-foot planting border can outperform a yard filled with disconnected features. For a larger yard, repeat materials instead of adding too many new ones. If the main patio is concrete, use concrete stepping pads or a matching paver color elsewhere. If the planting beds use native grasses and shrubs, repeat the same plant groups in threes or fives so the yard feels designed instead of collected.
Which Simple Backyard Design Should You Choose?
Choose the gravel patio if budget and speed matter most, and the space is informal. Choose the paver or concrete pad if dining, grilling, and furniture stability are the priority. Choose mulch beds and planting islands if the yard already functions but looks unfinished. Choose lawn reduction if mowing and irrigation are the pain points. Choose a fire-pit or destination dining zone if the backyard needs a reason to pull people outside.
The best version may combine two options: a paver pad with planting beds, a gravel lounge with path lighting, or a lawn-reduction border around a central play lawn. Keep the first phase manageable. A finished 12-by-16-foot patio with corrected drainage beats a half-built master plan every time.
Easy backyard landscape design is not about skipping the hard thinking. It is about making fewer, better decisions: where people sit, where water goes, what surface carries the daily use, what plants will survive at mature size, and which parts deserve professional installation. Get those right, and the backyard will feel simple because it works.
Frequently Asked Questions
What is the easiest backyard landscape design to install?
A mulch bed with shrubs and perennials is usually the easiest visual upgrade. For usable seating space, a small gravel patio with edging is often the simplest hardscape option, especially around 10 by 12 feet or 12 by 12 feet.
How much does a simple backyard landscape design cost in 2026?
Small upgrades can start in the hundreds for mulch and planting, while simple installed patio or landscape projects often land in the low thousands. Gravel patios commonly run about $5 to $10 per square foot installed, and paver patios commonly run about $8 to $25 per square foot installed.
What backyard landscaping adds the most usable space for the money?
A simple patio usually adds the clearest usable space for the money. A 10-by-12-foot or 12-by-14-foot gravel, concrete, or paver pad can create a practical dining or lounge area without redesigning the entire yard.
Do I need a permit for a backyard patio, fire pit, pergola, or retaining wall?
Permit rules vary by city and county. Small at-grade patios may not need a permit in many areas, but retaining walls, covered structures, electrical work, gas lines, drainage changes, and some fire features often require review. Check local rules before ordering materials.
Quick wins for a faster PC:
Clear out junk files and repair common Windows errorsFree Scan →Scan for outdated or missing drivers - takes under a minuteDriver Scan →Repair Windows errors before they cause bigger problemsFix Now →Is gravel, concrete, or pavers better for a low-maintenance backyard patio?
Concrete is often the simplest to maintain, pavers are durable and repairable, and gravel is usually the lowest-cost option. Gravel needs good edging and occasional raking, while pavers need a proper compacted base, edge restraint, and drainage to stay even.
How can I landscape my backyard with less watering?
Reduce weak turf areas, use native or adapted plants, group plants by water need, mulch beds 2 to 3 inches deep, use drip irrigation where appropriate, and adjust sprinkler zones so planting beds are not watered like lawn.
Quick Recap
Product prices and availability are accurate as of the date/time indicated and are subject to change. Any price and availability information displayed on Amazon at the time of purchase will apply.