The Tool Desk
Outbyte Driver Updater FREEFix the driver behind crashes, sound loss and screen glitchesFind Drivers →Outbyte PC Repair FREEClear out junk files and repair common Windows errorsFree Scan →If you already have an automatic garage door opener, setting up myQ is usually a small upgrade, not a full garage door project. For many US homes, the typical path is a Chamberlain myQ Smart Garage Control hub and wireless door sensor, often around $25 to $40 for the hardware in 2026. Once installed, you can open, close, check status, receive alerts, set schedules, and share limited guest access from your phone.
The catch is that myQ should only be added to a door and opener that are already working safely. On our job sites, we treat smart control as the final layer, not the fix for a bad door. If the door is heavy by hand, the opener strains, the photo eyes are missing, or the door fails a reversal test, smartphone control needs to wait until the mechanical and safety issues are corrected.
For a clean installation, plan on 30 to 60 minutes for a straightforward DIY setup. Add time if your garage Wi-Fi is weak, the opener label is hard to read, you have two doors, or the app has trouble pairing with the learn button. The guide below walks through the exact readiness checks, setup steps, costs, safety notes, and pro-call situations that matter before you trust a garage door to remote operation.
60-Second Readiness Checklist Before You Buy myQ
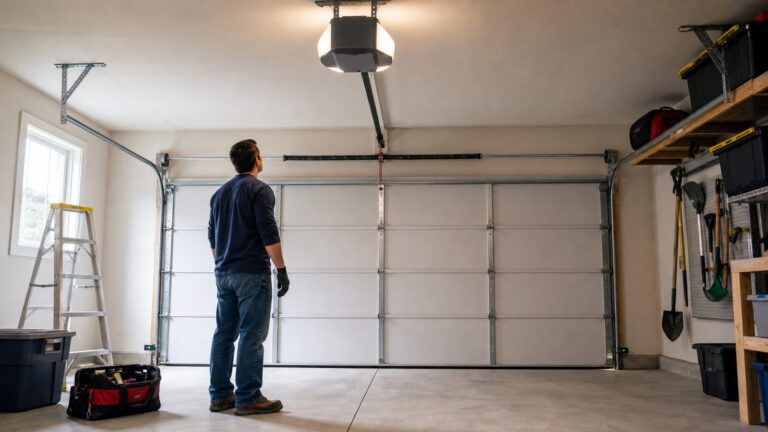
Before ordering anything, stand in the garage and check these six items. This saves the most common frustration: buying the hub first and finding out the opener, sensor system, or Wi-Fi is not ready.
- Opener age: most compatible openers are models made after 1993.
- Photo eyes: the door should have working photoelectric safety sensors near the floor, usually 4 to 6 inches above the slab on both sides of the opening.
- Reversal function: the door must reverse reliably when the safety beam is interrupted and when it contacts a proper test object.
- Wi-Fi: you need strong 2.4 GHz Wi-Fi where the hub will sit, tested with the garage door closed.
- Power: there should be a safe outlet near the opener or intended hub location.
- Account access: you need admin access to your phone, app store, home Wi-Fi name, and Wi-Fi password.
Take two photos before shopping: one of the opener label and one of the learn button area. The learn button may be yellow, purple, red, orange, green, or another color depending on brand and generation. Those photos make compatibility checks and support calls much easier, especially if the opener is mounted 8 to 10 feet overhead and the label is half-hidden by the rail or light cover.
#1 Best Overall
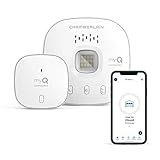
- “Did I shut the garage” No more worrying.
- Open or close your garage from anywhere. Simply download the free myQ app for iPhone or Android and get connected with your very own Smart Garage
- Works with Amazon Key In-Garage Delivery—an exclusive Prime member benefit that protects your Amazon packages.
- Give access to family or friends while on the go
- Never worry if the garage is closed at night by setting a close schedule
How myQ Works With Your Garage Door Opener
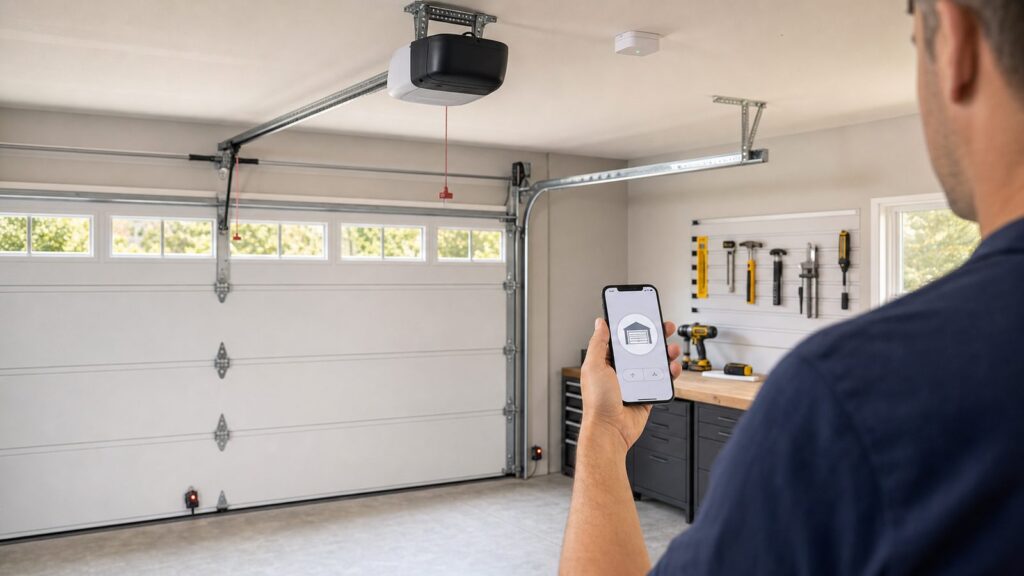
myQ control works in two common ways. Some Chamberlain, LiftMaster, and Craftsman-style openers have myQ built in. In that case, the opener itself connects to your home network through the myQ app. The second route is a retrofit hub, commonly the Chamberlain myQ Smart Garage Control, such as model MyQ-G0401. The hub plugs into an outlet near the opener, connects to Wi-Fi, pairs with a wireless sensor mounted to the garage door, and sends the same kind of open or close signal that a compatible remote would send.
The wireless door sensor is a key part of the system. The app needs to know whether the door is open or closed, not just whether a command was sent. The sensor is normally installed on the top panel of a sectional door, where it can detect the door position as the panel moves from vertical to horizontal. If that sensor is mounted on a dirty surface, placed on the wrong panel, or held only by weak adhesive in a hot garage, status readings can become unreliable.
Compatibility is the first real checkpoint. Chamberlain’s guidance centers on openers made after 1993 with standard photoelectric safety sensors that do not shut off into a low-power mode. That 1993 line matters because modern residential automatic opener safety rules require external entrapment protection, such as photo eyes, along with automatic reversal behavior. A myQ retrofit should never be used to modernize an unsafe pre-1993 opener.
myQ Setup Cost in 2026
For most homeowners, the hardware cost is modest. In 2026, the Chamberlain myQ Smart Garage Control is commonly found around $25 to $40 at major US retailers. A frequent real-world price is about $29.99 for the hub and one door sensor. If you want to monitor and control a second compatible garage door from the same supported hub, budget another $20 to $40 for an additional door sensor, depending on the exact model and availability.
Professional help costs more than the device because you are paying for the service call, troubleshooting, ladder work, opener pairing, Wi-Fi diagnosis, and sometimes door safety adjustments. A smart-control setup visit commonly falls in the $75 to $200 range when the door and opener are otherwise sound. If the opener itself needs replacement, 2026 installed opener pricing is a different category: commonly $218 to $540 with an average around $379, and broader installed ranges of $300 to $900 or more depending on opener type, door weight, accessories, removal, and local requirements.
| Item or Service | Typical 2026 US Cost | Best Fit |
|---|---|---|
| DIY myQ retrofit hub with one sensor | $25-$40 | Compatible post-1993 opener, good Wi-Fi, safe working door |
| Extra door sensor | $20-$40 | Second garage door on a compatible hub setup |
| Pro smart-control setup only | $75-$200 | Pairing help, Wi-Fi troubleshooting, safety check, multi-door setup |
| Standard opener replacement with installation | $218-$540 average range; broader $300-$900+ | Old, incompatible, noisy, weak, or unreliable opener |
| Opener as part of a larger garage door project | Often $300-$900; some 2026 guides show $441-$754 installed | Door replacement, heavier doors, upgraded drive system, battery backup needs |
Ongoing costs are usually optional. Basic myQ app control, status monitoring, notifications, schedules, and guest access are commonly marketed as standard features. Costs tend to show up around add-ons such as video storage, Tesla in-vehicle myQ integration, and Amazon Key delivery. Amazon states that Prime members pay $1.99 per 1- to 2-day in-garage order, with that fee waived when using Amazon Day with Key.
Tools and Materials You Need
A basic myQ retrofit does not require a construction-grade tool list. You are usually installing a light hub, pairing electronics, and mounting a small sensor. Still, have everything ready before you start so you are not standing on a ladder trying to read a Wi-Fi password from across the garage.
PC Slower Than It Used to Be?
A free scan shows the junk files, broken settings and background clutter dragging Windows down - then fixes them in one click.Free scan · Windows 10 & 11Crashes, No Sound, or Screen Glitches?
Random freezes, missing sound and display glitches usually trace back to one bad driver. Find and replace yours safely.Free scan · under a minute- Compatible myQ-enabled opener or Chamberlain myQ Smart Garage Control hub, such as MyQ-G0401.
- Wireless door sensor with included fastening strips or screws.
- Smartphone or tablet with the current myQ app installed.
- Home Wi-Fi name and password, ideally a confirmed 2.4 GHz network.
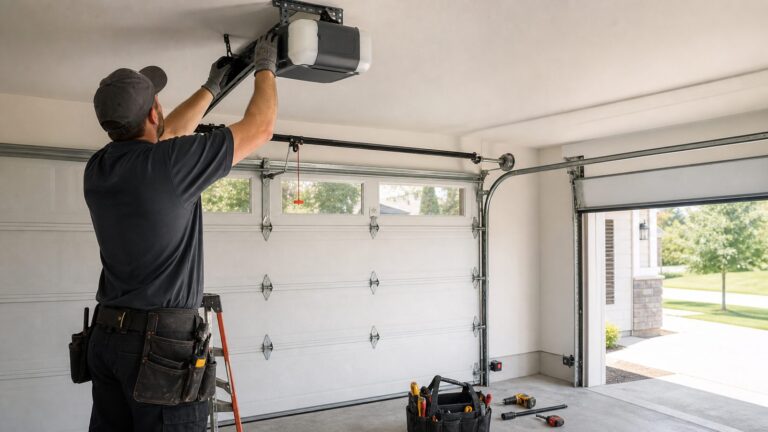
- Stepladder tall enough to comfortably reach the opener and hub location.
- Phillips screwdriver or drill/driver if using screws instead of adhesive strips.
- Clean rag and mild cleaner for the door panel surface before mounting the sensor.
- Owner’s manual or opener label photo showing model, manufacture date, and learn button details.
Do not use extension cords as a permanent power solution for a garage opener or hub. If there is no proper outlet near the opener area, call an electrician. A smart garage control is low voltage at the device, but the outlet and ceiling-mounted power arrangement still need to be correct for a garage environment.
Step-by-Step: How to Set Up myQ Smartphone Garage Door Control
1. Confirm Opener Compatibility
Start with the opener, not the app. Find the brand, model number, manufacture date, and learn button. Most compatible openers are post-1993 units with photoelectric safety sensors that stay powered. If the opener is very old, has no photo eyes, has a damaged wall console, or uses an unusual security system, check compatibility before buying the hub.
If the label is faded, take a close photo with your phone flash on. Remove the light cover only if it is designed to come off without forcing it. Some labels are on the back or side of the motor head. A clear model photo can save 20 minutes of guessing later.
2. Test the Garage Wi-Fi From the Hub Location
Garage Wi-Fi is where many otherwise simple installations fail. Test the signal with the garage door closed, standing where the hub will plug in. Metal doors, masonry walls, foil-faced insulation, detached garages, and refrigerators or freezers along the garage wall can all weaken the signal. The retrofit Smart Garage Control uses Wi-Fi and Bluetooth-assisted setup, and the garage needs reliable 2.4 GHz coverage.
If your router combines 2.4 GHz and 5 GHz under one network name, the app may still connect properly, but some homes pair more smoothly when the 2.4 GHz band is clearly available. If the signal is weak, fix that first with router placement, a mesh node, or an access point. Do not mount the hub and hope a one-bar signal will become reliable after setup.
Rank #2

- Wide-Angle Surveillance Camera: Capture a comprehensive view of your garage area, from driveway to doorway.
- Advanced Motion Detection: Monitor unfamiliar activity in your garage area for peace of mind.
- Real-Time Notifications: Receive timely and meaningful notifications via the myQ app to ensure the safety of your loved ones.
- Premium Smart Features (Subscription Required): Upgrade to a myQ subscription for advanced AI-powered detection including people, cars, and packages with intelligent alerts, plus access to recorded video history and enhanced motion detection. Free trial included to experience premium features.
- Two-Way Audio: Engage in live conversations while also monitoring ambient sounds in the area around your garage.
3. Install the myQ App and Create or Sign In to Your Account
Install the current myQ app on the phone that will administer the system. Use a strong password and do not share the main account login with contractors, cleaners, relatives, or delivery users. Shared logins are hard to manage later because you cannot cleanly revoke one person without changing the password for everyone.
Make sure the phone has Bluetooth enabled during setup and is connected to the same home network you plan to use. If you use a VPN, strict privacy DNS, or app-level network filtering on your phone, temporarily disabling those during pairing can reduce setup problems.
4. Plug In and Place the Hub
Plug the hub into an outlet near the opener, following the manufacturer’s spacing guidance in the app and printed instructions. In a typical ceiling-mounted opener setup, the hub should be close enough to communicate with the opener but not mounted where it blocks the opener light, rubs the rail, or hangs loose from the cord. Keep it away from direct water exposure, impact areas, and spots where stored lumber, ladders, or seasonal bins will hit it.
Use the app to connect the hub to Wi-Fi. Stay within a few feet of the hub during this step. If pairing fails, move the phone closer, confirm the Wi-Fi password, and verify you are not trying to connect to a 5 GHz-only network.
5. Pair and Mount the Door Sensor
The app will guide you through pairing the wireless door sensor. Once paired, mount it on the correct garage door panel, typically the upper panel of a sectional overhead door. Clean and dry the mounting spot first. Adhesive strips work best on a clean painted steel or wood surface at moderate temperature. In a garage that sees high heat, vibration, or dust, screws may be the more reliable attachment method if the sensor and door construction allow it.
Do not mount the sensor on a loose stile, cracked panel, removable trim piece, or a section that flexes heavily. The sensor should move with the door in a predictable way every cycle.
6. Pair the Hub to the Opener
This is the step where the hub learns to operate the opener. You will usually press the opener’s learn button when the app tells you to. Use a stable ladder and keep your body clear of the moving door path. If the learn button is under a light cover, open the cover carefully and avoid touching exposed wiring or hot bulbs.
Do these 3 things before closing this tab:
1Fix the driver behind crashes, sound loss and screen glitches2Clear out junk files and repair common Windows errors3Scan for outdated or missing drivers - takes under a minuteIf pairing does not work after several attempts, stop and recheck compatibility by opener model and learn-button color. Repeatedly pressing buttons without a plan can erase remote controls or keypad programming on some opener systems.
7. Name the Door Clearly and Test Operation
Use practical names in the app. “Main Garage,” “Left Bay,” “Right Bay,” or “Workshop Door” are safer than vague labels like “Garage 1” and “Garage 2.” Clear naming matters when you are away from home, tired, or managing more than one property.
Run a full open and close cycle from the app while standing in the garage. Watch the entire movement. Confirm the app status changes correctly from open to closed and back again. Then test from outside the garage with the door closed and the phone on cellular data, so you know remote status and commands are working beyond your home Wi-Fi.
Safety Checks You Should Not Skip
A garage door is the largest moving object in most homes. Smartphone control adds convenience, but it also means you may operate the door when you cannot see the opening. That makes the safety system non-negotiable.
Free tools Windows power users keep installed
One-click scans. No signup required.
First, test the photo eyes. With the door open, start closing it and interrupt the beam with a long object, staying clear of the door path. The door should reverse. If it does not, clean the lenses, check alignment, and call a garage door technician if the problem remains. Photo eyes are commonly mounted near the floor on both tracks, and they are vulnerable to bumps from trash cans, bikes, tools, and storage bins.
Rank #3
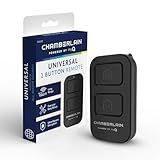
- Compatible with Leading Brands – Works seamlessly with Chamberlain, LiftMaster, Craftsman and most other garage door openers made after 1997.
- Long-Range Performance – Up to 1300 ft range for your garage door opener (conditions permitting) for smooth, reliable operation.
- Fast, Improved Programming – New setup process makes pairing with your garage door opener quick and frustration-free.
- Control Up to 2 Garage Doors or Gates – Each programmable button controls a different garage door openers or gate.
- myQ Smart Garage Control – Connect to the my Q app to manage access, receive notifications, and view garage door opener access history and more!
Second, test basic reversal behavior according to your opener manual. Many homeowners use a 2×4 laid flat under the center of the door as a practical field check, but follow the manufacturer’s instructions for your specific opener. If the door closes hard, keeps pushing, or does not reverse correctly, stop using remote operation until the opener is adjusted or repaired.
Third, disconnect the opener and check door balance by hand if you know how to do that safely. A properly balanced sectional door should not feel like dead weight. If it drops, shoots upward, binds, or sits crooked, do not keep cycling it with the motor. Broken springs, frayed cables, bent tracks, and worn rollers are repair issues, not app setup issues.
Smart Settings Worth Configuring After Setup
The best myQ setup is not just “phone opens door.” The value comes from status awareness and controlled access. Configure alerts on day one while the installation is fresh in your mind.
Quick wins for a faster PC:
Clear out junk files and repair common Windows errorsFree Scan →Scan for outdated or missing drivers - takes under a minuteDriver Scan →Repair Windows errors before they cause bigger problemsFix Now →Set an alert if the door is left open longer than 5 to 10 minutes. That catches the common evening mistake: unloading groceries, walking inside, and forgetting the door. Add a late-night alert for openings during sleeping hours, such as 10 p.m. to 6 a.m. If you have teenagers, guests, cleaners, or contractors, turn on access-related notifications so you know when delegated access is used.
Use guest access instead of sharing your main login. Give each person their own access window when possible. For a contractor, cleaner, pet sitter, or delivery need, disable temporary access immediately after the work or visit ends. That one housekeeping step prevents old permissions from becoming permanent side doors into your home.
If you use Amazon Key In-Garage Delivery, decide as a household whether that access fits your security preferences. It can be useful for package protection, but everyone in the home should understand when and how the garage may be opened for delivery. The same applies to Tesla in-vehicle myQ integration. It is separate from basic app control and may involve its own plan or subscription.
When to DIY vs. When to Hire a Pro
DIY makes sense when the opener is compatible, the door is operating smoothly, the photo eyes work, the outlet is already in place, and garage Wi-Fi is strong. A careful homeowner can often complete that setup in less than an hour with a ladder, phone, and screwdriver.
Hire a pro when the project moves beyond clean pairing and light mounting. That includes pre-1993 openers, missing photo eyes, failed reversal tests, damaged springs or cables, bent tracks, uneven travel, opener strain, grinding noise, inconsistent limits, or a door that will not balance manually. Also call a qualified electrician if a new outlet is needed near the opener. Do not solve power placement with a permanent extension cord.
There are also cases where replacement is the better investment. If the opener is 20 to 30 years old, uses outdated safety hardware, struggles with the door weight, or has unreliable travel limits, putting $30 of smart hardware on it may not be good value. A new opener installation in the $300 to $900 range can bring quieter belt-drive operation, better lighting, battery backup where needed, built-in smart control, and current safety features.
Independent reader supportYour contribution helps us test, update, and keep practical guides available for everyone.Permits, Codes, and Practical Construction Notes
Adding a plug-in myQ retrofit hub usually does not require a building permit by itself because you are not replacing the opener, altering structure, or adding a new circuit. That changes if electrical work is needed, if the opener is being replaced, or if local rules require inspection for certain garage door opener work. Some jurisdictions also have battery backup requirements for new or replacement residential garage door openers, especially where power outages and emergency egress concerns have shaped local law.
From a construction standpoint, the garage environment matters. Detached garages may need a stronger network plan than attached garages. Masonry, metal siding, foil insulation, and long driveway distances can all interfere with wireless reliability. Finished garages may hide outlets, make routing cleaner, and protect devices from impact. Unfinished garages often need more thought about where tools, shelving, bikes, and ladders will swing or be stored.
Recommended Free Tools
If the garage is part of a larger remodel, coordinate the smart opener plan with electrical, low-voltage, and door work. It is cheaper to add a properly placed ceiling outlet, improve lighting, and correct opener mounting while the garage is already being worked on than to come back later for a separate service visit.
Rank #4

- Wide-Angle Surveillance Camera: Capture a comprehensive view of your garage area, from driveway to doorway.
- Advanced Motion Detection: Monitor unfamiliar activity in your garage area for peace of mind.
- Real-Time Notifications: Receive timely and meaningful notifications via the myQ app to ensure the safety of your loved ones.
- Premium Smart Features (Subscription Required): Upgrade to a myQ subscription for advanced AI-powered detection including people, cars, and packages with intelligent alerts, plus access to recorded video history and enhanced motion detection. Free trial included to experience premium features.
- Two-Way Audio: Engage in live conversations while also monitoring ambient sounds in the area around your garage.
Troubleshooting Common myQ Setup Problems
The Hub Will Not Connect to Wi-Fi
Confirm you are using a 2.4 GHz network with adequate signal at the hub location. Test with the garage door closed. Move the router or mesh node if needed. Recheck the password, phone Bluetooth setting, and whether the phone is using VPN software during setup.
The Hub Connects, but the Opener Will Not Pair
Recheck opener compatibility by model number, manufacture date, and learn-button color. Make sure you are pressing the correct learn button, not the wall console lock button. If multiple remotes stopped working after repeated attempts, consult the opener manual before continuing.
The App Shows the Wrong Door Status
Look at the door sensor. It may be mounted on the wrong panel, loose, tilted, or installed on a dirty surface. Re-pair the sensor if the app instructs you to. Replace the sensor battery if the app reports low battery or status becomes inconsistent after months of use.
What’s actually slowing this PC down?
Pick the symptom - the matching free tool is one click away.
The Door Starts to Close, Then Reopens
That is usually not a myQ problem. Check for blocked or misaligned photo eyes, objects in the track area, binding rollers, travel-limit issues, or force-setting problems. If the door reverses unpredictably, stop relying on remote operation and have the door and opener serviced.
Maintenance Before You Rely on Remote Operation
Smart control is most useful when the door is mechanically boring: smooth, balanced, quiet, and predictable. Keep the tracks clear, keep the photo eye area free of storage, and lubricate rollers and hinges as recommended by the door manufacturer. Do not grease the track unless the door manufacturer specifically calls for it; tracks are guides, not bearing surfaces.
Schedule service if the door gets louder, starts jerking, hangs crooked, leaves a gap at the floor, or needs repeated opener adjustments. A smartphone command should not be used to force a door through a mechanical problem. On our projects, we would rather replace worn rollers, correct spring tension, or repair a cable issue once than watch an opener beat itself up for another season.
Bottom Line
For the right garage, myQ is one of the simplest smart-home upgrades a homeowner can make. A $25 to $40 retrofit hub can add remote opening, status checks, alerts, schedules, and guest access to many compatible post-1993 openers. The setup flow is straightforward: confirm compatibility, verify 2.4 GHz Wi-Fi, install the app, connect the hub, pair the sensor, pair the opener, test the door, and configure alerts.
Quick wins for a faster PC:
Fix the driver behind crashes, sound loss and screen glitchesFind Drivers →Repair Windows errors before they cause bigger problemsFix Now →The real judgment is knowing when not to install it. If the opener is too old, the photo eyes are missing, the door fails reversal testing, or the door is heavy, noisy, crooked, or damaged, fix those issues first. Smart garage control should make a safe door more convenient. It should never be used to disguise an unsafe one.
Frequently Asked Questions
Can I add myQ to my existing garage door opener?
Usually, yes, if the opener is compatible. Most compatible openers are models made after 1993 with working photoelectric safety sensors that do not power down. Check the opener brand, model, manufacture date, and learn-button color before buying a retrofit hub.
How much does it cost to set up myQ in 2026?
DIY hardware commonly costs about $25 to $40 for a Chamberlain myQ Smart Garage Control hub with one sensor. An extra door sensor is often $20 to $40. Professional setup typically runs $75 to $200 if no major opener, door, Wi-Fi, or electrical repairs are needed.
Do I need 2.4 GHz Wi-Fi for myQ?
Yes, a reliable 2.4 GHz Wi-Fi connection in the garage is the normal requirement for a retrofit myQ Smart Garage Control setup. Test the signal from the hub location with the garage door closed before installation.
Is the myQ app free to open and close my garage door?
Basic app control, status monitoring, notifications, schedules, and guest access are commonly marketed as standard features. Extra costs may apply for video storage, Tesla in-vehicle myQ integration, or Amazon Key delivery services.
Is it safe to use myQ with an older garage door opener?
Only if the opener is compatible and the safety system works correctly. Do not add myQ to a pre-1993 opener, a door without working photo eyes, a door that fails reversal testing, or a system with damaged springs, cables, tracks, or unpredictable travel.
Do I need a permit to install myQ?
A plug-in retrofit hub usually does not require a permit by itself. Permits or inspections may apply if you add an electrical outlet, replace the opener, change wiring, or live in a jurisdiction with specific garage door opener requirements.
Quick Recap
Product prices and availability are accurate as of the date/time indicated and are subject to change. Any price and availability information displayed on Amazon at the time of purchase will apply.
The Tool Desk
Outbyte PC Repair FREEClear out junk files and repair common Windows errorsFree Scan →Outbyte Driver Updater FREEScan for outdated or missing drivers - takes under a minuteDriver Scan →