What’s actually slowing this PC down?
Pick the symptom - the matching free tool is one click away.
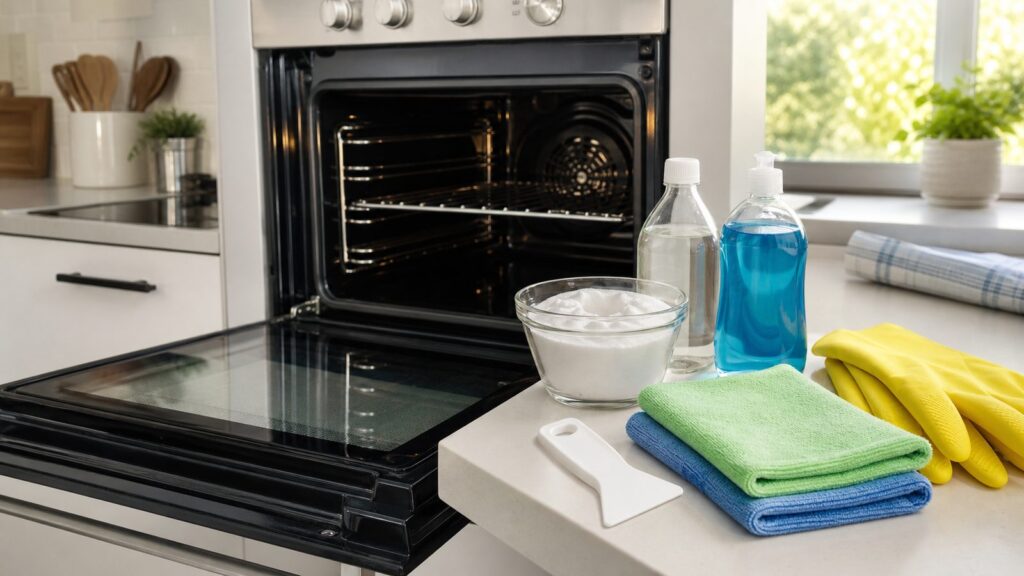
The best DIY oven cleaner for most homeowners is simple: 1/2 cup baking soda mixed with about 3 tablespoons of water into a spreadable paste. Apply it to a completely cool oven, keep it off heating elements, gas ports, igniters, fans, vents, and control seams, let it sit for 1 to 12 hours, then loosen the grime with a plastic scraper and wipe everything clean with warm water. For greasy film, add a few drops up to 1 tablespoon of dish soap. Use vinegar near the end as a rinse and deodorizer, not as the main cleaner.
That is the practical answer. The better answer is knowing which recipe fits the mess in front of you. Fresh spills, brown baked-on residue, black carbonized grease, cloudy oven glass, and sticky rack grime do not all respond the same way. On our job sites, we treat oven cleaning like other maintenance work: start with the least aggressive method that will do the job, protect the surrounding finishes, and escalate only when the condition calls for it.
There is also a safety reason to keep the oven and range area clean. Cooking remains the leading cause of home fires and home fire injuries in the United States. The U.S. Fire Administration reported about 170,000 home cooking fires in 2021, with about 135 deaths, 3,000 injuries, and more than $494 million in property loss. NFPA data also shows that, on recent annual averages, 66% of home cooking fires started with food or other cooking materials igniting. Grease buildup is not just ugly. It can smoke, stink, and feed a flare-up.
Best DIY Oven Cleaner Recipes at a Glance
Here is the short version before we get into the step-by-step work. Baking soda is the safest default because it is mildly abrasive and alkaline enough to loosen many food soils without the harshness of caustic oven sprays. Dish soap improves grease removal because it emulsifies oily residue. Vinegar is useful after the baking soda has already done its work. Ammonia is a last-resort method for removable racks or a sealed bowl in a cool oven, and it requires strict ventilation and no mixing with bleach or other cleaners.
Recommended Free Tools
| Oven condition | Best DIY recipe | Dwell time | Typical cost per cleaning | Best use |
|---|---|---|---|---|
| Fresh spill or light residue | Warm water wipe or steam bowl | 10-30 minutes | Under $1 | Recent drips before they carbonize |
| Baked-on food residue | 1/2 cup baking soda + 3 tbsp water | 1-12 hours | Under $1 | General oven floor, side walls, and door glass |
| Greasy film and splatter | Baking soda paste + dish soap | 2-12 hours | About $1-$2 | Oven glass, walls, racks, and greasy door edges |
| Odor after cleaning | Vinegar rinse after paste removal | 5-10 minutes | Under $1 | Final wipe, deodorizing, and residue removal |
| Heavy carbonized buildup | Repeat paste treatment or hire a pro | Overnight, possibly repeated | DIY under $2; pro often $121-$167 | Thick black deposits, rental turnover, neglected ovens |
Safety Rules Before You Put Anything in the Oven
Clean only when the oven is fully cool. Do not spray cold liquid onto hot glass or enamel. Thermal shock can crack glass or stress finishes. If you cooked recently, wait at least 1 to 2 hours, longer for a large wall oven or a high-temperature roast.
#1 Best Overall
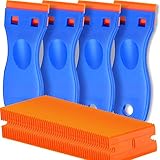
- A VERSATILE TOOL: Scraper tool is ideal for removing vinyl, debris, decals, sign, glue, stickers, labels, grease and paint from glass, walls, appliance, metal, oven and more. These plastic scrapers work great for removing labels, dripped wax, and even melted plastic from 3D printer beds. You'll find the scraper tool a useful little tool. Very handy
- OUTSTANDING PERFORMANCE: Great cleaning tool that plastic razor blades doesn't penetrate the surface like a razor blade, is easy to use and allows us to remove decals without scratches
- EASY TO USE: Plastic razor blade scraper dent on the handle is especially designed for your thumb placing on it when work, giving you great control and comfort. Also, changing the blades is easy and risk-free, all it takes is a flick of the wrist to remove an old blade and a light press to install a new one. kwbgjq
- PACKAGE INCLUDES: 4 pcs scrapers and 100 pcs extra plastic double edged blades for your everyday and replacement needs
- ABOUT US: If you have any questions about plastic razor scraper tool, contact us, we will give you a satisfactory solution within 24 hours
Unplugging is not usually necessary for a routine wipe-down, but be smart around electrical parts. Do not push paste, water, or vinegar into heating-element connections, convection fan openings, temperature probes, control-panel seams, door-lock slots, vents, or light sockets. On gas ovens, keep every cleaner away from gas ports, igniters, pilot areas, and burner openings. If your model has exposed parts you do not recognize, stop and check the manual.
Do not use bleach in an oven. Do not mix bleach with ammonia, vinegar, acids, or unknown residues. Bleach and ammonia can produce toxic chloramine gas, and bleach plus acids can create dangerous fumes. If you used any commercial cleaner before switching to a homemade cleaner, rinse thoroughly and ventilate before applying anything else.
If you have a self-cleaning oven, read the manual before using any spray cleaner, pumice stone, steam cycle, or abrasive pad. Major appliance manufacturers warn that commercial oven cleaners can damage self-cleaning oven interiors unless the manual specifically allows them. The same caution applies to aggressive scrubbing tools on special enamel coatings.
Recipe 1: Baking Soda Paste for Baked-On Grime
This is the baseline recipe we recommend first because it is cheap, controllable, and less likely to damage finishes than harsh chemical sprays. It works best on brown baked-on spills, dried food residue, odor, and light to moderate oven-floor grime.
Ingredients and tools
- 1/2 cup baking soda
- About 3 tablespoons water, adjusted as needed
- Small bowl
- Gloves
- Non-scratch sponge or microfiber cloths
- Plastic scraper or silicone spatula
- Spray bottle with water or vinegar for final rinse
The paste should look like soft drywall compound or thick frosting. If it runs, add baking soda. If it clumps and falls off the wall, add water 1 teaspoon at a time.
How to use it
- Remove the racks and any loose foil, pans, liners, or thermometer accessories.
- Brush or vacuum loose crumbs from the cool oven floor. Use a handheld vacuum only if everything is fully cool and dry.
- Spread the paste over dirty enamel and glass surfaces, staying clear of heating elements, gas ports, igniters, fans, vents, and door gasket material.
- Let it sit for 1 hour for light grime, 4 hours for baked-on residue, or overnight for stubborn deposits.
- Scrape gently with a plastic scraper. Keep the blade angle low so you lift residue instead of gouging the surface.
- Wipe with warm water and microfiber cloths until no gritty residue remains.
- Use a light vinegar mist only after most baking soda has been removed, then wipe again with clean water.
The biggest mistake is scrubbing too hard too early. Dwell time is the work. A paste that sits overnight often removes more grime than 20 minutes of aggressive scouring, and it is much kinder to enamel, glass, and trim.
Recipe 2: Baking Soda and Dish Soap for Greasy Oven Film
If the oven feels slick, yellowish, or tacky, plain baking soda may need help. Add dish soap. A good degreasing dish liquid breaks oil into smaller droplets so the residue can be wiped away instead of smeared around.
Grease-boosted formula
- 1/2 cup baking soda
- 2 to 3 tablespoons warm water
- A few drops to 1 tablespoon dish soap
Use less water than the basic recipe at first because the dish soap loosens the paste. You want a spreadable layer that sticks to the oven walls and glass.
Where this recipe works best
This is the better homemade oven cleaner for the oven door glass, greasy side walls, splatter around a roasting zone, and metal racks. It is also useful around the outer door lip, but do not flood seams or control areas. For stainless trim, wipe with the grain and avoid gritty scrubbing that can leave dull patches.
Rank #2

- DURABILITY: The strength and stiffness of the plastic blade are made of high-quality thermoformed plastic, which is lightweight, providing you with a strong and enduring design structure with more flexibility.
- SAFE: Front and back blades for safe storage. The two grooves on the back of the plastic razor blade firmly secure the plastic razor blade, ensuring that it does not slide out. the plastic blade is sharp enough to remove gaps and stubborn residues, while not scratching the surface or wearing, making our scraper efficient, clean, safe, and easy.
- COMFORT: Our plastic blade scraper consists of a sturdy handle and a plastic blade, the ergonomic curved handle design reduces hand fatigue, the dent on the handle is designed for grip and control, and it can be placed top of it while working for your comfort.
- MULTIPURPOSE: Plastic shavers can be used to remove adhesives, stickers, walls, tiles, paints, floors, dirt, glue, caulk, decals, tints, labels, window films on windows and windshields, cars, and it can also remove stains from ovens, induction cooktops, cooktops, and glass hotops.
- WHAT YOU CAN GET: 4 pcs plastic razor blades with 120 pcs double-edged plastic blades, complete set that is easy to carry and store. You can quickly and easily replace the blades anytime and anywhere. If you have any questions about our plastic scraper tools, please contact us. We will provide you with satisfactory solution as soon as possible.
Let the paste sit for 2 to 12 hours. For vertical surfaces, apply a thinner coat and press a damp paper towel against the paste for 30 to 60 minutes if it dries too quickly. Remove with warm water first, then use a final clean-water wipe. If soap residue remains, the oven may smell the next time you heat it.
Recipe 3: Vinegar Rinse for Residue and Odor
Vinegar is useful, but not in the way many homeowners expect. If you mix vinegar and baking soda at the beginning, the fizz looks productive but the reaction can neutralize the alkalinity that helps baking soda loosen greasy soil. Use vinegar near the end.
Quick wins for a faster PC:
Clear out junk files and repair common Windows errorsFree Scan →Scan for outdated or missing drivers - takes under a minuteDriver Scan →Best vinegar rinse
- 1 cup warm water
- 1/4 cup white vinegar, typically 5% acidity
- Spray bottle or damp cloth
After removing most of the baking soda paste, mist the vinegar solution lightly over remaining white film. Let it fizz for 1 to 2 minutes, then wipe with a clean damp cloth. Follow with plain water. Vinegar can help with odor and mineral-like residue, but it is not a miracle degreaser.
Avoid soaking gaskets, seams, control labels, painted trim, or natural stone countertops near the range. Acid can dull or damage some surfaces outside the oven cavity.
Recipe 4: Steam Bowl for Fresh Spills
For a fresh spill that has not baked through multiple cycles, steam is often enough. This is the lowest-cost and lowest-risk method.
How to steam-clean lightly
- Place an oven-safe bowl or baking dish with 2 to 4 cups of water on the center rack.
- Heat the oven to about 250 F for 20 to 30 minutes.
- Turn the oven off and let it cool until warm, not hot.
- Wipe loosened residue with a damp cloth.
Do not confuse this with a manufacturer steam-clean cycle. If your oven has a steam-clean setting, follow the manual exactly because water volume, timing, and cavity coating vary by model. Do not pour water directly onto the oven floor unless the manual says to do so.
Outdated Drivers Are Slowing You Down
One free scan finds every outdated or missing driver and matches the right update for your exact hardware.Free scan · exact hardware matchPC Slower Than It Used to Be?
A free scan shows the junk files, broken settings and background clutter dragging Windows down - then fixes them in one click.Free scan · Windows 10 & 11Recipe 5: Ammonia Method Only as a Last Resort
Ammonia can soften tough grease, but it deserves respect. We do not treat it as a casual cleaner. Use it only in a well-ventilated kitchen, never with bleach, never with vinegar, and never around a hot oven, pilot flame, or unknown chemical residue.
Safer limited approach
For removable racks, place them in a heavy-duty bag or covered tub with a small open cup of household ammonia, not poured directly over every surface. Leave it outside or in a very well-ventilated area overnight, then rinse thoroughly with gloves on. For an oven cavity, some homeowners place a shallow dish with a small amount of ammonia in a completely cool oven overnight, but this is not appropriate for every appliance or household. If anyone in the home has respiratory sensitivity, skip it.
Never run the oven with ammonia inside. Never combine ammonia with bleach. If you smell strong fumes, leave the area, ventilate, and stop the cleaning process.
Rank #3
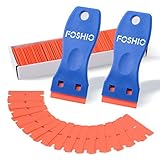
- Plastic scraper set include 2pcs plastic scraper and 100pcs double edge plastic razor blades
- Plastic Material:It is Light weight and brings the rustproof performance.
- Double Edge Blades - economical and lasting using. You can change the blades quickly and easily with the Blades clip.
- Sharp yet flexible to conform to the surface and protect them from being scraped.
- Scraper heads are angled for better performance, greater control and strength, making scraping projects faster and easier.
How to Clean Oven Racks Without Scratching the Oven
Remove racks before applying paste inside the oven. Dragging dirty racks across softened paste can grind grit into enamel. Racks are easier to clean in a bathtub, utility sink, or large plastic bin.
Lay a towel in the tub to protect porcelain. Add hot water and 1 to 2 tablespoons of dish soap. Soak racks for 2 to 8 hours, then scrub with a non-scratch pad or nylon brush. Rinse well and dry completely before reinstalling. If the manufacturer allows a rack-cleaning bag or cleaning stone, use it according to the appliance instructions. Do not assume every rack finish can tolerate the same treatment.
If a rack no longer slides smoothly after cleaning, do not oil it with cooking oil. Check the manual for approved rack lubricant or replacement guidance. Food oils can smoke and create sticky residue.
How to Clean Oven Glass Without Cloudy Streaks
Oven glass usually needs grease control more than abrasion. Use the dish-soap baking soda paste and a plastic scraper held nearly flat. Let the paste sit for 30 minutes to 2 hours, then remove it with warm water. Repeat if needed.
Do not pry apart glass panels unless your model instructions clearly show how. Oven doors use hinges under spring tension, and many doors are heavier than they look. If you remove a door, take photos first, support the weight, and keep fingers clear of hinge pinch points. For residue trapped between glass panes, a professional cleaning or appliance-service visit may be the better call.
Free tools Windows power users keep installed
One-click scans. No signup required.
What DIY Oven Cleaning Costs in 2026
One reason homemade oven cleaner remains popular is cost. A normal DIY cleaning often uses less than $2 in ingredients. As of 2026 retail pricing, baking soda often runs about $1.34 for a 1-pound box or about $3.24 for a 4-pound box. White vinegar is commonly about $3.94 per gallon. Dish soap examples range from roughly $2.94 for 18 ounces to around $5.25 for 28 ounces, depending on size and store pricing.
The tools cost more than the cleaner, but most are reusable. A basic homeowner kit usually runs $10 to $35: microfiber cloths, non-scratch sponge, gloves, spray bottle, plastic scraper, bucket or bowl, and maybe a nylon brush. A heavier non-scratch kit may run $20 to $60 if you add extra towels, rack-soaking bags, an oven-safe steam bowl, or a manufacturer-approved cleaning stone.
| Option | Typical 2026 cost | Time required | Best fit |
|---|---|---|---|
| Basic DIY paste cleaning | Under $2 in ingredients | 1-12 hours dwell plus 30-60 minutes labor | Most routine oven grime |
| DIY starter tool kit | $10-$35 | Reusable | Homeowners without cleaning supplies |
| Heavy-duty DIY kit | $20-$60 | Reusable | Racks, glass, older baked-on spills |
| Professional oven cleaning | Commonly $121-$167 per oven | Usually 1-3 hours | Heavy buildup, rentals, double ovens, difficult access |
| Broader local add-on pricing | About $150-$300 | Varies | Deep cleaning, hood/filter work, travel minimums |
Professional cleaning pricing varies by region, single versus double oven, wall oven access, rack and glass disassembly, severity of carbonized grease, travel minimums, and whether the range hood or filters are included. General house-cleaning visits in 2026 often run about $120 to $280 for a typical 2- to 3-bedroom home, but oven cleaning is often an add-on or separately priced task.
Self-Cleaning Ovens: Use the Feature Carefully
Self-cleaning cycles can be useful, but they are not magic and they are not risk-free. High-heat self-clean cycles can reach roughly 800 to 1,000 F. That heat can turn residue to ash, but it can also create smoke, odor, and stress on door locks, controls, thermostats, seals, and nearby cabinetry if the oven is heavily soiled or poorly ventilated.
Do these 3 things before closing this tab:
1Repair Windows errors before they cause bigger problems2Fix the driver behind crashes, sound loss and screen glitches3Clear out junk files and repair common Windows errorsBefore running self-clean, remove racks unless the manual says they can stay in. Wipe out loose food and pooled grease. Turn on the range hood, open a window if needed, and keep children, pets, towels, paper, and stored items away from the range. Do not run self-clean right before a holiday meal. If a weak thermal fuse, lock, thermostat, or control board fails, repair costs can run from the low hundreds to several hundred dollars depending on brand and region.
Rank #4

- REXBETI razor scrapers are built with high quality and durable design that can achieve heavy-duty use. The sturdy construction is reliable and long-lasting providing you with greater durability, ensuring you can easily tackle tough tasks
- 3 position for easy to retract and push out blades. Easy blade replacement - simple, quick blade-swapping that doesn't require tools or complicated steps, allowing you to maintain the effectiveness of the scrapers
- 2 razor scrapers with 30pcs metal and 50pcs plastic blades for your daily use. Window and glass cleaning - For removing stickers, decals, dried paint splatters, and hard water stains from car windows and glass surfaces. Kitchen and appliance cleaning - For scraping grease, burnt-on residue, and stubborn stains from flat-top stoves, cooktops, and countertops. Paint removal - For stripping dried paint from tables, chairs, window frames, and flooring. Sticker and label removal - For taking off stickers, labels, and decals from vehicles and surfaces. DIY and home projects - For removing old wallpaper, caulk, and adhesive residue during renovations
- The dual-blade system (metal for tough surfaces, plastic for delicate ones) makes it versatile. Require both metal blades for tough surfaces and plastic blades for delicate surfaces to protect against scratching and damage. All blades are sharp and durable and packaged in a sturdy reusable plastic box
- Safe, comfortable handles - Ergonomic design with good grip control during extended use. Designed for homeowners, renters, car owners, DIY enthusiasts, cleaning-focused households
For a lightly dirty self-cleaning oven, a mild baking soda wipe may be the better maintenance step. For a heavily greasy self-cleaning oven, remove loose grease manually first or hire a professional rather than asking the appliance to burn off months of buildup in one high-heat cycle.
Independent reader supportYour contribution helps us test, update, and keep practical guides available for everyone.Range Hood and Ventilation: The Part People Forget
A clean oven under a grease-loaded hood still leaves odor, smoke, and fire-risk problems. The range hood captures grease vapor, steam, and combustion byproducts. If the metal filter is clogged, airflow drops and grime settles back onto cabinets, walls, and appliance surfaces.
Most metal mesh filters can be removed and soaked in hot water with dish soap for 15 to 30 minutes, then rinsed and dried. Very greasy filters may need a second soak. Charcoal filters for recirculating hoods are usually replaced, not washed. Check the hood manual for the right interval, but many busy kitchens need filter attention every 1 to 3 months.
The Tool Desk
Outbyte Driver Updater FREEScan for outdated or missing drivers - takes under a minuteDriver Scan →Outbyte PC Repair FREERepair Windows errors before they cause bigger problemsFix Now →From a construction standpoint, cleaning an appliance does not require a building permit. But changing the range hood, adding ductwork, modifying gas piping, changing electrical circuits, cutting cabinets, or altering appliance clearances can trigger code requirements and permits. If the oven smokes repeatedly after cleaning, or if the hood cannot keep up during normal cooking, that may be a ventilation problem rather than a cleaning problem.
When to DIY vs. When to Hire a Pro
DIY is the right move for normal baked-on residue, light to moderate grease, cloudy glass, and routine maintenance. Plan on 30 to 60 minutes of hands-on work plus dwell time. A patient overnight paste treatment is usually safer than harsh scraping.
Hire a professional when the oven has thick black carbonized buildup, smoke continues after cleaning, the glass needs disassembly, the oven is part of a rental turnover, or you are dealing with a double wall oven that is awkward to reach. A pro cleaning at $121 to $167 per oven can be reasonable if it saves half a day and avoids damage.
Call an appliance technician, not just a cleaner, if there is a gas odor, electrical smell, tripping breaker, damaged gasket, broken door lock, failed display, temperature-control problem, recurring smoke after cleaning, or signs that heat is affecting nearby cabinetry. Cleaning does not fix a combustion, wiring, thermostat, or installation issue.
Common Mistakes That Damage Ovens
The first mistake is mixing baking soda and vinegar at the start and expecting a stronger cleaner. The fizz is brief. For grease, the better sequence is alkaline paste first, vinegar rinse later.
The second mistake is putting liquid or paste where it does not belong. Avoid gas ports, igniters, electric connections, convection fans, vents, probes, controls, light sockets, and gasket material. A clean enamel wall is not worth a damaged ignition system.
Best Value

- ♥[Portable & Flexible] - The rugged window scraper is lightweight and portable, convenient for home use and travel use. The package comes with 1 piece sticker scraper and 20 replacement plastic razor blades giving you more durability and flexibility to complete tasks
- ♥[Ergonomic Handle] - Ergonomic curved handle design for greater comfort and control, lets you complete the work with a reduced amount of effort. The ergonomic razor blade holder gives you a more substantial edge to grasp
- ♥[Practical & Multifunctional] - The multi-functional plastic scraper is widely used in removing glue, stickers, debris, adhesives, caulk, labels, decals from walls, counter tops, windshields, stoves, glass, appliances, metal, etc. Save your valuable time by keeping mini razor scraper tool kit in the living room, bathrooms, kitchen, car, workshop, toolbox, office, Recreational Vehicle, boat, motorcycle
- ♥[Sharp Blades & Scratch Proof] - The plastic scraper tool is made of high quality plastic with solid construction for providing strength and stiffness, which is strong, flexible, not easy to deform and break. The plastic razor blade is sharp enough to remove stubborn residue without scratching or gouging. The plastic design protect you from hurting when using it
- ♥[Multiple Color Choice] - We provide you with four color(blue, black, green, yellow) to choose, considering the different market demands. As we know, Blue symbolizes the trust and dependability. Black suggests authority and power. Besides, a dark color will not show the dirt. Yellow represents prosperous, healthy. Green indicates vitality and hope. A bright color is more appropriate for the gift-giving. More colors, stay tuned.
The third mistake is using steel wool, harsh scouring pads, unapproved pumice, or commercial oven cleaner on surfaces the manufacturer tells you to protect. Self-cleaning enamel, stainless trim, glass, and printed control labels can be permanently dulled or scratched.
The fourth mistake is leaving residue behind. Baking soda dust can smoke, smell, and leave white film the next time the oven heats. After any paste method, wipe with clean water until the cloth comes away without grit. Then run the empty oven at a low-to-moderate temperature for 10 to 15 minutes with ventilation on before cooking food.
Bettesworth’s Practical Maintenance Schedule
For a normal household, wipe fresh spills as soon as the oven is cool. Do a quick interior check every 2 to 4 weeks. Clean racks and glass every 1 to 3 months if you roast, broil, or bake frequently. Do a deeper paste cleaning every 3 to 6 months, or sooner if the oven smokes during preheat.
For heavy cooking households, short intervals matter. Grease that is wiped in the first 24 hours may need only warm water and dish soap. The same spill after ten heating cycles can become black carbon that takes overnight paste, scraping, and repeated rinsing.
The best homemade oven cleaner is not one dramatic recipe. It is the right sequence: remove loose debris, apply baking soda paste, add dish soap for grease, give it time, scrape gently, rinse thoroughly, use vinegar at the end, and check ventilation. That gives you a cleaner oven without turning a maintenance chore into an appliance repair.
Frequently Asked Questions
What is the best homemade oven cleaner for baked-on grease?
Use 1/2 cup baking soda, 2 to 3 tablespoons warm water, and a few drops up to 1 tablespoon of degreasing dish soap. Let it sit 2 to 12 hours, scrape gently with plastic, then rinse thoroughly.
The Tool Desk
Outbyte PC Repair FREERepair Windows errors before they cause bigger problemsFix Now →Outbyte Driver Updater FREEFix the driver behind crashes, sound loss and screen glitchesFind Drivers →Can you really clean an oven with baking soda and vinegar?
Yes, but use them in sequence. Baking soda paste should do the main cleaning. Vinegar works best afterward as a light rinse to help remove baking soda film and odor.
Can I use DIY oven cleaner in a self-cleaning oven?
Usually, a mild baking soda paste is acceptable if kept away from elements, ports, fans, vents, and gaskets, but check the owner’s manual first. Do not use commercial oven cleaner in a self-cleaning oven unless the manual says it is allowed.
How long should baking soda paste sit in an oven?
For light grime, 1 hour may be enough. For baked-on residue, use 4 hours. For stubborn grease or carbonized deposits, leave the paste overnight, then scrape gently and rinse.
What should I never mix when cleaning an oven?
Never mix bleach with ammonia, vinegar, acids, or unknown cleaner residues. Bleach and ammonia can produce toxic chloramine gas. It is also best to avoid bleach in ovens entirely.
Recommended Free Tools
How much does professional oven cleaning cost in 2026?
Professional oven cleaning in the U.S. commonly runs about $121 to $167 per oven in 2026. Some local deep-cleaning add-ons range from about $150 to $300 depending on oven type, access, grime level, and whether hood or filter cleaning is included.
Quick Recap
Product prices and availability are accurate as of the date/time indicated and are subject to change. Any price and availability information displayed on Amazon at the time of purchase will apply.