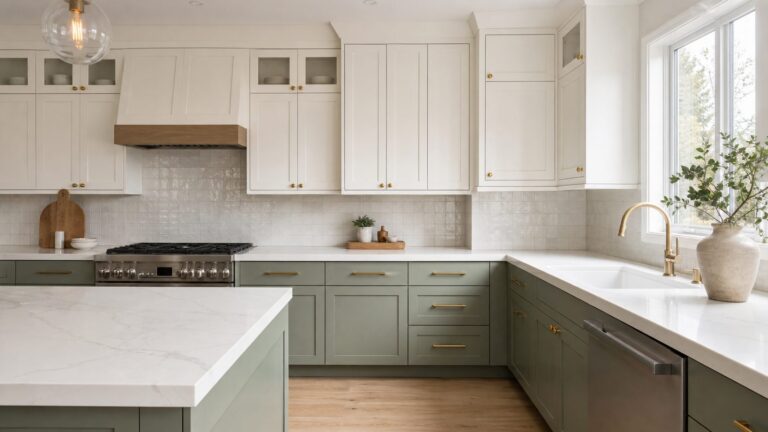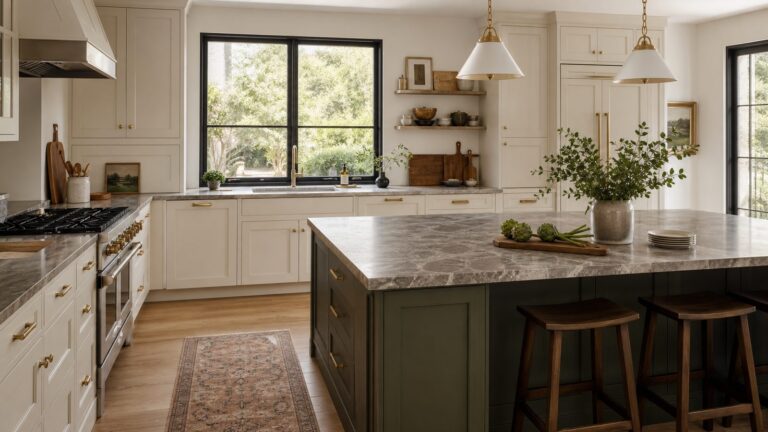
Painting kitchen cabinets is worth considering when the cabinet boxes are solid, the layout still works, and you want a major visual change without paying for full replacement. In 2026, a typical professional cabinet painting project often lands around $1,500 to $6,500, while a careful DIY job commonly requires $200 to $600 in materials plus several days or weekends of labor. The catch is that cabinet painting fails fast when it is treated like ordinary wall painting.
On our job sites, most cabinet paint problems trace back to prep, sequencing, or unrealistic expectations. Kitchen cabinets collect hand oils, cooking film, silicone polish, sink-area moisture, dishwasher heat, and abrasion around pulls. Paint has to bond to all of that, then survive years of daily contact. The 12 mistakes below are the ones that most often lead to peeling, sticky doors, visible brush marks, and expensive rework.
1. Painting Cabinets That Should Be Replaced or Refaced
Paint is a finish, not a structural repair. It can make sound cabinets look new, but it cannot fix swollen particleboard, delaminating veneer, peeling thermofoil, broken drawer boxes, water-damaged sink bases, or a kitchen layout that no longer works. If the cabinet doors are warped, the hinge screws are stripped, or the boxes are out of square, paint only makes the damage look cleaner for a short time.
Good paint candidates include stable wood, MDF, and previously painted cabinets where the existing coating is well bonded. Poor candidates include cabinet bottoms softened by leaks, doors with failing vinyl wrap, and low-grade boxes that flex when doors close. Before pricing paint, open every door, pull every drawer, check the sink base with a flashlight, and look for swelling near the dishwasher, range, and toe kicks.
What pros do instead
We decide first whether the cabinet structure deserves a finish-grade paint job. If the boxes are sound but the doors are dated, refacing or replacing only the doors may be smarter. If the layout, storage, or appliance clearances are wrong, replacement usually protects the homeowner from spending $3,000 on cabinets they still dislike.
#1 Best Overall
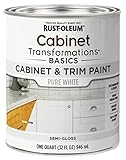
- CABINET TRANSFORMATION: Refresh outdated cabinets, vanities, furniture and trim with rich Pure White color and a smooth semi-gloss finish
- DURABLE PERFORMANCE: Easy-to-clean finish resists dirt and grime while standing up to household chemicals
- SMOOTH APPLICATION: Outstanding flow and leveling help create a beautiful finish with brush, roller, pad applicator or airless sprayer
- FAST PROJECT COMPLETION: Dries to touch in 30 minutes, recoats in 2 hours and is ready for normal use after 24 hours
- INTERIOR CABINET COATING: Ideal for kitchens, bathrooms, laundry rooms and other interior cabinet and trim applications
| Option | Best For | Typical 2026 Cost Range | Watchouts |
|---|---|---|---|
| Paint | Sound cabinets, good layout, cosmetic refresh | DIY: about $200-$600 materials; pro: about $1,500-$6,500 | Requires excellent prep and cure time |
| Reface | Good boxes with outdated doors or veneer | Often several thousand dollars, depending on door count and material | Does not fix a bad layout or damaged boxes |
| Replace | Damaged cabinets, poor layout, major remodel | Basic stock cabinetry may start around $3,000; custom kitchens can reach $50,000+ | Higher cost, longer schedule, more trades involved |
2. Painting Over Grease, Wax, or Silicone Residue
Cabinet paint failures are usually adhesion failures. The most common cause is contamination left on the old finish. Around a stove, the film may be cooking oil. Around pulls, it is hand grime. On older cabinets, it may be furniture polish, wax, or silicone residue. If primer is applied over that layer, the paint bonds to the dirt instead of the cabinet.
Cabinets should be cleaned before any sanding starts. Sanding dirty cabinets can drive grease and grime deeper into the old finish, which makes adhesion worse. This is especially important on glossy factory finishes, older stained cabinets, and doors that have been polished for years.
What pros do instead
We remove doors and drawers, clean with a cabinet-safe degreaser, rinse or wipe with clean water as required by the cleaner, and let the surfaces dry fully. High-touch areas get extra attention: trash pullouts, sink base doors, dishwasher-side stiles, upper doors near the range, and any panel beside a coffee maker or toaster. Cleaning is not a quick wipe. It is the first bond test.
What’s actually slowing this PC down?
Pick the symptom - the matching free tool is one click away.
3. Skipping the Adhesion Test
Laminate, thermofoil, glossy lacquer, and unknown old finishes can be unpredictable. Some coatings accept primer after cleaning and scuff sanding. Others reject it, even when the surface looks dull. Painting the whole kitchen before testing is an expensive way to find out that the system does not bond.
An adhesion test takes little time compared with stripping or repainting 25 doors. Choose an inconspicuous spot such as the back of a door, the inside edge of a drawer front, or a side panel near the floor. Clean it, scuff it, prime it, let it dry according to the product directions, and then test whether it scratches or peels too easily.
What pros do instead
We test the actual cabinet surface with the actual primer and topcoat system. If the primer fails on laminate or thermofoil, we stop before the budget is wasted. Sometimes the answer is a specialty bonding primer. Sometimes the answer is new doors, refacing, or replacement.
4. Leaving Doors, Drawers, and Hardware Installed
Painting cabinets in place looks faster until the finish starts showing drips at the lower rails, heavy buildup around hinges, missed edges, and sticky contact points where doors touch the frames. Installed doors also force awkward brush angles, which makes runs and lap marks more likely.
Do these 3 things before closing this tab:
1Scan for outdated or missing drivers - takes under a minute2Repair Windows errors before they cause bigger problems3Fix the driver behind crashes, sound loss and screen glitchesHardware creates another problem. Hinges, pulls, rubber bumpers, and silicone pads interrupt the coating. Paint on hinges looks amateur, and paint over rubber bumpers often stays soft or pulls off. Old bumpers should be removed or carefully masked before painting. New bumpers should be installed only after the finish has had adequate cure time.
What pros do instead
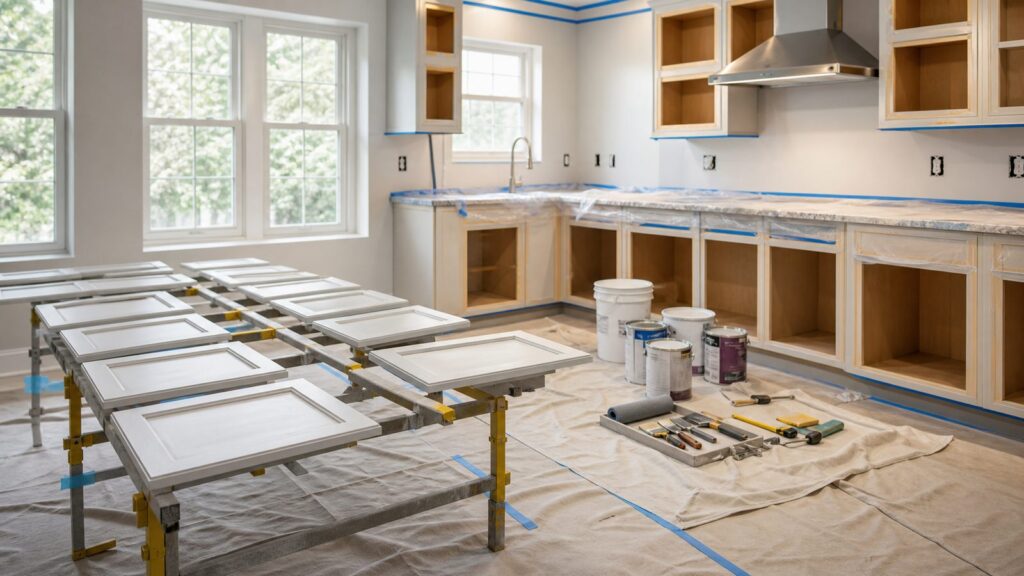
We remove doors, drawer fronts when practical, hinges, pulls, and bumpers. We create a staging area with stable supports so doors can dry flat or vertically without touching. We also photograph the kitchen before disassembly so hinge orientation, reveal spacing, drawer order, and hardware placement are documented.
5. Failing to Label Everything
Cabinet doors are not always interchangeable, even when they look identical. Openings may be slightly out of square. Hinges may be adjusted differently. Drawer fronts may vary by fractions of an inch. If everything goes into one pile, reassembly becomes a long alignment fight.
Rank #2

- Includes 30 featured and newest released color card. Sprayed on color to see our colors in your homes lighting for more accurate color choices.
- ALL-IN-ONE Paint - NO Sanding, NO Priming, NO Top Coat Required, Low Luster, Velvet Sheen Finish
- Interior/Exterior - Paint your whole house - Ideal for hard surfaces including walls, doors, cabinets, counters, furniture, metal, glass, ceramics and floor and wall tile
- Durable yet stretches to paint smooth fabrics, vinyl and leather
- Results cannot be guaranteed. Digital screens may not show color accurately. Product search "ALL-IN-ONE PAINT by Heirloom Traditions, Color Confidence Card", for an accurate color choice.
This is where many DIY projects lose a full day. The painting may be done, but the doors do not sit evenly, paired doors rub, and drawer faces reveal old inconsistencies. If hardware is mixed up, soft-close hinges and worn hinge plates can complicate the problem.
Quick wins for a faster PC:
Clear out junk files and repair common Windows errorsFree Scan →Scan for outdated or missing drivers - takes under a minuteDriver Scan →What pros do instead
We mark each door, drawer front, hinge, and hardware set with a simple map: upper left 1, upper left 2, base sink left, base sink right, and so on. Labels go where they will not be painted, such as under hinge cups or on painter’s tape inside the cup area. Hinges stay with their original doors when possible.
6. Sanding the Wrong Way
Sanding is not about stripping every cabinet to bare wood. For most painted cabinet systems, sanding is about dulling the old finish so primer can grip. Skipping this step leaves glossy areas that reject coating. Sanding too aggressively can cut through veneer, fuzz MDF edges, round profiles, or expose raw areas that absorb primer unevenly.
Oak cabinets need special attention. If you paint oak without grain filling, the open grain will usually telegraph through the finish. Some homeowners like that visible-grain look. If you want a smoother, more modern painted finish, grain filling needs to be part of the plan before primer and topcoat.
What pros do instead
We clean first, then scuff sand with the least aggressive grit that creates a uniform dull surface. We protect edges and profiles, vacuum dust thoroughly, and wipe with a suitable tack cloth or damp method recommended for the coating system. On oak, we discuss grain expectations before the bid is finalized because grain filling adds labor and cost.
7. Using Wall Paint Instead of Cabinet Enamel
Wall paint is designed for broad vertical surfaces that are not handled 30 times a day. Kitchen cabinets need a harder, more washable coating with better blocking resistance, which means the painted surfaces are less likely to stick together after drying. Standard wall latex may look fine for the first week and then scuff, soften, or peel around pulls.
Cabinet coatings also need to match the application method. Some enamels level well with a brush and high-density foam roller. Others are better sprayed. Sheen matters too: satin and semi-gloss are common because they balance cleanability with defect hiding. Very glossy finishes show surface flaws. Very flat finishes usually do not hold up well to kitchen cleaning.
What pros do instead
We use a cabinet-grade enamel or urethane-modified acrylic system compatible with the primer and existing substrate. For a small to average kitchen, material planning often includes 1 to 2 gallons of primer and 1 to 2 gallons of cabinet enamel, depending on door count, porosity, color change, and coat requirements.
8. Skipping Primer or Using the Wrong Primer
Primer is not optional on many cabinet jobs. It improves adhesion, blocks stains, evens porosity, and gives the finish coats a consistent base. White cabinets are especially unforgiving because tannin bleed, grease shadows, and uneven old stain can show through. Dark colors have their own problem: they reveal dust nibs, brush marks, and panel defects.
Rank #3

- Includes 30 featured and newest released color card. Sprayed on color to see our colors in your homes lighting for more accurate color choices.
- ALL-IN-ONE Paint - NO Sanding, NO Priming, NO Top Coat Required, Low Luster, Velvet Sheen Finish
- Interior/Exterior - Paint your whole house - Ideal for hard surfaces including walls, doors, cabinets, counters, furniture, metal, glass, ceramics and floor and wall tile
- Durable yet stretches to paint smooth fabrics, vinyl and leather
- Results cannot be guaranteed. Digital screens may not show color accurately. Product search "ALL-IN-ONE PAINT by Heirloom Traditions, Color Confidence Card", for an accurate color choice.
The wrong primer can be as bad as no primer. A primer that does not bond to a glossy finish, does not block tannins, or is incompatible with the topcoat can create peeling or discoloration. Cabinets near ranges, dishwashers, and sinks need more than a cosmetic primer choice.
What pros do instead
We match primer to the surface: bonding primer for slick factory finishes, stain-blocking primer where wood tannins or old stains are a risk, and compatible primer/topcoat systems from the start. After primer dries, we sand lightly to remove dust nibs and raised grain before applying finish coats.
9. Ignoring Hardware Changes Until After Paint
Changing from knobs to pulls, or from 3-inch pulls to 5-inch pulls, should be decided before painting. Filling old holes after the finish coats are on almost always leaves visible patches. Even if the color matches, the sheen and texture usually do not.
New hardware can also create clearance issues. Long pulls may interfere on tight corner cabinets. Thick knobs may hit adjacent walls or appliances. Doors near a range, refrigerator, or dishwasher should be checked for swing and grip clearance before holes are drilled.
Outdated Drivers Are Slowing You Down
One free scan finds every outdated or missing driver and matches the right update for your exact hardware.Free scan · exact hardware matchPC Slower Than It Used to Be?
A free scan shows the junk files, broken settings and background clutter dragging Windows down - then fixes them in one click.Free scan · Windows 10 & 11What pros do instead
We select hardware early, measure hole spacing, fill abandoned holes before primer, and drill new holes after layout is confirmed. A hardware template helps keep pulls consistent, but we still verify every door and drawer because older cabinets are not always perfectly aligned.
10. Rushing Dry Time, Cure Time, and Reassembly
Dry and cured are not the same thing. Paint may be dry enough to touch or recoat in hours, but many cabinet coatings need days to weeks before they resist abrasion, cleaning, and door-to-frame contact. Reassembling too early can cause sticking, imprinting, chipped edges, and soft paint around bumpers.
A careful DIY cabinet project can occupy multiple days or several weekends. One day may go to disassembly, cleaning, and labeling. Another to sanding, repairs, and masking. Primer, sanding, and two finish coats add more time, especially if both sides of doors are being painted. A professional crew may finish faster because of equipment, staging, and experience, but even a pro job still needs controlled drying and reassembly windows.
What pros do instead
We build the schedule around the coating system, not wishful thinking. Doors are handled carefully after drying, but normal use is delayed until the coating has hardened enough for real kitchen traffic. New bumpers, final adjustments, and aggressive cleaning wait until the finish can tolerate contact.
Recommended Free Tools
11. Painting at the Wrong Point in a Kitchen Remodel
Cabinet painting should be sequenced with the rest of the kitchen work. If cabinets are painted before drywall sanding, demolition, electrical changes, countertop installation, or backsplash work, the new finish is exposed to dust, tools, adhesive, grout, and trade traffic. If painting is pushed too late, it can be harder to mask finished countertops, floors, appliances, and tile.
Rank #4

- Includes 30 featured and newest released color card. Sprayed on color to see our colors in your homes lighting for more accurate color choices.
- ALL-IN-ONE Paint - NO Sanding, NO Priming, NO Top Coat Required, Low Luster, Velvet Sheen Finish
- Interior/Exterior - Paint your whole house - Ideal for hard surfaces including walls, doors, cabinets, counters, furniture, metal, glass, ceramics and floor and wall tile
- Durable yet stretches to paint smooth fabrics, vinyl and leather
- Results cannot be guaranteed. Digital screens may not show color accurately. Product search "ALL-IN-ONE PAINT by Heirloom Traditions, Color Confidence Card", for an accurate color choice.
The right sequence depends on the project, but cabinet painting usually belongs after messy demolition, framing, drywall, and major electrical work, and before final hardware, final caulk, touch-ups, and careful appliance reinstallation. Countertop and backsplash work can damage finished cabinets if protection is not planned.
What pros do instead
We coordinate cabinet painting as part of the remodel schedule. Finished cabinets get protective coverings before countertop templates, slab installation, tile work, and appliance moves. We also check cabinet-to-appliance clearances, range hood clearances, and heat exposure areas before painting around cooking zones.
12. Underestimating Safety, Ventilation, and Lead Rules
Cabinet painting can involve sanding dust, solvent vapors, spray mist, and old coatings. Spraying can produce the smoothest finish, but it raises the stakes for masking, ventilation, overspray control, respirator use, and a clean drying setup. Brushing and rolling with the right enamel can still produce a good homeowner-grade finish with less equipment risk.
Homes built before 1978 require extra caution because old paint may contain lead. Disturbing lead paint through sanding or scraping can create hazardous dust. Federal lead-safe renovation rules may apply when contractors disturb painted surfaces in pre-1978 housing. Homeowners should test suspect coatings and use lead-safe methods before sanding.
What pros do instead
We isolate the work area, control dust, ventilate according to the product requirements, and use proper PPE. On older homes, we address lead-safe requirements before work starts. We do not dry-sand unknown old coatings in a lived-in kitchen and hope cleanup solves it.
Independent reader supportYour contribution helps us test, update, and keep practical guides available for everyone.How Much Does Cabinet Painting Cost in 2026?
For professional kitchen cabinet painting in the United States, a conservative full-kitchen range is about $1,500 to $6,500. Small, simple kitchens may come in under $2,000. Large kitchens with many drawers, ornate profiles, heavy repairs, sprayed finishes, two-tone colors, or oak grain filling can reach $4,000 to $7,000 or more.
Per-linear-foot pricing often falls around $30 to $70 per linear foot, but linear footage alone can be misleading. A 12-foot run with 8 slab doors is not the same labor as a 12-foot run with 16 detailed doors, 10 drawer fronts, glass panels, crown molding, and exposed end panels. Some cost guides measure by square foot, with 2026 figures starting around $5.40 to $10.79 per square foot for cabinet painting. Others report national averages around $1,390 to $3,353, with averages near $2,164. Smaller painting projects may show average costs closer to $941 because they are not always full kitchens.
The Tool Desk
Outbyte PC Repair FREEClear out junk files and repair common Windows errorsFree Scan →Outbyte Driver Updater FREEScan for outdated or missing drivers - takes under a minuteDriver Scan →DIY materials commonly run $200 to $600 for degreaser, sandpaper, filler, primer, cabinet enamel, brushes, rollers, trays, masking, drop cloths, tack cloths, and PPE. Renting or buying a sprayer can add roughly $100 to $500 or more. Minor cabinet repairs before paint may add about $140 to $500 or more, while extensive water damage or veneer failure can push the project toward refacing or replacement economics.
When to DIY and When to Hire a Pro
DIY cabinet painting makes sense when the kitchen is small, the cabinets are structurally sound, the finish is not failing, and you can leave doors off long enough for proper drying and cure. It also helps if you are comfortable labeling parts, sanding without damaging veneer, maintaining a dust-free work area, and accepting a good brush-and-roll finish instead of a shop-sprayed look.
Best Value
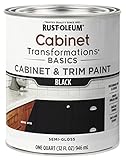
- CABINET TRANSFORMATION: Refresh outdated cabinets, vanities, furniture and trim with rich Black color and a smooth semi-gloss finish
- DURABLE PERFORMANCE: Easy-to-clean finish resists dirt and grime while standing up to household chemicals
- SMOOTH APPLICATION: Outstanding flow and leveling help create a beautiful finish with brush, roller, pad applicator or airless sprayer
- FAST PROJECT COMPLETION: Dries to touch in 30 minutes, recoats in 2 hours and is ready for normal use after 24 hours
- INTERIOR CABINET COATING: Ideal for kitchens, bathrooms, laundry rooms and other interior cabinet and trim applications
Hire a pro when the kitchen is large, the color change is dramatic, the cabinets are oak and you want a smooth finish, the existing surface is laminate or thermofoil, or the home may involve lead-safe work. A pro is also the better choice when cabinet painting is part of a larger kitchen remodel with countertops, backsplash, appliance moves, electrical changes, and finish protection concerns.
The biggest difference is not only appearance. It is process control. A professional cabinet job includes surface evaluation, disassembly, protection, cleaning, sanding, repair, primer selection, coating selection, drying management, and reassembly. Skipping any one of those steps can turn a budget refresh into a redo.
Free tools Windows power users keep installed
One-click scans. No signup required.
Final Touch-Up and Maintenance Planning
A cabinet paint job should end with documentation. Save labeled leftover primer and topcoat. Record the product names, sheen, color formula, batch information if available, and application date. Keep a few notes about where each coating was used, especially if island cabinets, uppers, and lowers have different colors.
For the first few weeks, treat painted cabinets gently. Avoid harsh scrubbing, hanging damp towels over doors, slamming drawers, or using aggressive cleaners. Once cured, clean with mild soap and water or the coating manufacturer’s recommended cleaner. High-touch areas around pulls, sink bases, trash pullouts, dishwasher edges, and cooking zones should be checked periodically for wear so small touch-ups can be handled before moisture reaches the substrate.
Done correctly, cabinet painting can be one of the best-value kitchen upgrades. Done casually, it is one of the fastest ways to spend a weekend creating a finish that chips before the next holiday. The difference is not luck. It is prep, sequencing, product compatibility, and patience.
Frequently Asked Questions
Is painting kitchen cabinets worth it compared with refacing or replacing?
Yes, if the cabinet boxes are solid, the doors are stable, and the kitchen layout still works. Painting is not worth it for swollen particleboard, peeling thermofoil, failing veneer, water-damaged sink bases, or a layout you already dislike.
Free tools Windows power users keep installed
One-click scans. No signup required.
How much does it cost to paint kitchen cabinets in 2026?
A typical professional full-kitchen cabinet painting project often costs about $1,500 to $6,500. DIY materials commonly run $200 to $600, with sprayer rental or purchase adding roughly $100 to $500 or more.
Do I need to sand kitchen cabinets before painting?
Usually, yes. Clean first, then scuff sand to dull the old finish so primer can bond. Do not sand dirty cabinets because grease and grime can be driven into the old coating.
What kind of paint should I use on kitchen cabinets?
Use a cabinet-grade enamel or urethane-modified acrylic coating designed for trim, doors, and cabinets. Standard wall paint is usually too soft for daily cabinet use.
How long should painted cabinets cure before normal use?
Many cabinet coatings dry within hours but need days to weeks to cure enough for abrasion, cleaning, and door contact. Follow the coating manufacturer’s cure guidance and handle doors gently during that period.
PC Slower Than It Used to Be?
A free scan shows the junk files, broken settings and background clutter dragging Windows down - then fixes them in one click.Free scan · Windows 10 & 11Crashes, No Sound, or Screen Glitches?
Random freezes, missing sound and display glitches usually trace back to one bad driver. Find and replace yours safely.Free scan · under a minuteCan I paint laminate or thermofoil cabinets?
Sometimes, but adhesion is riskier than with wood or MDF. Clean, scuff, and test a bonding primer on an inconspicuous area before committing to the whole kitchen. Peeling thermofoil is usually a poor paint candidate.
Quick Recap
Product prices and availability are accurate as of the date/time indicated and are subject to change. Any price and availability information displayed on Amazon at the time of purchase will apply.