Quick wins for a faster PC:
Clear out junk files and repair common Windows errorsFree Scan →Scan for outdated or missing drivers - takes under a minuteDriver Scan →Repair Windows errors before they cause bigger problemsFix Now →The best dryer vent kit is not the fanciest box on the shelf. It is the kit that matches your dryer location, keeps the duct short and open, uses the right metal components, and sends lint and moisture outdoors without restriction.
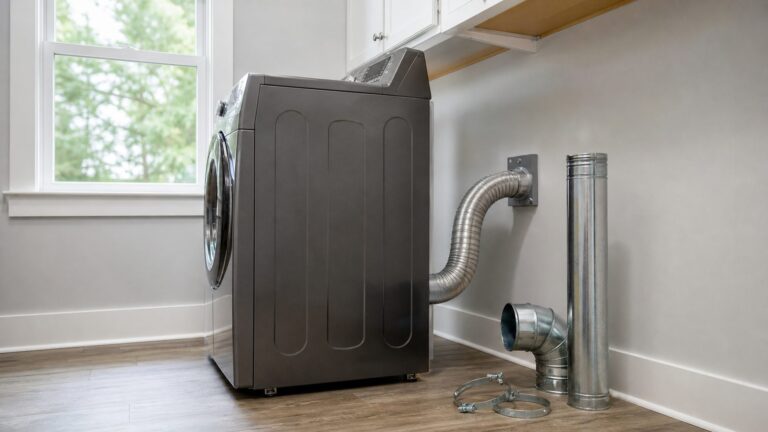
For most homes, that means two different things: smooth rigid metal duct for the permanent exhaust run inside walls, ceilings, basements, or crawlspaces, and a short UL 2158A-listed semi-rigid transition duct from the dryer to the wall connection. A 4-inch duct is the standard residential size. The transition duct should be one continuous length, exposed, not crushed, and generally no longer than 8 feet.
On our job sites, dryer vent problems usually come from one of four decisions: using plastic or flimsy foil hose, pushing the dryer back until the duct collapses, routing the vent too far with too many elbows, or terminating at a hood that clogs with lint. A good kit prevents those problems. A bad kit hides them until dry times get longer or the system becomes a fire hazard.
Dryer ventilation deserves that level of attention. U.S. fire data commonly cites about 2,900 reported home clothes dryer fires per year, with an estimated 5 deaths, 100 injuries, and $35 million in property loss. Failure to clean is the leading factor at 34%. Lint buildup blocks airflow, heat rises, and the dryer works harder than it should.
Recommended Free Tools
What Counts as a Dryer Vent Kit?
Retailers use the phrase dryer vent kit loosely. One kit may be nothing more than an 8-foot hose and two clamps. Another may include rigid pipe, elbows, a wall sleeve, exterior hood, foil HVAC tape, screws, and mounting hardware. Before buying, separate the system into three parts.
1. The permanent exhaust duct
This is the duct that runs from the laundry wall box or connection point to the exterior termination. For concealed runs, the better choice is smooth rigid metal duct, typically 4 inches in diameter. It resists crushing, holds its shape, and traps less lint than corrugated hose.
#1 Best Overall
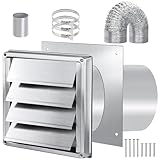
- Universal 4inch through wall dryer vent kit : The 4" Flexible Dryer Vent Wall Ducting Kit compatible with Broan-Nutone Ventilation Fan, and other universal 4” diameter vent opening, easy installation with 3" to 4" foam adapter. Stainless steel louvered vent cover with ease for maximum exhaust flow to exhaust hot air from the clothes dryer vent and bathroom fan venting. PLS measure duct diameter to ensure the size is right before purchasing.
- Convenient venting system: Our dryer vent connector kit is equipped with most of required to setup a venting system either for a clothes dryer/Range Hood /AC vent or a bathroom/kitchen exhaust fan/ceiling fan/ventilation fan, to exhaust hot air from bathroom/storage shed/RV/basement.
- Stainless Steel 4" dryer vent hose connector kit: Our dryer wall vent duct kit for exhaust fan is made of stainless steel,solid construction with a nice finish, sturdy and weather-resistant, over time the dryer vent cover is not easily to cracked or rusted.
- Good sealing performance: Our 4 Inch dryer duct connector kit has added wall plate and foil tape, realize easier installation and filling of gaps, perfect sealing during installation. Using the stainless steel hose clamp to tightly attach duct kit, stable and durable.
- Package includes: Our package includes everything needed to replace the exhaust fan's ducting---- 4” flexible dryer vent hose(Max 4.92ft), 7.2" x 7.2" stainless steel dryer vent cover, 11” long 4” diameter metal duct connector, dryer vent wall plate, 3 stainless steel hose clamp, foam adapter, 8 mounting screws, foil tape.
2. The transition duct
This is the short exposed connector between the dryer outlet and the wall. It needs to handle movement when the dryer is pulled out for cleaning, but it should not be flimsy. A UL 2158A-listed semi-rigid aluminum transition duct is usually the right choice. Keep it as short as practical, never conceal it inside a wall or ceiling, and do not exceed 8 feet unless your local code and dryer instructions specifically allow it.
3. The exterior termination
This is the wall hood or roof cap where dryer air leaves the house. It should have a backdraft damper that opens fully when the dryer runs. It should not have a screen, because screens collect lint and can block airflow. Bird-resistant designs are fine when they do not create a lint-catching screen at the outlet.
Free tools Windows power users keep installed
One-click scans. No signup required.
Best Dryer Vent Kit Types by Application
The best kit depends on the room. A laundry room on an exterior wall needs a different solution than a stacked dryer in a tight closet or an interior laundry room that has to vent through the roof. Use the application first, then choose the product.
| Dryer location | Best kit type | Typical use | Watchouts |
|---|---|---|---|
| Exterior-wall laundry room | Rigid metal wall vent kit plus short semi-rigid transition duct | Shortest, cleanest route through wall | Use a full-opening hood with damper and no screen |
| Interior laundry room | Rigid metal duct run to exterior wall or roof | Longer concealed route | Calculate equivalent length and limit elbows |
| Tight closet or stacked unit | recessed dryer box plus semi-rigid or close-clearance kit | Prevents crushed hose behind dryer | Confirm access for future cleaning |
| Basement dryer | Rigid metal duct with gradual elbows | Run through rim joist or exterior wall | Support duct and slope/route cleanly |
| Roof-only route | dryer-rated roof vent kit | When wall termination is impractical | Harder to clean; more lint-prone |
| Apartment or condo | Building-approved replacement transition duct | Existing common vent or exterior duct | Do not modify shared systems without approval |
| Gas dryer | Outdoor vented metal system only | Standard gas dryer exhaust | Never use indoor bucket kits |
Rigid metal dryer vent kits
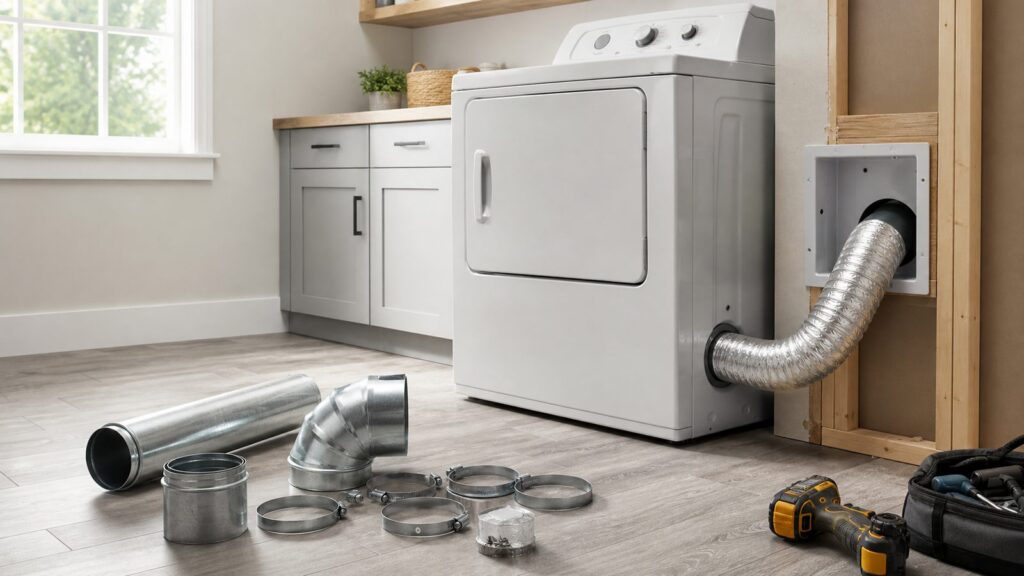
A rigid metal dryer vent kit is the best choice for new installations, remodels, and reroutes. These kits may include straight sections of 4-inch galvanized steel or aluminum duct, adjustable elbows, a wall sleeve, and an exterior hood. For a permanent exhaust path, this is the standard we want to see.
Rigid pipe takes more layout work than a flexible hose, but that is the point. It keeps a consistent diameter, avoids sagging, and gives lint fewer places to collect. When our crews frame or remodel laundry spaces, we plan the dryer location early so the vent can run straight to daylight instead of being forced around cabinets, plumbing, or stacked appliances after the fact.
UL 2158A semi-rigid transition kits
For the exposed connection behind the dryer, a semi-rigid aluminum kit is usually the practical winner. Common retail sizes are 4 inches by 8 feet, although the installed length should be much shorter whenever possible. A good kit includes a listed duct, two solid clamps, and enough stiffness that it does not collapse when the dryer moves slightly.
This is the kit many homeowners can install themselves when the existing wall connection and exterior vent are already correct. Pull the dryer out, remove the old hose, vacuum lint from the outlet area, attach the new transition duct with clamps, push the dryer back carefully, and verify that the exterior damper opens strongly when the dryer runs.
Periscope and close-clearance kits
Close-clearance kits are made for laundry closets where the dryer sits close to the wall. Instead of a round hose bending sharply behind the appliance, a periscope-style metal duct shifts the connection vertically or horizontally in a flatter profile.
These kits are useful, but they are not magic. Measure the dryer outlet height, wall outlet height, offset distance, and available depth before buying. Many tight-space problems are better solved with a recessed dryer box during a remodel. A recessed box lets the transition duct sit partly inside the wall cavity at the connection point, reducing the chance that the duct gets crushed when the dryer is pushed back.
Roof dryer vent kits
A roof vent kit should be a second-choice solution, used when a wall termination is not practical. Roof terminations can work, but they are harder to inspect and clean. Lint tends to collect at roof caps, and homeowners are less likely to notice a flap that is not opening properly.
Windows Errors? Fix Them Before They Spread
Repair common Windows errors and clear accumulated junk for a smoother, more stable PC - no reinstall needed.Free scan · no reinstallOutdated Drivers Are Slowing You Down
One free scan finds every outdated or missing driver and matches the right update for your exact hardware.Free scan · exact hardware matchRank #2

- Universal 4inch dryer vent kit : The 4" Flexible Dryer Vent Wall Ducting Kit compatible with Broan-Nutone Ventilation Fan, and other universal 4” diameter vent opening, easy installation with 3" to 4" foam adapter. Louvered vent cover with ease for maximum exhaust flow to exhaust hot air from the clothes dryer vent and bathroom fan venting. PLS measure duct diameter to ensure the size is right before purchasing.
- Convenient venting system: Our 4" dryer vent connector kit is equipped with most of required to setup a venting system either for a clothes dryer or a bathroom/kitchen exhaust fan/ceiling fan/ventilation fan, to exhaust hot air from bathroom/storage shed/RV/basement.
- High Quality 4" dryer vent duct hose connector : Our dryer wall vent duct kit for exhaust fan is made of high quality and high impact material, and add UV inhibitor in the hood, durable and weather-resistant, prevent the vent cover cracking or warping when facing the sun.
- Good sealing performance: Our 4 Inch through wall flexible wall ducting kit has added wall plate and foil tape, realize easier installation and filling of gaps, perfect sealing during installation. Using the stainless steel hose clamp to tightly attach duct kit, stable and durable.
- Package includes: Our package includes everything needed to replace the exhaust fan's ducting---- 4” flexible dryer vent hose(Max 63”), 6" x 6" white louvered vent cover, 11” long 4”diameter metal duct connector, dryer vent wall plate, 2 stainless steel hose clamp, foam adapter, 8 mounting screws, foil tape.
If you need a roof route, choose a dryer-rated roof cap with a damper and a cleanable design. Do not substitute a bath fan roof cap. Plan for maintenance access from the attic, roof, or both. In high-use homes, pet-heavy homes, or long roof runs, annual cleaning may not be enough.
Indoor dryer vent kits
Indoor bucket-style dryer vent kits are not equivalent to a proper outdoor dryer exhaust. They are generally limited to electric dryers only, where allowed, and they add heat, lint, and moisture to the room. They are not for gas dryers because gas dryers must exhaust combustion byproducts outdoors.
We treat indoor kits as a limited workaround, not a construction-standard solution. Before using one, check the dryer manufacturer’s instructions, lease or condo rules, and local code requirements. In many homes, the right answer is to create a proper outdoor vent path.
Code and Safety Rules That Matter
Dryer vent rules are not complicated, but they are often ignored. Most U.S. jurisdictions base residential requirements on the International Residential Code with local amendments. Your local code official has the final say, but the practical rules below are the baseline our crews design around.
Vent outdoors
A standard vented dryer should exhaust outdoors. It should not terminate in an attic, crawlspace, garage, basement, wall cavity, or soffit. Dumping moist lint-filled air into enclosed spaces can create moisture damage, mold risk, and fire risk.
Use a damper, not a screen
The exterior terminal should include a backdraft damper. That damper keeps outside air, pests, and weather from freely entering the duct when the dryer is off. The terminal should not have a screen. Screens collect lint quickly, and lint buildup restricts airflow.
Respect duct length limits
IRC-based guidance commonly uses a maximum dryer exhaust length of 35 feet from the dryer connection to the exterior terminal, reduced by 2.5 feet for each 45-degree bend and 5 feet for each 90-degree bend unless the dryer manufacturer allows a longer engineered run.
That means a 25-foot run with two 90-degree elbows counts like 35 feet: 25 feet of straight duct plus 10 feet of elbow penalty. Add one more 90-degree elbow and that same route becomes the equivalent of 40 feet, which exceeds the common prescriptive limit.
The Tool Desk
Outbyte PC Repair FREEClear out junk files and repair common Windows errorsFree Scan →Outbyte Driver Updater FREEFix the driver behind crashes, sound loss and screen glitchesFind Drivers →Keep transition ducts exposed and short
The transition duct from the dryer to the wall should be listed and labeled for dryer use, typically UL 2158A. It should be a single length, not longer than 8 feet, and not installed inside walls, floors, ceilings, or concealed spaces. If the duct disappears into construction, it should be rigid metal exhaust duct, not a flexible transition hose.
Follow the dryer manufacturer’s instructions
Dryer manufacturers publish venting tables that may allow longer equivalent lengths for specific models, often based on blower capacity and duct configuration. For new construction and permitted remodels, keep those instructions with the project records. Inspectors may ask how the run length was calculated.
Rank #3

- [Stretch Universal Connector] PetOde dryer lint vacuum cleaner attachment is designed with a premium elasticated stretch universal connector that can be connected to most vacuum cleaners! Say goodbye to the worry of purchasing incompatible attachment models
- [Suitable for Most Dryers] The inner height of our Vacuum Hoses attachment is the same as on the market at 0.4", while the outer height is 0.73" which is thinner than the hose opening on the market, so it can enter narrower gaps
- [Practical Dryer Lint Brush] This long brush is specially designed to clean the dryer lint, and can also be used to clean the refrigerator coils, radiators and other hard-to-reach places
- [Cleans Years of Build-up Lint] A dryer that is not cleaned for many years will accumulate a lot of lint. Ventilation openings can become narrow or even blocked. It can help you effectively clean your dryer vent, making your dryer more efficient
- [Cleaning Supplies] The flexible and convenient dryer vent cleaner kit is long enough, making it a perfect choice for cleaning places like behind appliances and gaps in the sofa in your home
What Dryer Vent Kits Cost in 2026
Material cost is usually modest. Labor and access drive the real price. A simple hose replacement behind a dryer is not the same project as coring through brick, opening drywall, or running a new vent through a roof.
| Project or material | Typical 2026 U.S. cost | Notes |
|---|---|---|
| Basic dryer hose or semi-rigid kit | $10-$30 materials | Common 4-inch by 8-foot kits |
| Better close-clearance or specialty kit | $30-$80+ materials | Periscope fittings, close elbows, heavier metal parts |
| New dryer vent installation | $200-$800 installed | Common national range for professional work |
| Exterior-wall installation | $140-$600 installed | Varies by wall type, patching, and access |
| More complex professional installs | $354-$1,190 installed | Often includes harder routing or higher local labor |
| Dryer vent replacement | $100-$300 installed | When the route already exists |
| Homewyse May 2026 baseline | $192-$380 per vent | Before location and option adjustments |
| Professional cleaning | $100-$300 | Often around $150-$200 for accessible standard vents |
Costs rise when the dryer is far from an exterior wall, the route needs several elbows, the installer must cut brick, concrete, stucco, or siding, the vent has to go through the roof, drywall must be opened and patched, or an unsafe existing line needs to be rerouted. Tight laundry closets, stacked appliances, recessed dryer boxes, and gas-appliance clearances can also add labor.
For a homeowner replacing only the exposed transition duct, the job may take 30 to 60 minutes. For a new vent through an exterior wall, a professional crew may need 2 to 4 hours depending on wall construction and finish repairs. A long concealed reroute can become a half-day or full-day job, especially when drywall patching, attic work, or masonry drilling is involved.
How to Choose the Right Dryer Vent Kit
Start with the shortest route outdoors
The best dryer vent kit cannot overcome a bad route. Every foot of duct and every elbow adds resistance. Start by finding the shortest, straightest path to an exterior wall. If the laundry location is being designed during a remodel or addition, place the dryer with venting in mind before cabinetry and appliance stacks lock the room into a poor layout.
Use smooth metal where the duct is permanent
For any run inside a wall, ceiling, basement, crawlspace, or attic, use rigid smooth metal duct. Avoid plastic, vinyl, and nonlisted foil hose. Those products can crush, trap lint, and violate dryer instructions or local requirements.
Choose a proper exterior hood
Look for a 4-inch dryer hood with a full-opening damper. The outlet should move freely when the dryer is running. Avoid screens. If pest resistance is needed, use a dryer-rated hood design that does not create a lint screen at the termination.
Do these 3 things before closing this tab:
1Clear out junk files and repair common Windows errors2Scan for outdated or missing drivers - takes under a minute3Repair Windows errors before they cause bigger problemsMeasure before buying a tight-space kit
For a periscope kit, measure the centerline of the dryer outlet, the centerline of the wall outlet, the offset between them, and the depth available behind the dryer. Many close-clearance kits have a limited adjustment range. If the outlets do not line up within that range, the kit will either leak, bind, or force the dryer farther into the room than expected.
Verify UL 2158A listing for transition duct
For the exposed flexible or semi-rigid connector, look for UL 2158A listing or labeling. Marketing terms like “heavy duty” are not the same as a listing. The label matters because transition ducts sit close to the appliance and must tolerate heat, movement, and normal service conditions.
Common Dryer Vent Kit Mistakes
The cheapest white vinyl accordion hose is one of the fastest ways to create a problem. It fits almost anywhere because it is flimsy, and that is exactly why it gets crushed behind the dryer. Once crushed, airflow drops, lint collects, and drying time increases.
Another common mistake is hiding flexible duct inside a wall. Flexible transition ducts are for exposed appliance connections. Concealed ductwork should be rigid metal so it can maintain its shape and be cleaned properly.
What’s actually slowing this PC down?
Pick the symptom - the matching free tool is one click away.
Long runs with too many elbows are just as common. A homeowner may see only 20 feet of duct and assume the layout is fine, but four 90-degree elbows add 20 feet of equivalent length. That turns a short-looking route into a restricted system.
We also see exterior hoods with screens, painted-shut dampers, broken flaps, or pest guards packed with lint. After any installation, run the dryer and check the hood outside. The damper should open decisively. If it barely moves, the system needs troubleshooting before the dryer goes back into regular use.
Rank #4
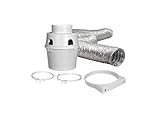
- Can be used to vent your electric clothes dryer indoors when outdoor venting is not possible
- Includes 4-inch by 5-foot ProFlex dryer transition duct, plastic lint reservoir, 2 plastic adjustable clamps
- Ideal for apartments, condominiums and RVs
- ProFlex dryer transition duct UL approved for safe dryer venting
- Not be used with gas clothes dryers
When to DIY and When to Hire a Pro
Good DIY projects
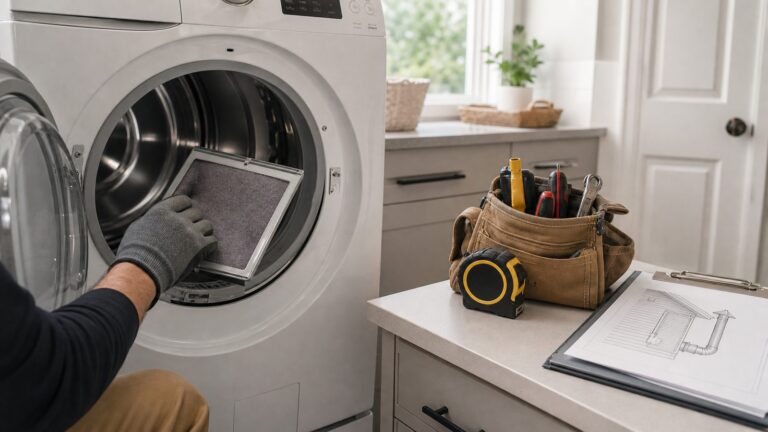
A homeowner with basic tools can often replace an exposed transition duct if the wall outlet, exterior hood, and permanent duct are already correct. Use a listed semi-rigid kit, keep the length short, secure both ends with clamps, and avoid crushing the duct when sliding the dryer back. A flashlight, vacuum, nut driver, tape measure, and work gloves are usually enough.
A simple exterior hood replacement can also be DIY-friendly when it is on a first-floor wall, the siding is accessible, and the existing duct is sound. Use exterior-grade sealant around the wall penetration, fasten the hood securely, and confirm the damper swings freely.
Call a professional
Hire a pro when the job involves cutting a new wall or roof penetration, drilling masonry, rerouting concealed ductwork, opening and patching drywall, working in an attic or crawlspace, coordinating a gas dryer, or correcting a long run with multiple elbows. Also bring in a pro for multifamily buildings, condos, or townhomes where dryer exhaust may be governed by association rules, fire separations, or shared building systems.
Permits vary by jurisdiction. A simple like-for-like transition hose replacement usually does not require one. A new exterior penetration, reroute through framing, roof termination, or work tied to a larger remodel may require permit review. If we are already opening walls for a laundry remodel, we treat the dryer vent as part of the mechanical planning, not as an afterthought.
Installation Checks After the Kit Is In
Once the dryer vent kit is installed, do not judge the job only by how it looks behind the dryer. Airflow is the test.
First, run the dryer on an air or timed cycle and check the exterior hood. The damper should open fully or nearly fully. Weak movement can mean a crushed transition duct, blocked hood, long run, lint obstruction, or too many elbows.
Second, run a normal timed dry cycle with a typical laundry load. If towels or jeans that used to dry in 45 minutes now take 70 or 90 minutes, airflow is still restricted or the dryer has another service issue.
Third, inspect the transition duct after sliding the dryer back. A perfect installation can fail in the last 6 inches of movement if the hose folds behind the appliance. This is where semi-rigid duct, close-clearance elbows, or a recessed dryer box earn their cost.
Maintenance: How Often to Clean a Dryer Vent
Clean the lint screen before or after every load. That small habit protects airflow through the dryer itself. The duct system also needs periodic cleaning. For many households, once a year is a reasonable baseline. For high-use laundry rooms, large families, pet-heavy homes, long duct runs, roof terminations, or multifamily laundry areas, inspect and clean more often.
Warning signs include longer drying times, a dryer that feels unusually hot, a laundry room that gets humid, a burning smell, lint collecting around the exterior hood, or a damper that does not open well. Any of those signs should move cleaning from “later” to “now.”
Outdated Drivers Are Slowing You Down
One free scan finds every outdated or missing driver and matches the right update for your exact hardware.Free scan · exact hardware matchWindows Errors? Fix Them Before They Spread
Repair common Windows errors and clear accumulated junk for a smoother, more stable PC - no reinstall needed.Free scan · no reinstallBest Value

- Extra Thick Aluminum: Our dryer vent hose, with wire helix and foil accordion structure, is twice thicker than many 3-ply thin options on the market. It overturns people's misperception to aluminum foil ducting. No longer flimsy! It is reinforced for tear and puncture resistance but maintaining flexibility for easy movement.
- Safer: This dryer hose, made of extra thick aluminum, can withstand max.215℉ high temperature. Compared with pvc hose, it is more heat and aging resistant in hot and moist air. It will not melt easily and emit plastic odor.
- Less Pressure Drop: Our dryer duct hose is designed with narrower foil accordion space for larger inside diameter. It exhausts air faster so that your clothes dryer can work efficiently. The design also increases the duct strength.
- Easy Installation: Our dryer vent hose kit is with 2 tool-free hose clamps. Hand twisting in tight place behind dryer is much easier than using screwdriver. Our duct ends have both tidy collars to make it easy to slide on the dryer and wall vent. It saves your time and make job easier! Women and elder-friendly!
- Widely Used: Our 4 inch duct hose is ideal for laundry room clothes dryer, bathroom exhaust fan, grow room/tent ventilation and HVAC ducting(heating and cooling). It is a heavy duty transition duct for less replacement!
Professional cleaning typically runs about $100-$300 in 2026, with many standard accessible vents landing around $150-$200. Expect higher prices for roof terminations, multi-story homes, long runs, heavy blockages, or bird and nest removal.
Our Bottom-Line Recommendation
For most homes, the safest dryer vent setup is a 4-inch smooth rigid metal exhaust duct routed by the shortest practical path outdoors, paired with a UL 2158A-listed semi-rigid transition duct no longer than 8 feet, a full-opening exterior damper, and no screen at the termination.
If your dryer sits on an exterior wall, keep it simple: rigid wall kit, good exterior hood, short semi-rigid connector. If the dryer is in a tight closet, add a recessed dryer box or close-clearance kit so the duct does not get crushed. If the dryer is far from an exterior wall or must vent through the roof, treat it as a design problem, not a shopping problem. The route, length, elbows, and cleanout access matter more than the brand name on the box.
A dryer vent kit is a small purchase, but it affects fire safety, appliance life, energy use, and daily convenience. Buy the kit that fits the actual installation, not just the one that fits the appliance outlet.
Frequently Asked Questions
What is the safest type of dryer vent kit to use?
For most homes, use smooth rigid metal duct for the permanent exhaust run and a short UL 2158A-listed semi-rigid transition duct between the dryer and wall. The exterior termination should have a backdraft damper and no lint-catching screen.
Is rigid or semi-rigid dryer vent better?
Rigid metal duct is better for permanent or concealed runs because it resists crushing and collects less lint. Semi-rigid listed aluminum is better for the short exposed transition connection behind the dryer.
Are indoor dryer vent kits safe or code compliant?
Indoor dryer vent kits are not a code-equivalent replacement for venting a standard dryer outdoors. They are generally limited to electric dryers where allowed, add moisture indoors, and should never be used with gas dryers.
How much does dryer vent installation cost in 2026?
Basic DIY hose kits often cost $10-$30. Professional dryer vent installation commonly ranges from about $200-$800, while more complex installs can run roughly $354-$1,190 depending on routing, wall type, roof access, and repairs.
What’s actually slowing this PC down?
Pick the symptom - the matching free tool is one click away.
How long can a dryer vent be under code?
IRC-based guidance commonly limits dryer exhaust ducts to 35 feet from dryer connection to exterior terminal, subtracting 2.5 feet for each 45-degree bend and 5 feet for each 90-degree bend unless the dryer manufacturer allows otherwise.
How often should a dryer vent be cleaned?
Clean the lint screen every load and inspect or clean the dryer vent at least once a year for many homes. Clean more often for large families, pet-heavy homes, long runs, roof terminations, or dryers showing longer dry times.
Quick Recap
Product prices and availability are accurate as of the date/time indicated and are subject to change. Any price and availability information displayed on Amazon at the time of purchase will apply.