What’s actually slowing this PC down?
Pick the symptom - the matching free tool is one click away.
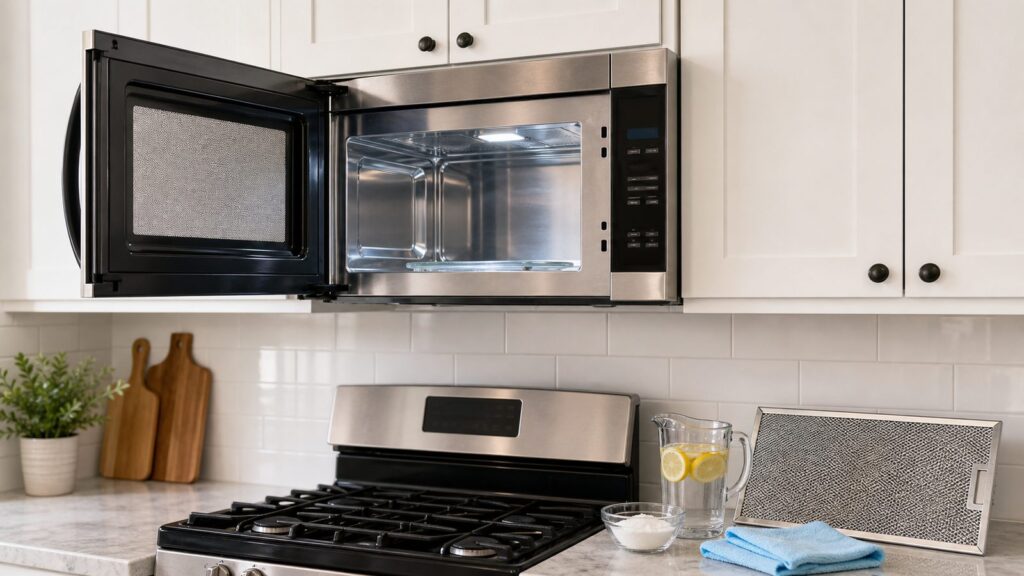
The best way to clean a greasy microwave is to loosen the grease with steam first, wipe the softened residue with mild soap, treat baked-on spots with baking soda paste, and clean the removable parts separately. If the microwave is over the range, the job is not finished until the underside grease filters are washed and the charcoal filter is checked.
On our kitchen remodel and punch-list jobs, microwave grease usually tells us one of two things: the appliance has not been cleaned often enough, or the range ventilation is not keeping up with the cooking load. The first is a 20- to 45-minute DIY cleaning job. The second can affect cabinets, paint, odors, and indoor air quality.
Most homeowners can handle this with $0 to $20 in basic supplies: white vinegar, lemon juice, baking soda, dish soap, Microfiber cloths, and a Non-scratch sponge. If you buy a kitchen degreaser, choose one appropriate for food-adjacent surfaces; EPA Safer Choice products commonly run about $10 to $25. The key is using the right cleaner in the right place. A microwave is not an oven cavity, and aggressive cleaners can damage interior coatings, seals, vents, and plastic parts.
Before You Start: What Not to Use in a Microwave
Unplug the microwave if you can reach the plug safely. For built-in or over-the-range units where the plug is hidden in an upper cabinet, leave the door open while cleaning and do not run the unit until all parts are dry and reinstalled. Remove the glass tray, roller ring, and any rack before cleaning the cavity.
Quick wins for a faster PC:
Fix the driver behind crashes, sound loss and screen glitchesFind Drivers →Repair Windows errors before they cause bigger problemsFix Now →Do not use bleach, ammonia, oven cleaner, steel wool, metal scrapers, abrasive pads, or heavy solvent sprays inside the microwave. Do not spray liquid directly into vents, control panels, seams, fan openings, or the waveguide cover. The waveguide cover is usually a small mica or plastic-looking panel on the interior wall; if it is burnt, cracked, missing, or sparking, stop using the microwave and replace the part or the appliance.
Never run a microwave empty to deodorize it. Use a cup or bowl of water when running any steam cycle. Also keep metal out of the microwave cavity unless the manufacturer specifically supplied a rack for that model and the manual allows it.
#1 Best Overall
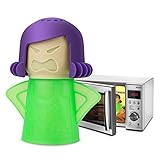
- Use steam to clean the crud from your microwave, just add vinegar and water, then microwave for 7 minutes. No Need to Use Dangerous Chemical & Stain Removers.
- The steam comes out of mama's head and softens microwave dirt and stains for easier cleaning.
- Easy to use, first remove angry mama's hair and head from body, then add vinegar and water to fill lines on the body, add a squeeze of lemon Juice (or essence) to liquid for a pleasant odor. Angry Mama cuts microwave cleaning time in less than half.
- Cute, Clever Design, Will Make a Great Gift for Any Occasion. Made with Heat- Resistant materials ,Angry mama is dishwasher safe for easy cleaning.
Method 1: Steam Clean Microwave Grease With Vinegar or Lemon
This is the first method we use because it does the most work with the least abrasion. Steam softens grease and cooked-on food so you can wipe instead of scrape. That matters because the interior coating is part of the appliance’s protection system.
What You Need
- 1 microwave-safe glass or ceramic bowl or measuring cup
- 1 cup water
- 1 to 2 tablespoons white vinegar or lemon juice
- Microfiber cloth
- Non-scratch sponge
- mild dish soap
Steps
- Remove the turntable, roller ring, and rack.
- Add 1 cup of water and 1 to 2 tablespoons of white vinegar or lemon juice to a microwave-safe bowl.
- Microwave on high for 2 to 5 minutes, depending on grease level. Stop once the window is steamy.
- Leave the door closed for 5 minutes so the steam can keep working.
- Carefully remove the bowl. It will be hot.
- Wipe the ceiling first, then the side walls, back wall, floor, and inside of the door.
- Use a drop of dish soap on a damp cloth for remaining greasy film.
- Finish with a clean damp cloth, then dry with a towel.
Work from top to bottom. Grease on the ceiling often melts and drips, so cleaning the floor first just means cleaning it twice. Pay attention to the door gasket and contact surfaces, but wipe them gently. Residue there can hold odor and affect closure; aggressive scrubbing can damage the seal or latch area.
Recommended Free Tools
Vinegar is good for odor and light grease. Lemon smells better and works well for light splatter. Neither is a magic degreaser for months of baked-on residue. If grease still feels tacky after one steam cycle, repeat once, then move to baking soda paste instead of harder scrubbing.
Method 2: Use Baking Soda Paste for Baked-On Splatter
Baking soda is useful because it gives mild cleaning action without the harshness of metal tools or abrasive pads. We use it for brown splatter dots, sticky corners, and the ring of grease that forms under the turntable.
Mixing Ratio
Start with 3 tablespoons baking soda and 1 tablespoon water. Add water a few drops at a time until it becomes a spreadable paste. It should cling to a vertical wall without running into seams.
Steps
- Steam the microwave first using Method 1.
- Apply baking soda paste to baked-on spots with a soft cloth or non-scratch sponge.
- Let it sit for 5 to 10 minutes.
- Wipe with a damp cloth using light pressure.
- Repeat on stubborn spots rather than scraping.
- Wipe again with clean water and dry fully.
Do not pack paste into vents, seams, screw heads, fan openings, or around the waveguide cover. If you see flaking paint, exposed metal, burn marks, or evidence of arcing, cleaning is no longer the main issue. The microwave needs inspection, repair, or replacement.
Baking soda also helps with odor. After wiping the paste away, place 1 cup of water in the microwave and run it for about 1 minute. Let the cavity cool, then wipe again. If the burnt smell remains after the cavity, tray, and filters are clean, look closer at the waveguide cover, interior coating, and vent path.
Method 3: Wash the Turntable, Roller Ring, and Rack Separately
The glass tray often looks like the main problem, but the roller ring and track underneath can hold a surprising amount of grease. If those parts go back in dirty, the microwave will still smell greasy when it warms up.
Steps
- Remove the glass turntable, roller ring, and removable rack.
- Wash them in warm water with mild dish soap.
- Use a non-scratch sponge or soft nylon brush on the roller wheels and grooves.
- Rinse thoroughly.
- Dry completely before reinstalling.
Many glass trays are dishwasher-safe, but check the manual if the tray has special coatings, unusual supports, or manufacturer warnings. The same goes for removable racks. A rack designed for one microwave is not automatically safe in another model.
Before reinstalling, wipe the circular track inside the microwave. Grease collects there because the tray shields it from quick wipe-downs. If the tray wobbles after cleaning, confirm the roller ring is seated properly and the center coupler is not cracked.
Rank #2
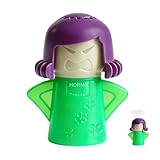
- Food-Grade Safe Material --Made from premium heat-resistant PP plastic, this cleaner is BPA-free and odorless. It withstands high temperatures without deforming or releasing harmful substances, ensuring safety for your family and the environment.
- 【Powerful Steam Cleaning】--Simply fill with water and white vinegar (add lemon for fresh scent), then microwave on high for 3-5 minutes. The high-temperature steam penetrates and softens stubborn grease and food splatters, making cleanup effortless—no harsh chemicals needed.
- Funny Design & Stress Relief -- The HORNO "Angry Mama" design turns a boring chore into a fun activity. This cute cartoon figure not only looks great in your kitchen but also "blows off steam" to clean your microwave effectively.
- Multi-Purpose & Easy Care --Beyond microwaves, it’s perfect for cleaning refrigerator interiors, oven doors, and more. The smooth surface prevents grime buildup and is dishwasher safe for easy maintenance.
Method 4: Clean Over-the-Range Microwave Filters
This is the step many cleaning guides miss. An over-the-range microwave is also part of the kitchen ventilation system. The underside metal grease filters catch cooking grease before it enters the fan path. If they are clogged, the microwave can smell greasy even when the inside cavity is spotless.
Most over-the-range microwaves have one or two metal grease filters underneath. If the unit recirculates air back into the kitchen instead of venting outdoors, it usually also has a charcoal filter behind the grille or above the door. Metal grease filters are commonly washable. Charcoal filters are typically replaced rather than washed, depending on the manufacturer.
How to Clean Metal Grease Filters
- Turn the microwave fan and cooktop off. Let surfaces cool.
- Slide or pop out the metal grease filters from the underside of the microwave.
- Fill a sink or dishpan with hot water, dish soap, and 1/4 cup baking soda.
- Soak filters for 10 to 15 minutes.
- Brush gently with a soft nylon brush.
- Rinse until water runs clear.
- Dry completely before reinstalling.
Some grease filters are dishwasher-compatible, but verify that in the owner’s manual. Thin aluminum filters can bend, discolor, or shed finish if treated too roughly. Never reinstall wet filters. Water trapped near the fan housing or electrical components is not worth the shortcut.
When to Replace Filters
Replace a metal grease filter if it is bent, torn, clogged after washing, or no longer seats properly. Aftermarket grease filters commonly cost about $10 to $40 each. Charcoal filters commonly cost about $10 to $50 or more depending on brand, size, and whether you buy OEM or aftermarket.
Do these 3 things before closing this tab:
1Scan for outdated or missing drivers - takes under a minute2Repair Windows errors before they cause bigger problems3Fix the driver behind crashes, sound loss and screen glitchesFor a busy kitchen, clean metal grease filters about once a month. For lighter cooking, every 2 to 3 months may be enough. Charcoal filter intervals vary by model and cooking habits, but many households should plan on replacement every 6 to 12 months. If cabinets above the range feel sticky, the kitchen stays smoky, or odors linger after cooking, check the filters and the ducting setup.
Cost and Time Comparison
For most homeowners, microwave cleaning is a low-cost job. The bigger expense comes when grease has hidden a failing appliance, damaged filter system, poor venting, or installation problem.
| Task | Typical 2026 Cost | Time | Best For |
|---|---|---|---|
| DIY steam clean with vinegar or lemon | $0-$10 | 10-20 minutes | Light grease, odor, weekly maintenance |
| DIY baking soda paste cleaning | $0-$10 | 20-35 minutes | Baked-on splatter and sticky residue |
| DIY filter cleaning | $0-$20 | 20-45 minutes | Over-the-range microwave grease filters |
| Commercial kitchen degreaser | $10-$25 | 15-30 minutes | Exterior surfaces and removable parts, if label allows |
| Replacement OTR grease filter | $10-$40 each | 5-10 minutes | Damaged, clogged, or missing metal filters |
| Replacement charcoal filter | $10-$50+ | 10-20 minutes | Recirculating OTR microwaves with odor issues |
| Professional house cleaning visit | $100-$300 typical; deep cleaning often $200-$400+ | Varies | Whole-kitchen cleaning or move-in/move-out service |
| OTR microwave installation | Basic labor often $100-$300; complex work $200-$600+ | 1-4 hours | Replacement, duct changes, cabinet adjustments |
Hourly cleaning-company rates commonly run about $30 to $75 per cleaner-hour nationally in 2026. Some independent local cleaners are lower, and high-cost metro areas can be higher. Inside-appliance cleaning may be included in deep cleaning, but it is often an add-on for standard visits. Confirm that before scheduling.
If cleaning reveals a microwave that needs replacement, cost depends heavily on the type. A basic countertop unit can average around $150. Built-in microwave replacement can run roughly $275 to $2,800 depending on the appliance, trim kit, cabinetry, and labor. Over-the-range installation commonly lands in the low hundreds for a straightforward swap, but new ducting, electrical changes, exterior venting, and cabinet work can push the project higher.
Can You Use Degreaser in a Microwave?
You can use some commercial degreasers around a microwave, but be careful about where they go. A food-adjacent kitchen degreaser may be useful on the exterior, handle, underside surfaces, removable grease filters, or nearby cabinet faces if the product label allows it. Inside the microwave cavity, mild soap, steam, vinegar, lemon, and baking soda are safer first choices.
If you use a degreaser, spray it onto a cloth, not into the microwave. Keep it away from vents, control panels, seams, fan openings, and the waveguide cover. Wipe the surface afterward with a clean damp cloth so chemical residue is not left near food. Wear rubber gloves if the label recommends them.
Rank #3

- FUN AND FUNCTIONAL: Fred’s Dragon’s Breath is a whimsical microwave steam cleaner of mythical proportions! It uses water, vinegar, and hot steam to loosen grease, splatters, and stuck-on food so your microwave is easier to wipe clean.
- EASY TO USE: Remove the head, add 2 oz white vinegar and 2 oz water, replace the head, then microwave on high for 5–7 minutes. Let it sit for an additional 1-2 minutes before carefully removing it by the tail. Instructions included.
- QUALITY CONSTRUCTION: Made from BPA-free, food-safe silicone, Dragon’s Breath measures 4.2 x 5.1 x 3.2 inches. It is microwave safe, dishwasher safe, reusable, and flexible enough for repeated kitchen cleanup.
- STEAM, THEN WIPE: Skip the harsh sprays and tough scrubbing. Dragon’s Breath is designed to loosen cooked-on grime, not replace the final wipe-down. After steaming, use a cloth or sponge to wipe the microwave and tackle any spots that remain.
- GIFT-READY GADGET: Packed in a fun display box with easy-to-follow instructions, Fred’s Dragon’s Breath is a clever and practical gift for anyone who loves a clean microwave and a touch of whimsy. Fun for for housewarmings, white elephant, and more.
Avoid disinfecting wipes inside the cavity unless the manufacturer specifically allows them and you rinse afterward. Many wipes leave residue or fragrance that can heat up the next time the microwave runs. That is not something we want near food or interior coatings.
How Often to Clean a Microwave
For normal home use, wipe fresh splatter as soon as the appliance cools. Do a quick steam clean every 1 to 2 weeks if the microwave is used daily. Clean heavier grease immediately after messy foods like bacon, chili, tomato sauce, butter, or cheese.
Free tools Windows power users keep installed
One-click scans. No signup required.
For over-the-range units, clean metal grease filters monthly in active kitchens and every 2 to 3 months in lighter-use homes. Replace charcoal filters on the manufacturer’s schedule, often every 6 to 12 months depending on cooking volume. Rental units, short-term rentals, and multigenerational households usually need the shorter interval.
The practical test is simple: if you smell old grease when you heat a cup of water, the cavity, tray, or filters need attention. If the cabinets above the range feel tacky, the issue may be ventilation performance rather than just microwave cleaning.
Independent reader supportYour contribution helps us test, update, and keep practical guides available for everyone.When Grease Points to a Bigger Kitchen Problem
A microwave over a range sits in a rough location. It is exposed to steam, oil, heat, and food particles from the cooktop below. If the fan is weak, the filters are clogged, or the duct path is poor, grease can settle on the microwave underside, upper cabinets, backsplash, ceiling paint, and nearby trim.
In construction terms, that is a system issue. The appliance, ducting, cabinet clearances, electrical supply, and exterior termination all matter. The 2018 IRC exhaust provisions address domestic kitchen exhaust duct construction and routing, and local code may add requirements. A greasy microwave alone is usually not a permit issue. Replacement, relocation, hardwiring, new exterior ducting, cabinet modification, or electrical work can trigger permit or code requirements depending on the jurisdiction.
The Tool Desk
Outbyte Driver Updater FREEFix the driver behind crashes, sound loss and screen glitchesFind Drivers →Outbyte PC Repair FREERepair Windows errors before they cause bigger problemsFix Now →Also pay attention to the power setup. A microwave should not be run on an extension cord or power strip after moving it for cleaning. Over-the-range and built-in units often have dedicated installation requirements. If the outlet, cord, plug, or cabinet opening looks improvised, bring in a qualified electrician or appliance installer.
When to DIY vs When to Hire a Pro
DIY is the right choice when the microwave works normally, the grease is on accessible surfaces, the filters slide out easily, and there are no signs of burning, arcing, damaged coating, loose mounting, or electrical problems. Most DIY microwave cleaning takes 20 to 45 minutes and costs less than $20.
Hire a professional cleaner when the entire kitchen needs degreasing, the property is being turned over, or you want inside-appliance cleaning bundled with a larger visit. A standard house cleaning commonly runs about $100 to $300 in 2026, while deep cleaning often runs about $200 to $400 or more. Ask specifically whether inside the microwave, underside filters, cabinet faces, and range backsplash are included.
Rank #4

- ✨ Easy To Use: Duck steam-breathing microwave cleaner makes it easy to remove tough stains. Simply add vinegar, water, and a little lemon, and this "Duck" will release steam to soften the dirt in 5-8 minutes!
- ✨ Easily Cleans: Steam is ejected from the duck's head hat to soften microwave dirt and stains, making cleaning easier. microwave cleaner is safe and reusable.
- ✨ Easy Cleaning: Microwave cleaner will not release harmful substances for human body in high temperature environment, add a little lemon liquid can increase the aroma, dishwasher safe for easy cleaning.
- ✨ Funny Gift: Cute and clever design, Make the duck microwave cleaner the perfect gift for any occasion, practical and fun, bringing joy to the recipient while keeping your microwave clean.
- ✨ To Avoid Burns: Microwave oven heats for a long time, please wait 3-5 minutes to avoid burning your fingers. Safer to use!
Call an appliance technician, electrician, or qualified installer if you see sparks, buzzing, smoke, burn marks, a damaged waveguide cover, peeling interior coating, a loose over-the-range unit, a failing fan, or a plug/outlet problem. Stop using the microwave until it is checked. Grease is combustible, and public fire-safety guidance consistently emphasizes keeping cooking equipment clear of grease buildup.
Crashes, No Sound, or Screen Glitches?
Random freezes, missing sound and display glitches usually trace back to one bad driver. Find and replace yours safely.Free scan · under a minutePC Slower Than It Used to Be?
A free scan shows the junk files, broken settings and background clutter dragging Windows down - then fixes them in one click.Free scan · Windows 10 & 11Consider replacement when the appliance is old, still smells burnt after thorough cleaning, has interior damage, has unreliable controls, or would cost too much to repair compared with a new unit. For countertop units, replacement is often the simplest route. For built-in and over-the-range units, factor in trim kits, mounting brackets, duct alignment, electrical requirements, haul-away, and cabinet fit.
Final Cleaning Checklist
- Steam first for 2 to 5 minutes, then let the door stay closed for 5 minutes.
- Remove and wash the turntable, roller ring, and rack separately.
- Use baking soda paste for baked-on splatter; wait 5 to 10 minutes before wiping.
- Clean gently around the door gasket, latch area, and waveguide cover.
- Wash over-the-range metal grease filters and dry them fully.
- Replace charcoal filters instead of washing them unless the manual says otherwise.
- Do not use bleach, ammonia, oven cleaner, metal tools, or abrasive pads inside the cavity.
- Run a short cup-of-water test after cleaning and stop if you notice sparks, smoke, buzzing, or abnormal smells.
A clean microwave is not just about appearance. It reduces odors, protects the interior finish, improves everyday kitchen hygiene, and keeps grease from building up around a heat-producing appliance. For over-the-range units, filter maintenance also helps the kitchen ventilation system do its job.
Frequently Asked Questions
What is the fastest way to clean a greasy microwave?
Steam it with 1 cup of water and 1 to 2 tablespoons of vinegar or lemon juice for 2 to 5 minutes, leave the door closed for 5 minutes, then wipe from top to bottom with a damp microfiber cloth.
Can I clean a microwave with vinegar and baking soda?
Yes. Use vinegar in water for steam cleaning, then use baking soda mixed with a little water as a paste for baked-on splatter. Do not mix large amounts in a closed container or pack paste into vents and seams.
How do I clean the grease filter on an over-the-range microwave?
Remove the metal filter, soak it in hot water with dish soap and about 1/4 cup baking soda for 10 to 15 minutes, gently brush it, rinse it, and let it dry completely before reinstalling.
Why does my microwave still smell greasy after cleaning?
The odor may be coming from the roller ring, the track under the turntable, the underside grease filters, or a charcoal filter that needs replacement. If there are burn marks, sparks, or a damaged waveguide cover, stop using the unit.
Do I need a permit to replace an over-the-range microwave?
A simple same-size replacement often does not require a permit, but local rules vary. New electrical work, hardwiring, exterior ducting, cabinet modification, or relocating the appliance may require permits or licensed trades.
Quick Recap
Product prices and availability are accurate as of the date/time indicated and are subject to change. Any price and availability information displayed on Amazon at the time of purchase will apply.