Recommended Free Tools
Most homeowners who ask how to polish landscaping rocks are really trying to solve a simpler problem: the rock bed looks dull, dirty, stained, or uneven. In most installed landscapes, the fix is not true polishing. It is a careful cleaning process followed, if needed, by a stone-safe sealer that gives the surface a darker wet-look finish.
On our job sites, we treat landscape rock as part of the drainage and hardscape system, not just decoration. Rock beds collect pollen, dust, decomposed leaves, grass clippings, algae, hard-water residue, soil, and failed sealer. If you attack that with the wrong cleaner or a pressure washer at full force, you can damage plants, expose landscape fabric, strip paver joint sand, or send dirty runoff toward the storm drain.
The best approach is simple: clean dry first, rinse gently, spot-treat stains, let the rock fully dry, then decide whether sealing or partial replacement makes sense. For a typical residential bed, basic DIY cleaning may cost $10 to $60 if you already own a hose and blower. A more involved setup with brushes, sprayers, screening, PPE, and rented or entry-level tools often lands around $40 to $150, not counting a pressure washer. Professional pressure washing commonly runs about $0.15 to $0.75 per square foot in 2026, with many driveway-type jobs falling around $100 to $500 depending on size, staining, access, and region.
Cleaning vs. Polishing: Know What You Are Actually Trying to Do
True polishing changes the surface of the stone. That is lapidary work: abrasion, tumbling, grit stages, and final polish. It can work beautifully for small decorative stones, but it is not realistic for several hundred pounds or several tons of installed river rock, gravel, or crushed stone.
What’s actually slowing this PC down?
Pick the symptom - the matching free tool is one click away.
#1 Best Overall

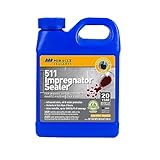
- On very porous surfaces like Travertine, use 511 Porous Plus.
- Formula is oil and water resistant that creates an invisible barrier for protection
- Covers up to 500 square feet per pint
- Offers superior coverage, formulated to provide stain protection that is UV transparent and resists weather elements
- Easy application and will not yellow, safe to use around food prep areas
A hobby rock tumbler usually handles about 2 to 6 pounds per batch, and a full polishing cycle can take weeks. Grit and polish kits commonly cost about $15 to $30, while hobby tumblers often run roughly $50 to $240 depending on barrel size and durability. That is fine for accent stones in a planter bowl. It is not a practical method for a 300-square-foot landscape bed installed 2 to 3 inches deep.
For installed landscaping rock, the polished look usually comes from three things: removing grime, restoring contrast, and optionally applying a UV-stable outdoor sealer rated for natural stone or concrete. That sealer does not last forever. Sun, irrigation, abrasion, freeze-thaw cycles, foot traffic, and soil contamination wear it down. A good sealer can improve color and make future rinsing easier, but it is maintenance, not a permanent finish.
Why Landscaping Rocks Turn Dull
Rock rarely dulls because the stone itself has worn out. More often, the surface is coated with fine material. Dust and pollen settle into the texture. Leaves break down and release tannins. Irrigation leaves mineral scale. Soil migrates up through thin fabric or washes in from the lawn. Algae and moss grow where shade and moisture linger. Old sealer can haze, yellow, peel, or trap dirt.
That difference matters because each cause needs a different response. Dust and pollen may only need dry blowing and a hose rinse. Leaf tannins may need mild detergent and scrubbing. Algae may need a targeted outdoor cleaner. White marble chips stained by soil may be more difficult because aggressive acids can etch the stone. Black polished pebbles may look gray because of hard-water residue or oxidized coating, not because they need more pressure.
Before buying products, look closely at the bed. Check whether the rock is discolored on top only, stained all the way through, mixed with soil below the surface, or sitting over exposed fabric. If the bottom 1 to 2 inches are packed with mud, surface cleaning will disappoint you. In that case, screening, resetting, or replacing the top layer may be the better money.
Match the Method to the Rock Type
Not all landscape stone tolerates the same cleaning. Dense stones such as granite, basalt, quartz, and many river cobbles usually handle rinsing, brushing, and careful pressure washing better than soft or porous materials. Limestone, marble chips, sandstone, and lava rock need more restraint.
Calcium-based stones such as limestone and marble can etch when exposed to acidic cleaners, including vinegar. Porous lava rock can crumble or trap cleaner. Sandstone can shed grains if scrubbed too aggressively. Dyed or coated decorative pebbles may fade or streak if cleaned with harsh chemicals or high pressure.
Use a small hidden test area before applying any cleaner or sealer across the full bed. Give that test 24 to 48 hours. That waiting period matters because some damage shows up after the rock dries: chalking, whitening, etching, blotching, or color change.
The Tool Desk
Outbyte Driver Updater FREEScan for outdated or missing drivers - takes under a minuteDriver Scan →Outbyte PC Repair FREERepair Windows errors before they cause bigger problemsFix Now →Tools and Materials That Actually Help
For most homeowners, the right kit is basic: leaf blower, garden rake, stiff nylon brush, buckets, hose with adjustable nozzle, gloves, eye protection, knee pads, pump sprayer, and a tarp or plywood sheet for protecting nearby surfaces. Avoid wire brushes on softer stone and pavers because they can scratch or leave metal residue.
For heavily contaminated gravel, add a wheelbarrow and a screening frame with hardware cloth. A screen with roughly 1/4-inch to 1/2-inch openings works for many gravel and river rock sizes, but match the mesh to the stone. The goal is to let soil and fines fall through while keeping the rock. Work in sections of 10 to 25 square feet so you can reset the bed evenly without losing track of grade and fabric condition.
For cleaners, start mild. Plain water and dish soap handle more jobs than homeowners expect. Hydrogen peroxide can help with organic staining in some cases. Stone-safe outdoor cleaners are better for sensitive material than improvised acidic mixes. Vinegar should be avoided on limestone, marble chips, and other calcium-based stone. Bleach should be treated as a last-resort vegetation and runoff risk, not a default landscape cleaner.
Rank #2
- SCS Certified INDOOR ADVANTAGE GOLD
- Interior & Exterior Use
- Weather Resistant
- Superior Coverage
- Safe for Food Areas
Step-by-Step: How to Clean Landscaping Rocks
1. Start dry
Blow leaves, pollen, grass clippings, mulch, and loose dust out of the bed before adding water. This is one of the most skipped steps. Water turns fine debris into mud, and mud settles deeper between stones. Keep the blower angle low and move debris toward a tarp, driveway edge, or collection point rather than into the lawn or street.
2. Pull weeds and inspect edging
Hand-pull weeds before washing. If you wash first, wet stems break and roots stay behind. Check edging at the same time. Failed edging lets lawn soil and mulch migrate into rock, which means you will be cleaning the same bed again in a month. For most decorative rock beds, maintaining a 2- to 3-inch rock depth and a firm edge does more for long-term appearance than repeated chemical cleaning.
3. Dry rake and regrade
Use a rake to loosen compacted areas and even out the surface. Keep rock away from plant crowns, siding, weep holes, and wood trim. Around foundations, preserve positive drainage away from the house. Rock is decorative, but the base grade still has to move water correctly.
4. Rinse gently
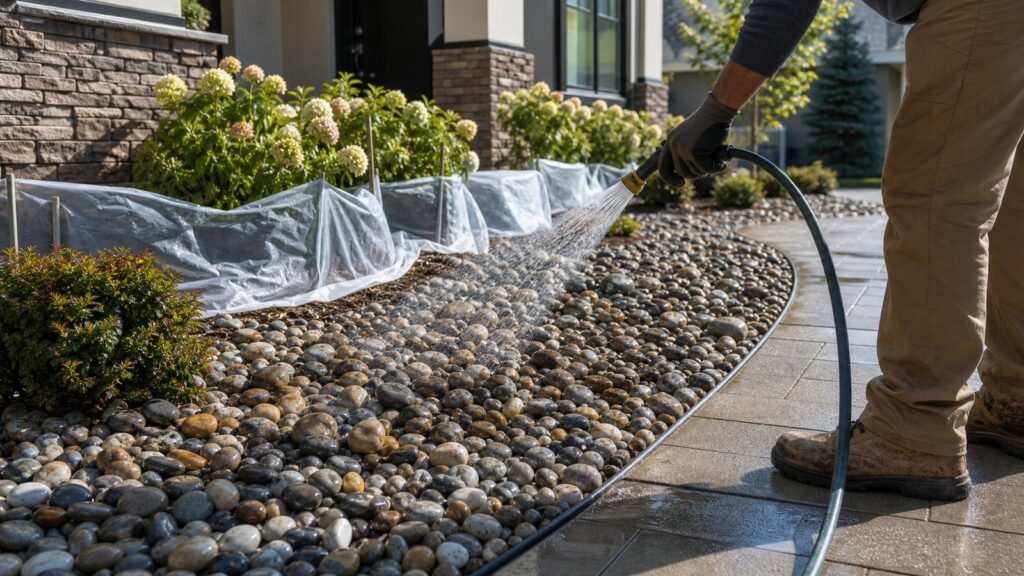
Use a garden hose with a fan or shower setting. Start at the high side of the bed and work downhill. Do not blast directly at exposed landscape fabric or plant roots. If dirty water starts carrying visible sediment toward a driveway, gutter, or storm drain, stop and redirect the rinse area. Capture sediment with towels, wattles, gravel bags, or a temporary low berm.
5. Spot-clean stains
Mix a small amount of mild dish soap in a bucket of water and scrub stained stones with a stiff nylon brush. For algae or moss, use a product labeled for outdoor hardscape or stone use and follow the dwell time on the label. Keep cleaners off desirable plants. Pre-wet nearby vegetation, shield it during application, and rinse it afterward.
6. Screen and reset badly contaminated gravel
If soil is mixed throughout the rock, remove and wash in sections. Shovel rock onto a screen over a wheelbarrow, shake out soil, rinse away from drains, then reinstall. This is slower, but it is often the only method that makes a muddy gravel bed look clean again. While the rock is out, repair torn fabric, remove sediment pockets, and reset edging.
7. Let the bed dry before judging the result
Wet stone always looks richer. Let the area dry fully before deciding whether it still needs treatment. In warm weather, a shallow bed may dry in a few hours. Shaded or deep areas may need 24 hours or more. If the rock looks good wet but dull when dry, sealer may be the finish you are after.
Can You Pressure Wash River Rock or Gravel?
Yes, but only in the right conditions. Pressure washing can work on large river rock, boulders, edging stone, and rock borders where the stones are heavy enough to stay put. It is risky on pea gravel, lightweight lava rock, thin crushed stone, and beds with exposed fabric.
Use the least aggressive setup that cleans the surface. A wide fan tip is safer than a narrow jet. Keep distance from the stone, angle the spray low across the surface, and avoid digging into the bed. Do not blast directly into mulch, plant crowns, paver joints, edging gaps, siding, door thresholds, or exposed fabric. High pressure can scatter gravel, strip paver joint sand, push soil into drains, and create more cleanup than the original problem.
Free tools Windows power users keep installed
One-click scans. No signup required.
Where rock borders touch pavers, inspect the joints afterward. Pressure washing can remove sand from paver joints. If those joints are left open, weeds, movement, settlement, and drainage problems follow. Refill joint sand as needed after the surface dries.
Rank #3
![MORE Premium Stone Sealer - Water Based Formula - Protection for Natural Stone and Tile Surfaces [Pint / 16 Oz.]](https://m.media-amazon.com/images/I/31-tq3tD6OL._SL160_.jpg)
- SEAL & PROTECT - MORE Premium Stone Sealer forms an invisible barrier that provides maximum protection against the toughest stains on the most porous stones. Ultimately, you’ll have the peace of mind knowing your precious surfaces are protected from life’s daily spills. You’ll know it’s working when liquids bead up on the surface.
- HIGH-PERFORMANCE FORMULA - One pint (16oz) provides 125 square feet of coverage. Our cutting-edge formula contains polymers that bond with the pores of the stone to create a durable, long-lasting, invisible barrier that prevents oil and water-based staining. Simply apply the product to the surface evenly with a brush, roller, or paint pad. Allow it to absorb for 15 minutes, then wipe away the excess with a dry cloth or paper towel. Do not allow the sealer to dry on the surface.
- CLEAN INGREDIENTS - Made with just four ingredients, MORE Premium Stone Sealer is low odor and unscented. Our water-based formula has less impact on indoor air quality so it can be used worry-free on stone surfaces anywhere around your home.
- MULTI-SURFACE SEALER - Our Premium Stone Sealer can be used on granite, marble, limestone, travertine, quartzite, bluestone, slate, concrete, onyx, cement tile, and other natural stone. It can also be used as a grout sealer. It’s perfect for exterior and interior stone countertops, patios, walls, floors, and stone furniture. Protecting and beautifying your surfaces has never been easier.
- MORE - MORE Surface Care brings a fresh, new approach to stone and tile care. Every product in the MORE line is manufactured in the USA and formulated specifically to work seamlessly together to care for and protect your natural stone, ceramic, porcelain, and concrete surfaces. Our products are safer and easier to use, without sacrificing quality or results.
Pressure washing also has a runoff issue. Even plain rinse water can carry sediment, organic matter, algae, cleaner residue, or sealer particles. Do not let wash water run to the curb, gutter, or storm drain. Storm drains typically discharge to local waterways without the same treatment as sanitary sewer systems. Capture sediment on site and dispose of it with solid waste or soil as appropriate for the material.
How to Make Landscaping Rocks Look Wet
If you want darker color and stronger contrast after cleaning, use an outdoor sealer rated for natural stone or concrete. Look for a UV-stable product intended for exterior use. For many landscape beds, a penetrating or breathable sealer is safer than a heavy film-forming coating, especially where water can stand, freeze-thaw cycles occur, or people walk.
Apply sealer only after the rock is clean and fully dry. Trapped moisture can cause haze, blotching, whitening, or poor bond. Most products require thin coats rather than one heavy coat. Heavy application can make stone sticky, slippery, glossy in patches, or prone to collecting dust.
Test first. This is especially important on white rock, black polished pebbles, marble chips, limestone, lava rock, and mixed decorative stone. Some sealers deepen color dramatically. Others create a satin or gloss finish that may not match the house or hardscape. Give the test area 24 to 48 hours before committing.
Do not promise yourself a permanent wet look. Outdoor sealers wear. Irrigation, UV exposure, foot traffic, abrasion from raking, and winter conditions all shorten service life. Plan on inspection at least once a year. In high-sun or high-traffic areas, refresh may be needed sooner than in shaded decorative beds.
What It Costs in 2026
Cost depends on whether the rock is dusty, stained, soil-contaminated, or beyond practical cleaning. The table below gives realistic planning numbers for US homeowners in 2026.
| Option | Typical 2026 Cost | Best For | Watch Outs |
|---|---|---|---|
| Basic DIY cleaning | $10-$60 | Light dust, pollen, leaves, mild staining | Assumes you already own a hose and blower |
| DIY upgraded tools | $40-$150 | Brushes, pump sprayer, screening setup, PPE, small tool rentals | Buying a consumer pressure washer can add $80-$250+ |
| Professional pressure washing | $0.15-$0.75 per sq ft; many jobs $100-$500 | Large stone, boulders, hardscape borders, heavy surface grime | Runoff control and paver joint sand matter |
| Landscaper hand cleaning or resetting | Often labor-based; landscaper labor commonly $50-$100 per hour | Screening, lifting, resetting, edging repairs | Slow work when gravel is mixed with soil |
| Rock removal | Commonly $150-$1,200; large or deep beds can exceed $1,500 | Failed beds, contaminated rock, redesigns | Disposal, access, and depth drive cost |
| Replacement rock | Bulk gravel often $10-$75 per ton; pea gravel $30-$65 per ton; river rock $45-$130+ per ton | Badly faded, mixed, or muddy beds | Delivery and installation can exceed material cost |
| Installed decorative rock | Roughly $75-$240 per ton installed; some regions run $2-$8 per sq ft installed | Full refresh or new bed | Depth, access, fabric, edging, and local labor affect price |
As a practical threshold, if small gravel is packed with soil through the full depth of the bed, replacement often beats hand-cleaning. If the top inch is faded or contaminated but the lower bed is sound, replacing only the top 1 inch can restore color for less labor than washing every stone. For a 200-square-foot bed, that top-dress approach may require roughly 0.6 to 1.0 cubic yard depending on rock size and coverage depth.
When to DIY and When to Hire a Pro
DIY makes sense when
Handle the job yourself if the bed is small, the rock is stable, staining is light, plants are easy to protect, and runoff can stay on your property. A 50- to 150-square-foot decorative bed with river rock or granite chips is usually manageable over a weekend. Expect 2 to 6 hours for blowing, weeding, rinsing, spot scrubbing, and cleanup, depending on how much organic material is trapped in the stone.
Hire a pro when
Bring in a landscaper or pressure-washing contractor when the bed is large, rock is deep, access is poor, sediment control is difficult, or the work touches pavers, drains, slopes, or sensitive plantings. Professional help also makes sense when you need removal, screening, new fabric, edging repair, top dressing, or replacement. A crew can move material faster and is more likely to have the right nozzles, containment methods, and labor capacity.
For pressure washing, ask how they plan to control runoff and protect adjacent surfaces. For landscape crews, ask whether they price by the hour, square foot, cubic yard, or ton. Rock installation labor is often discussed in the range of $25 to $100 per ton, while general landscaper labor commonly falls around $50 to $100 per hour. The exact number depends on local labor rates, wheelbarrow distance, bed depth, slope, disposal, and whether sealing is included.
Rank #4

- Enhances Natural Color – Revives and deepens the beauty of stone, grout, pavers, and concrete.
- Restores Faded Surfaces – Brings back the richness of weathered and worn stone indoors or outdoors.
- Water-Based Protection – Seals against water damage while allowing stone to breathe naturally.
- Durable & Easy to Apply – Low-odor formula rolls, sprays, or brushes on for long-lasting results.
- Made in the USA – Proudly crafted with premium quality for trusted performance and protection.
Safety, Plants, and Stormwater Rules
Wear gloves, eye protection, long sleeves, and closed-toe shoes. Wet rock is slippery, and loose stone shifts underfoot. If using a pressure washer, follow the manufacturer instructions and keep the spray away from skin, electrical components, windows, siding seams, and people. High-pressure water can inject under skin and damage surfaces quickly.
Quick wins for a faster PC:
Fix the driver behind crashes, sound loss and screen glitchesFind Drivers →Clear out junk files and repair common Windows errorsFree Scan →Scan for outdated or missing drivers - takes under a minuteDriver Scan →Protect plants before any cleaner touches the bed. Pre-wet foliage and soil, shield delicate plants with plastic or fabric during application, and rinse afterward. Do not leave plastic over plants in sun. Avoid overspray on edible plants unless the cleaner label specifically allows that use.
Runoff deserves real attention. Sediment, nutrients from decomposed leaves, detergents, bleach, and sealer residue should not be washed to the street or storm drain. Work in small areas. Use absorbent barriers, filter socks, gravel bags, or temporary berms. Let sediment settle, scoop it up, and dispose of it as solid waste or soil when appropriate. If your property has a direct drain inlet, steep driveway, HOA stormwater rule, or municipal discharge requirement, check local guidance before pressure washing or using chemicals.
Common Mistakes That Make Rock Beds Worse
The biggest mistake is adding water too soon. Dry debris is easy to remove. Wet debris becomes sludge. Blow, rake, and collect first.
The second mistake is using the wrong cleaner. Vinegar is not safe for every stone. It can etch limestone and marble. Bleach can injure plants and should not be allowed into storm drains. Strong cleaners can also discolor coated decorative stone. Always test first.
Crashes, No Sound, or Screen Glitches?
Random freezes, missing sound and display glitches usually trace back to one bad driver. Find and replace yours safely.Free scan · under a minutePC Slower Than It Used to Be?
A free scan shows the junk files, broken settings and background clutter dragging Windows down - then fixes them in one click.Free scan · Windows 10 & 11The third mistake is overusing pressure. A narrow pressure-washer tip can scatter pea gravel, tear fabric, carve soil channels, and push dirty water where it does not belong. Bigger equipment does not automatically mean a cleaner result.
The fourth mistake is sealing dirty or damp rock. Sealer locks in what is underneath. If the surface still has dust, algae, moisture, or mineral residue, the finish can haze or fail early. Clean first, dry fully, apply thin coats, and keep traffic off until the product has cured according to the label.
How to Keep Landscaping Rocks Clean Longer
Prevention is cheaper than restoration. Keep mulch and soil separated from rock with solid edging. Blow leaves and clippings out of rock beds every 2 to 4 weeks during heavy growing and leaf seasons. Trim plants so they do not constantly shed into the stone. Redirect sprinklers that hit decorative rock every day, especially in hard-water areas where mineral spotting is common.
Maintain proper depth. Most decorative rock beds perform best around 2 to 3 inches deep. Too thin, and fabric shows through. Too deep, and leaves, fines, and soil settle into the bed and become harder to remove. Around plants, pull rock back from crowns and trunks to reduce moisture problems.
Do these 3 things before closing this tab:
1Clear out junk files and repair common Windows errors2Fix the driver behind crashes, sound loss and screen glitches3Repair Windows errors before they cause bigger problemsBest Value

- Long-Lasting Protection – Shields stone and grout from water, soap scum, and calcium for up to 10 years.
- Preserve Natural Beauty – Maintains the original look, color, and texture of marble, granite, travertine, and limestone.
- Easy Maintenance – Makes showers easier to clean by preventing buildup and stains before they start.
- Safe & Low Odor – Water-based, non-toxic formula safe for family and eco-friendly.
- Professional Quality – Designed by stone care experts, trusted by homeowners and professionals alike.
Inspect after storms. If soil washes into the bed, fix the source: missing edging, bare slope, downspout discharge, poor grade, or thin fabric. Cleaning the rock without correcting the source is temporary. In construction terms, treat the cause before polishing the symptom.
Bottom Line
For installed landscape rock, clean and protect is the right mindset. True polishing is for small loose stones in a tumbler, not an entire rock bed. Start dry, use mild cleaning methods first, match the cleaner to the stone, control runoff, and pressure wash only where the rock and surrounding surfaces can handle it.
If the goal is richer color, a tested outdoor stone sealer can create a wet-look finish, but it needs clean, dry stone and periodic reapplication. If the bed is packed with soil or the top layer is badly faded, partial replacement may be cheaper and cleaner than trying to scrub every rock back to life.
Frequently Asked Questions
Can you really polish landscaping rocks after they are installed?
Not in the true lapidary sense. Installed landscape rock is usually cleaned, brightened, and sometimes sealed. Actual polishing with grit and a tumbler is practical only for small loose stones, usually a few pounds per batch.
What is the safest way to clean landscape rocks without killing plants?
Start with dry blowing and raking, then rinse with water and scrub stains with mild dish soap. Pre-wet nearby plants, shield them during cleaning, rinse afterward, and avoid letting cleaner sit in the root zone.
Can I pressure wash river rock or gravel beds?
Large river rock and boulders can often be pressure washed carefully with a wide fan tip and low spray angle. Pea gravel, lava rock, thin crushed stone, exposed fabric, and paver joints are easier to damage.
How do I make landscape rocks look wet permanently?
There is no permanent wet look outdoors. A UV-stable exterior stone or concrete sealer can darken the rock, but sun, water, abrasion, freeze-thaw cycles, and foot traffic wear it down over time.
Is vinegar safe for cleaning white landscape rocks?
Not always. Vinegar can etch limestone, marble chips, and other calcium-based stone. Test first, and use a stone-safe cleaner when you do not know the exact rock type.
When is it cheaper to replace landscape rock instead of cleaning it?
Replacement often makes sense when small gravel is mixed with soil through the full depth, when the rock is badly faded, or when removal and screening would take more labor than adding a fresh top layer or new material.
Quick Recap
Product prices and availability are accurate as of the date/time indicated and are subject to change. Any price and availability information displayed on Amazon at the time of purchase will apply.