Rainscaping is the practical side of beautiful yard drainage. Instead of sending every storm straight across the lawn, into the street, or toward a foundation, a well-built rainscape slows water down, spreads it out, stores some of it, and lets the rest move to a safe overflow point.
For homeowners, the best rainscaping projects usually solve a visible problem: mulch washing out of beds, puddles near a patio, water cutting across a driveway, soggy turf, downspout erosion, or high summer irrigation demand. On our job sites, we treat these as construction problems first and planting projects second. The grading, soil, overflow route, and maintenance access have to work before the plants and stone can do their job.
Below are eight rainscaping ideas that work well in residential yards and gardens, with realistic 2026 cost ranges, sizing notes, safety checks, and guidance on when a homeowner can handle the work versus when it is time to bring in a drainage pro.
Start With a Simple Drainage Map
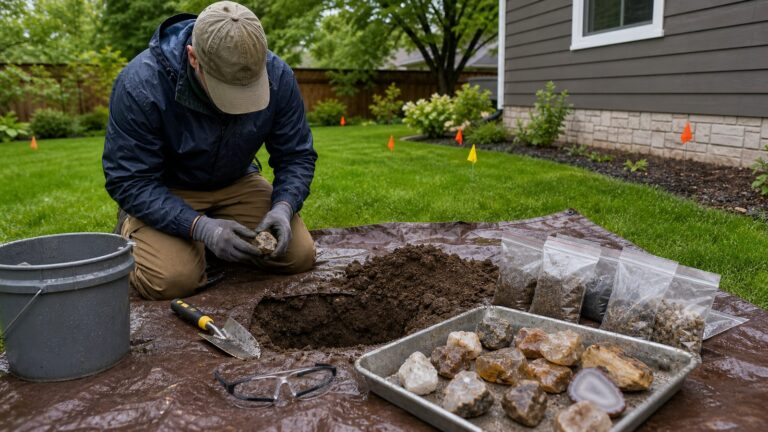
Before choosing a rain garden, dry creek bed, or permeable patio, walk the property during or right after a hard rain. Mark where water starts, where it concentrates, where it causes damage, and where it can safely overflow.
#1 Best Overall

- 50-Gallon Capacity: Provides ample storage for harvested rainwater, ideal for watering gardens, lawns, and plants.
- Durable Construction: Made from UV-resistant polyethylene for long-lasting durability and protection from the elements. Made of 100% Recycled plastic.
- Overflow Valve: Built-in overflow valve for managing excess water and the option to connect multiple barrels for increased storage.
- Convenient Spigot: Easy-to-use plastic spigot for quick and efficient water retrieval.
- Low Maintenance: Easy to install and maintain, offering a simple, sustainable solution for homeowners.
A useful drainage map should include roof planes, gutters, downspouts, driveway slope, patio slope, low spots, retaining walls, neighboring lots, sidewalks, street inlets, septic fields, wells, and large trees. If a downspout drains 600 square feet of roof, that is a different design problem than a small bed catching runoff from a shed roof.
As a rule of thumb, 1 inch of rain on 1,000 square feet of roof produces about 623 gallons of runoff. That means a modest 300-square-foot roof section can shed roughly 187 gallons in a 1-inch storm. A 55-gallon rain barrel will fill quickly. A decorative bed with no overflow will flood. A properly sized rain garden or swale can handle much more, but only if water is directed to it and excess water has somewhere safe to go.
The core principle is simple: do not just collect water. Always provide a safe overflow path away from foundations, neighboring lots, sidewalks, driveways, septic systems, wells, and basement windows.
1. Build a Rain Garden Where Water Already Wants to Go
A rain garden is a shallow planted depression that receives runoff from a roof, driveway, patio, or lawn area. It is not a pond. It should drain down after a storm, usually within 24 to 48 hours, and support plants that can tolerate both wet and dry periods.
Do these 3 things before closing this tab:
1Scan for outdated or missing drivers - takes under a minute2Repair Windows errors before they cause bigger problems3Fix the driver behind crashes, sound loss and screen glitchesFor many homeowner projects, the basin is about 6 inches deep, with gently sloped sides, amended soil, mulch, and native or climate-adapted plants. Typical residential rain gardens often land in the 100- to 300-square-foot range, though the right size depends on the drainage area, soil infiltration rate, slope, and local rainfall patterns.
Good locations
Place a rain garden where runoff can enter naturally or through a controlled extension, swale, or stone channel. Keep it far enough from the house to avoid foundation problems. Common public stormwater guidance recommends at least 10 feet from home foundations and about 50 feet from septic systems or wells, but local rules can vary.
A rain garden should not sit over buried utilities, on a steep unstable slope, or in a spot where water already stands for days. If water remains longer than 24 to 48 hours after a typical storm, test the soil before building. Clay-heavy sites may need amended soil, a shallower basin, an underdrain, or a different approach.
2026 cost range
DIY rain garden materials commonly run about $1 to $5 per square foot. Many 100- to 400-square-foot DIY projects fall between $100 and $2,000, depending on plant size, compost, mulch, stone, edging, and whether soil has to be removed.
Professionally installed rain gardens commonly range from about $5 to $40 or more per square foot. The higher end usually involves excavation, soil replacement, haul-off, drainage pipe, engineered overflow, mature plants, decorative stone, difficult access, or heavy clay corrections.
Builder tip
Design the planting in moisture zones. Put the wettest-tolerant plants in the basin bottom, plants that handle occasional saturation on the side slopes, and more drought-tolerant plants on the upper edge. That makes the garden more resilient after both heavy spring storms and dry summer stretches.
2. Use a Bioswale or Vegetated Swale to Move Water Slowly
A bioswale is a shallow planted channel that conveys runoff while slowing it down and filtering sediment. In a residential yard, it can be as simple as a broad grassed or planted swale along a driveway, or as involved as an engineered feature with amended soil, check dams, erosion-control fabric, underdrain, and a defined outlet.
The difference between a swale and a trench drain is performance. A trench drain collects and pipes water away quickly. A vegetated swale spreads the flow, reduces erosion, and gives water a chance to soak in where soils allow it. That makes it useful along long driveways, side yards, and property edges where sheet flow keeps cutting ruts or washing mulch.
Free tools Windows power users keep installed
One-click scans. No signup required.
Practical dimensions
For a small residential swale, a broad shallow profile is usually better than a narrow ditch. A swale might be 2 to 6 feet wide with gently sloped sides that can be mowed or planted. The bottom should have enough pitch to move water, but not so much that storms turn it into a channelized stream. Where slope is steeper, small stone check dams can slow water and reduce scouring.
Swales need a legal, safe discharge point. Do not aim concentrated flow at a neighbor’s yard, sidewalk, foundation, or septic area. In cold climates, avoid routing overflow across walks and drives where it can freeze.
2026 cost range
Costs vary widely. A simple graded and planted swale can price similarly to a rain garden on a residential site. An engineered bioswale with excavation, amended soil, fabric, check dams, underdrain, curb cuts, and erosion control costs more and should be estimated after a site visit.
For DIY work, seed, plugs, compost, mulch, and erosion-control blanket may be the main costs. For pro work, grading equipment, hauling, soil disposal, pipe, stone, and finish restoration usually drive the price.
Outdated Drivers Are Slowing You Down
One free scan finds every outdated or missing driver and matches the right update for your exact hardware.Free scan · exact hardware matchPC Slower Than It Used to Be?
A free scan shows the junk files, broken settings and background clutter dragging Windows down - then fixes them in one click.Free scan · Windows 10 & 113. Add a Dry Creek Bed for Erosion Control and Visible Drainage
A dry creek bed is a stone-lined drainage path that looks intentional even when it is not raining. It is useful where runoff has already created a shallow washout path through mulch, turf, or bare soil. Built correctly, it can guide water through the yard without letting it cut a rut.
The key phrase is “built correctly.” A dry creek bed is not a cure for poor grading by itself. It needs a planned inlet, enough width for the expected flow, a stable base, and a safe outlet. If the bed simply ends in the middle of the lawn, the same drainage problem may show up 20 feet away.
Materials and construction
A typical small residential dry creek bed may include excavation, compacted subgrade, geotextile fabric where appropriate, a mix of 1- to 3-inch river rock, larger cobbles, and a few boulders to break up flow. The bed should be slightly recessed so water enters it instead of running beside it.
For a natural look, vary the stone size and avoid making the bed perfectly symmetrical. For performance, keep the channel continuous and make sure mulch, leaves, and sediment cannot block the inlet.
The Tool Desk
Outbyte Driver Updater FREEFix the driver behind crashes, sound loss and screen glitchesFind Drivers →Outbyte PC Repair FREERepair Windows errors before they cause bigger problemsFix Now →2026 cost range
Basic installed landscape-rock drainage beds are often quoted around $5 to $7 per square foot in contractor guidance. Decorative 30- to 50-foot beds with liner, mixed rock, and boulder accents can run roughly $800 to $2,500 in some 2026 regional cost guides. Large stone, tight access, roots, regrading, haul-off, and long runs increase cost.
This is a reasonable DIY project if the drainage area is small and the outlet is obvious. Hire help when the flow is heavy, the grade is unclear, the bed is near a structure, or the project ties into a stormwater system.
Rank #2

- 50-Gallon Capacity: Provides ample storage for harvested rainwater, ideal for watering gardens, lawns, and plants.
- Durable Construction: Made from UV-resistant polyethylene to withstand outdoor elements and ensure long-lasting durability.
- Overflow Valve: Built-in overflow valve for managing excess water and the option to connect multiple barrels for increased storage.
- Premium Brass Spigot: Features a high-quality brass spigot for easy, secure, and leak-free water retrieval.
- Low Maintenance: Easy to install and maintain, offering a simple, sustainable solution for homeowners.
4. Replace Hard Runoff Areas With permeable pavers
Permeable hardscape is one of the most useful rainscaping upgrades because it manages water where runoff is created. Permeable paver patios, walkways, driveway strips, and parking pads allow water to pass through open joints into a stone reservoir below.
The surface is only part of the system. The base matters more. A proper permeable paver installation typically includes an open-graded aggregate reservoir, edge restraints, bedding stone, joint aggregate, and geotextile where the soil and design call for it. In slow-draining soils or areas with high groundwater, an underdrain may be needed.
Best uses
Permeable pavers are especially effective for patios that puddle, walkways that shed water toward the house, driveway aprons, and parking areas where runoff currently crosses the lawn or sidewalk. They can also be paired with a rain garden or swale as part of a treatment train.
During construction, keep sediment out of the stone reservoir. Mud from adjacent grading can clog the system before the homeowner ever uses it. After installation, plan periodic vacuum sweeping or joint aggregate refresh, especially under trees or near bare soil.
2026 cost range
National installed ranges commonly fall around $10 to $30 per square foot for permeable pavers and $8 to $16 per square foot for pervious concrete driveways. Some high-cost urban programs report $40 to $60 per square foot for many permeable paver projects because of labor, disposal, insurance, specialty base requirements, and program standards.
Because the base is structural and drainage-critical, permeable driveways and parking areas are usually pro work. A small garden path or patio may be DIY-friendly for a skilled homeowner, but only if excavation depth, base stone, edge restraint, and slope are handled correctly.
Quick wins for a faster PC:
Scan for outdated or missing drivers - takes under a minuteDriver Scan →Clear out junk files and repair common Windows errorsFree Scan →Fix the driver behind crashes, sound loss and screen glitchesFind Drivers →5. Install a Rain Barrel or Cistern With a Real Overflow Plan
Rain barrels and cisterns collect roof runoff for later use, usually irrigation. They are helpful, visible, and relatively affordable, but they are not whole-yard flood control. A 55- to 100-gallon barrel fills fast in a storm, so overflow routing is the difference between a useful system and a wet foundation.
The simplest setup is a downspout diverter feeding a sealed barrel on a stable stand. The barrel should have a screened inlet, a hose bib, an overflow outlet, and a base that will not settle. Water weighs about 8.3 pounds per gallon, so a full 100-gallon setup can weigh more than 830 pounds before counting the barrel itself.
Use it as part of a treatment train
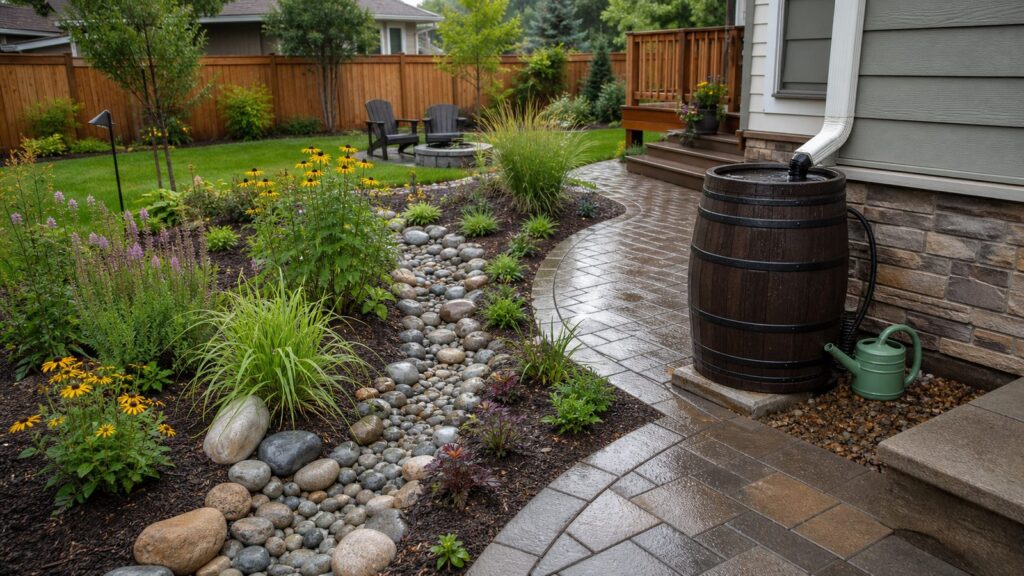
The best residential setups connect features. A downspout can feed a rain barrel. The barrel overflow can run to a rain garden. Larger storms can exit through a swale or dry creek bed. That way, each piece does what it is good at instead of asking one barrel to handle every storm.
Check local rules before installing rainwater harvesting, especially for larger cisterns or systems tied into irrigation or plumbing. Rainwater collection is legal in many places, but states and municipalities can regulate storage volume, indoor use, cross-connection protection, and permitting.
2026 cost range
Small residential rain barrel systems commonly range from about $120 to $2,160 installed for a 100-gallon setup, depending on barrel material, stand or base, diverter, gutter work, filtration, and labor. Subsidized municipal barrels can be much cheaper; some local programs list discounted barrels below $100 and subsidized options around $60.
Cisterns cost much more because storage volume, pumps, filtration, controls, winterization, underground tanks, and plumbing tie-ins all add complexity. Treat a cistern as a custom estimate, especially if it connects to irrigation zones or any indoor non-potable use.
6. Disconnect Downspouts Into Planted Infiltration Beds
Many yard drainage problems start at the downspout. A concentrated roof stream hits one spot, erodes soil, washes mulch, and keeps the same turf area wet after every storm. A downspout extension into a planted infiltration bed can be a simple and effective fix.
The goal is to spread the water before it causes damage. That may mean a solid extension, a buried non-perforated pipe to daylight, a pop-up emitter, a stone apron, or a shallow planted bed with amended soil. The right choice depends on slope, soil, and distance from the foundation.
Recommended Free Tools
Setbacks and slope
As a practical baseline, move roof water at least 10 feet away from the foundation when possible, and farther on lots with basement moisture issues or poor grading. Maintain positive slope away from the house. Do not discharge onto a sidewalk, driveway, neighbor’s yard, retaining wall, septic area, or well area.
Before digging, call 811 or your local utility locate service. Downspout work often looks shallow, but irrigation lines, low-voltage lighting, gas lines, cable, and electric service can be closer than expected.
2026 cost range
Simple downspout extensions, splash blocks, stone aprons, mulch, and plants are among the lower-cost rainscaping projects. Costs increase when the work includes buried pipe, pop-up emitters, regrading, concrete cuts, wall penetrations, or connection to an approved stormwater system.
This is often DIY-friendly if the water can be discharged safely above grade. Hire a pro when the downspout is tied to a basement water issue, the lot is flat, the outlet is hard to find, or buried drainage is needed.
What’s actually slowing this PC down?
Pick the symptom - the matching free tool is one click away.
7. Convert Weak Lawn Areas to Deep-Rooted Native Planting
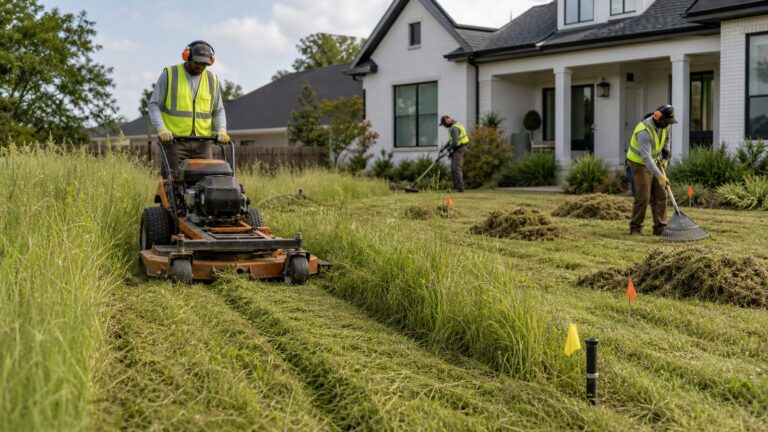
Turf is not always the best surface for managing stormwater. Compacted lawn on clay soil can shed water almost like a hard surface during intense rain. Deep-rooted native planting, meadow-style beds, shrub borders, and lawn reduction areas can improve infiltration, reduce irrigation demand, and stabilize soil.
This works especially well on slopes, along fence lines, at the edge of rain gardens, around dry creek beds, and in lawn areas that are hard to mow or always thin. Native and climate-adapted plants also support pollinators and typically need less supplemental water after establishment.
Planting strategy
Use plugs or larger plants where erosion control is needed quickly. Seed mixes cost less, but they take longer to establish and require more weed management early on. For a finished residential look, we often use a structured edge, repeated plant groupings, and mulch during establishment so the bed looks intentional from the start.
Expect the first year to require watering, weeding, replacement of failed plants, and mulch touch-ups. Most native plantings are not “no maintenance.” They are lower-input after establishment, but they still need care.
2026 cost range
Native planting and lawn conversion costs vary by plant size, density, sod removal, irrigation establishment, deer protection, mulch, and maintenance visits. Seed is the cheapest route but slower. Plugs, shrubs, and mature perennials cost more but stabilize soil faster and look finished sooner.
For small beds, homeowners can often handle removal, compost, mulch, and planting. Larger lawn conversions, steep slopes, erosion-prone areas, and sites requiring irrigation changes are better suited to a landscape contractor.
Rank #3

- 50-Gallon Capacity: Provides ample storage for harvested rainwater, ideal for watering gardens, lawns, and plants.
- Durable Construction: Made from UV-resistant polyethylene for long-lasting durability and protection from the elements. Made of 100% Recycled plastic.
- Overflow Valve: Built-in overflow valve for managing excess water and the option to connect multiple barrels for increased storage.
- Convenient Spigot: Easy-to-use plastic spigot for quick and efficient water retrieval.
- Sturdy Stand Included: Raised design ensures easy access to the spigot on the rain barrel for efficient water retrieval.
8. Improve Soil With Compost, Mulch, Aeration, Contours, and Berms
Not every rainscaping fix needs a new feature. Sometimes the best improvement is making the existing yard absorb and direct water better. Compacted soil, bare spots, thin mulch, and poor micro-grading are common reasons otherwise decent yards perform badly in storms.
Core soil improvements include aerating compacted lawn, topdressing with compost, refreshing mulch to 2 to 3 inches in planting beds, adding organic matter to new beds, and using shallow contours or berms to slow sheet flow. These upgrades are especially useful around rain gardens, swales, and native planting zones.
Where this helps most
Soil improvement is useful where water sheets across turf, mulch floats out of beds, or plants struggle between storms. It is less useful where the site has a true grading problem, groundwater issue, blocked drain, or water moving toward a foundation. In those cases, soil amendments may be part of the fix, but they are not the whole fix.
For clay soils, be realistic. Compost and aeration can improve the upper soil profile, but they do not turn heavy clay into a free-draining sand bed. If infiltration testing shows water standing longer than 24 to 48 hours, consider shallow basins, underdrains, conveyance features, or relocation.
Rainscaping Cost Comparison for 2026
Actual pricing depends on access, soil, disposal, plant size, drainage complexity, and local labor rates. Still, the ranges below are useful for early planning.
| Rainscaping idea | Typical 2026 cost range | Best use | DIY difficulty |
|---|---|---|---|
| Rain garden | DIY: $1-$5 per sq ft; pro: $5-$40+ per sq ft | Downspout, patio, or driveway runoff | Moderate |
| Bioswale or vegetated swale | Similar to rain gardens for simple sites; higher for engineered work | Moving water slowly across a yard | Moderate to hard |
| Dry creek bed | About $5-$7 per sq ft basic; $800-$2,500 for many decorative 30-50 ft beds | Erosion paths and visible conveyance | Moderate |
| Permeable pavers | Commonly $10-$30 per sq ft; some urban projects $40-$60 per sq ft | Patios, walks, driveway strips, parking pads | Hard |
| Pervious concrete driveway | Commonly $8-$16 per sq ft | Driveways and larger paved areas | Pro only |
| Rain barrel | About $120-$2,160 installed for a 100-gallon setup | Small-scale roof capture and irrigation | Easy to moderate |
| Cistern | Custom estimate | Larger rainwater harvesting | Pro recommended |
| Native planting or lawn conversion | Highly variable by plant size, density, and prep | Reducing runoff and irrigation demand | Easy to moderate |
When to DIY and When to Hire a Pro
Many rainscaping projects are approachable for a careful homeowner. Small rain gardens, above-grade downspout extensions, rain barrels, native planting beds, and short dry creek beds can be good DIY projects when the site is simple and the overflow route is obvious.
Hire a professional when water is close to the house, a basement has moisture issues, the lot is flat, the soil is heavy clay, the project involves buried pipe, the work affects a driveway or retaining wall, or the discharge point is unclear. Also bring in help for permeable driveways, large cisterns, underdrains, grading changes, and any project that may affect a neighbor or public right-of-way.
Permits and approvals matter. Some municipalities regulate stormwater connections, curb cuts, work near sidewalks, grading, retaining walls, and rainwater harvesting systems. HOAs may regulate front-yard planting, visible barrels, rock beds, and hardscape materials. Many rebate programs require pre-approval, approved contractors, inspections, or specific plant and material lists before work begins. Check those rules before final design, not after the project is built.
Maintenance That Keeps Rainscaping Working
A rainscape is not a set-it-and-forget-it feature. The first year matters most. Plan on watering new plants during establishment, weeding aggressively, replacing failed plants, refreshing mulch, and inspecting after heavy rain.
After storms, look for standing water beyond 48 hours, clogged inlets, mulch floating out, sediment buildup, erosion at outlets, and water bypassing the intended feature. Small corrections early are cheaper than rebuilding a failed drainage feature later.
Recommended Free Tools
Permeable pavers need clean joints to keep water moving through the surface. Plan vacuum sweeping or joint aggregate refresh as needed, especially before winter in cold climates. Dry creek beds need leaf and sediment removal at inlets. Rain barrels need screened openings, clean gutters, drained or winterized components where freezing is a concern, and overflow piping that stays connected.
The Best Rainscapes Work as a System
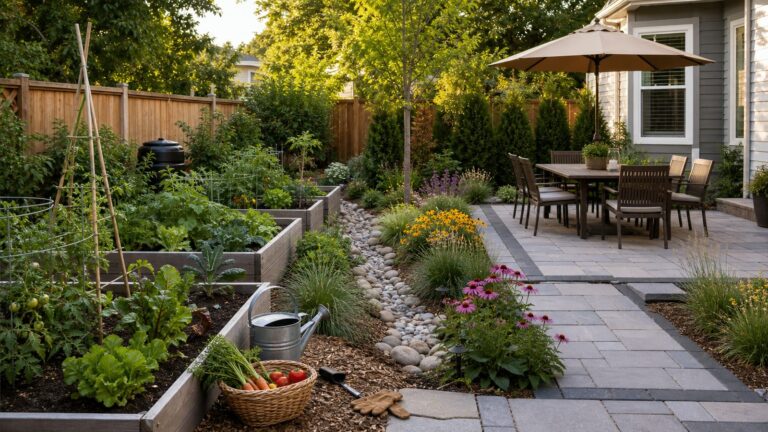
The strongest residential rainscaping projects use more than one idea. A downspout diverter can feed a rain barrel. The barrel overflow can enter a rain garden. Excess water can leave through a swale or dry creek bed. Nearby lawn can be converted to native planting so the whole area handles storms better.
That system approach is what separates attractive landscaping from dependable stormwater management. The yard looks better, but it also has a job: protect the foundation, reduce erosion, limit runoff, and keep water moving safely through the property.
If you start with a drainage map, size each feature to a real runoff source, and plan the overflow before digging, rainscaping can turn a wet problem area into one of the most useful parts of the yard.
Do these 3 things before closing this tab:
1Clear out junk files and repair common Windows errors2Fix the driver behind crashes, sound loss and screen glitches3Repair Windows errors before they cause bigger problemsFrequently Asked Questions
What is rainscaping?
Rainscaping is the use of landscape and hardscape features such as rain gardens, swales, permeable pavers, rain barrels, dry creek beds, native planting, and soil improvements to manage stormwater on site.
How far should a rain garden be from the house?
Common homeowner guidance is to keep rain gardens at least 10 feet from home foundations and about 50 feet from septic systems or wells. Local requirements can vary, so check municipal rules before building.
How much does a rain garden cost in 2026?
DIY rain garden materials commonly cost about $1 to $5 per square foot. Professionally installed rain gardens often range from $5 to $40 or more per square foot, depending on excavation, soil, plants, drainage piping, access, and disposal.
Do rain barrels prevent yard flooding?
Rain barrels help capture roof water for irrigation, but they do not provide whole-yard flood control. A 55- to 100-gallon barrel fills quickly during a storm, so the overflow must be routed to a safe location.
The Tool Desk
Outbyte Driver Updater FREEScan for outdated or missing drivers - takes under a minuteDriver Scan →Outbyte PC Repair FREERepair Windows errors before they cause bigger problemsFix Now →Are permeable pavers worth it for drainage?
Permeable pavers can be very effective when installed with the correct open-graded stone base, edge restraint, and maintenance plan. They are most useful for patios, walks, driveway strips, and parking areas that currently shed runoff.
Can rainscaping work in clay soil?
Yes, but clay soil needs extra care. Use infiltration testing first. If water stands longer than 24 to 48 hours, the design may need amended soil, a shallow basin, an underdrain, a swale, or a non-infiltration drainage solution.
Quick Recap
Product prices and availability are accurate as of the date/time indicated and are subject to change. Any price and availability information displayed on Amazon at the time of purchase will apply.