Do these 3 things before closing this tab:
1Clear out junk files and repair common Windows errors2Fix the driver behind crashes, sound loss and screen glitches3Repair Windows errors before they cause bigger problemsA good flagstone patio is not just flat stone arranged in the yard. It is a drainage system, a compacted base, a finished walking surface, and a long-term maintenance decision all in one. Homeowners can build a small dry-laid flagstone patio themselves, but it is heavy, slow work. The difference between a patio that feels solid for years and one that rocks after the first winter usually comes down to excavation depth, slope, compaction, and joint choice.
This guide covers a dry-laid flagstone patio, which means natural stone set over compacted aggregate and a bedding layer, not stone mortared to a concrete slab. On our job sites, we treat dry-laid patios as flexible pavement. The base has to drain, the stones have to be thick enough, and the edges need restraint. If your project has poor drainage, freeze-thaw conditions, tight hand-cut joints, steps, retaining walls, or a patio tied into a door threshold, it is worth getting a professional hardscape crew involved.
What a Flagstone Patio Costs in 2026
In 2026, most professionally installed dry-laid flagstone patios in the United States fall around $15 to $32 per square foot, with several national cost sources clustering near $15 to $30 per square foot. Homewyse’s May 2026 model starts around $24.88 to $32.06 per square foot before local site adjustments. Mortared or concrete-set flagstone can climb to roughly $42 to $45 per square foot because it adds slab work, mortar, more detailing, and usually more labor.
For a 200 square foot patio, a dry-laid installation commonly lands around $3,000 to $6,400. A 300 square foot patio often falls around $4,500 to $9,000. Material-only flagstone often ranges from about $2 to $15 per square foot depending on stone type, thickness, finish, and trucking distance, but that number does not include base stone, bedding material, edging, compaction equipment, delivery, waste, disposal, or your time.
What’s actually slowing this PC down?
Pick the symptom - the matching free tool is one click away.
#1 Best Overall

- Ideal For: Crusher Run, Sand, Soil and Block Paving Preparation.
- This electric-powered compactor is ideal for surface preparation when evenly compacted ground is required and suitable for sub-base preparation, sand, gravel, crusher run, soil, small aggregates, patios, block paving, driveways, pathways, and tarmac repairs.
- Powered by a 120V~60Hz 1.25A electric induction motor, no harmful fumes are emitted (unlike gas-powered compactors), it is ideal for use in enclosed spaces.
- Reliable, portable, quiet, low-maintenance power unit with a vibration damper system for increased user comfort using low-frequency and high-amplitude for better soil compaction.
- Added roll-bars, which offer increased strength and protection during transportation.
| Patio Item | Typical 2026 Range | What Changes the Price |
|---|---|---|
| Dry-laid flagstone installed | $15-$32 per sq. ft. | Access, labor rates, excavation, stone thickness, joint detail |
| Mortared or concrete-set flagstone | Up to about $42-$45 per sq. ft. | Concrete slab, mortar bed, drainage detailing, expansion control |
| Flagstone material only | $2-$15 per sq. ft. | Sandstone, limestone, bluestone, slate, quartzite, thickness, freight |
| 200 sq. ft. dry-laid patio | $3,000-$6,400 installed | Simple square layout versus curves, cuts, poor soils, drainage work |
| 300 sq. ft. dry-laid patio | $4,500-$9,000 installed | Furniture zones, fire pit tie-ins, demolition, hauling, tight joints |
Flagstone usually costs more than basic concrete pavers because irregular natural pieces must be sorted, fitted, leveled, and adjusted by hand. A clean flagstone patio is craftsmanship-heavy work.
Step 1: Plan the Size, Use, Pattern, and Drainage
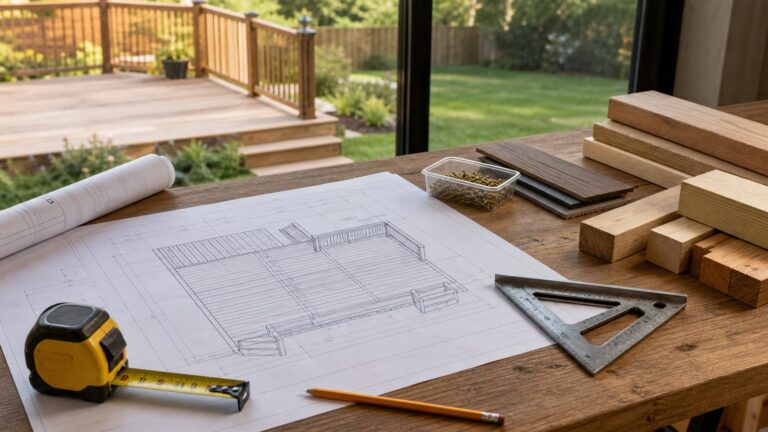
Start with how the patio will be used. A small bistro area can work at 8 by 10 feet. A four-person dining area is more comfortable around 10 by 12 feet. A six-person table, grill clearance, and walking room usually need 12 by 16 feet or more. If you want lounge seating and a fire feature, plan the furniture first, then size the patio around real clearances.
Flagstone is a natural flat stone category, not one single product. Common patio choices include sandstone, limestone, bluestone, slate, and quartzite. For pedestrian patios, choose pieces that are flat enough for chairs and foot traffic. Thin or highly uneven stone is more likely to rock or crack unless it is set in mortar over a rigid base.
Drainage is the part many DIY guides underplay. The patio should shed water away from the house and toward a place that can actually accept it. The 2024 IRC requires impervious surfaces within 10 feet of a foundation to slope at least 2 percent away from the building. In practical terms, use at least 1/4 inch of fall per foot away from the house. For a 12 foot deep patio, that means the outer edge should be about 3 inches lower than the house-side edge.
Recommended Free Tools
Step 2: Check Utilities, Permits, Setbacks, and Site Restrictions
Before digging, call 811 and have underground utilities marked. Do this even for a shallow patio. Irrigation lines, landscape lighting wire, cable service, gas lines, and electrical feeds are commonly closer to the surface than homeowners expect.
Also check your city, county, and HOA requirements. Some jurisdictions do not require a building permit for a basic patio at grade, but they may regulate setbacks, easements, lot coverage, stormwater runoff, grading, retaining walls, and patios attached to steps or structures. A patio that sends water onto a neighbor’s property can become a code and drainage problem even if the patio itself did not need a permit.
Pay special attention to door thresholds. Finished patio height should stay low enough that water cannot back up into siding, trim, or the door pan. On our projects, we confirm finished elevation before excavation begins, because once the base is installed, fixing a patio that is too high at the house becomes expensive.
Step 3: Calculate Materials and Choose the Right Stone
Measure the patio area in square feet and add 10 to 15 percent extra flagstone for waste, fitting, color selection, and breakage. Irregular flagstone has more layout waste than modular pavers. If the patio has curves or you want tighter joints, lean toward the higher waste factor.
For a dry-laid pedestrian patio, thicker stone is more forgiving. Many builders prefer natural cleft pieces in the 1.5 to 2 inch range for dry-laid work. Thinner pieces can work in limited conditions, but they demand a flatter, more supportive setting bed and are less tolerant of point loads from chair legs and uneven base areas.
Rank #2

- Effortless Operation: Equipped with a non-slip handle, this plate compactor stops sweaty palms from slipping even in hot weather
- Mighty Power: This compactor machine's 6.5 HP horsepower can compact 6,534 ft² of ground in 1 hour, and 18 kN compaction force combined with 75 ft/min travel speed can efficiently complete work tasks
- Durable Construction: This professional compactor's engine can reach a speed of 5700 RPM, helping you compact the ground quickly. The thick compaction plate can last for a long time. EPA-certified, ensuring low gas emissions for a cleaner atmosphere
- Large Capacity Fuel Tank: This gas powered compactor features a 0.5 L oil capacity and a 2.5 L fuel tank, use 95 octane gasoline. Simply refuel and start working. For engine protection, continuous operation is recommended for up to about 40 minutes
- Suitable for Various Roads: This vibrating plate compactor can be widely applied in construction, municipal administration, highways, railways, and other fields to fulfill the road surface tamping of dirt, gravel, lawn, and so on
For the base, use angular compactable aggregate, not pea gravel. Rounded stone shifts under load. A common dry-laid build-up is 4 to 6 inches of compacted crushed-stone base for pedestrian patios, with deeper excavation in freeze-thaw climates, clay soils, or weak subgrade. Some stone masons excavate around 8 to 9 inches to allow roughly 6 inches of compacted road base, a bedding layer, and the stone thickness.
Step 4: Mark the Layout and Set Finished Elevations
Mark the patio with stakes, mason’s line, marking paint, or a garden hose for curves. Square or rectangular patios should be checked diagonally. If both diagonal measurements match, the layout is square.
Set the finished grade before you excavate. Use a laser level if available, or set string lines from the house-side finished elevation to the outer edge with the planned slope built in. For patios near a foundation, use 1/4 inch per foot of fall away from the house unless the site requires a more specific drainage plan. A patio that is 16 feet wide can still be level side to side, but it should fall in the direction you want water to move.
Windows Errors? Fix Them Before They Spread
Repair common Windows errors and clear accumulated junk for a smoother, more stable PC - no reinstall needed.Free scan · no reinstallCrashes, No Sound, or Screen Glitches?
Random freezes, missing sound and display glitches usually trace back to one bad driver. Find and replace yours safely.Free scan · under a minuteMark the excavation depth from the finished surface, not from the existing lawn. For example, if your stone averages 1.5 inches thick, your bedding layer is 1 inch, and your compacted base is 6 inches, you need roughly 8.5 inches below finished patio height. Add or adjust for sod removal, high spots, and planned transitions to walks or lawn.
Step 5: Excavate to the Proper Depth
Remove grass, organic soil, roots, soft material, and loose fill. Organic material decomposes and settles, which creates low spots and rocking stones. Keep the excavation bottom consistent with the same slope you want in the finished patio.
For many dry-laid patios, plan on 7 to 9 inches of excavation below finished grade. That usually provides room for 4 to 6 inches of compacted crushed stone, about 1 inch of bedding material, and 1.5 to 2 inches of flagstone. In clay soils, wet areas, or freeze-thaw regions, deeper base preparation may be needed. A patio carrying only foot traffic does not need the same base as a driveway, but it still needs enough compacted structure to bridge seasonal movement.
Stockpile clean topsoil where it can be reused for landscape repair, but keep it out of the patio base. If excavation spoils cannot stay on site, include hauling and disposal in the budget. Disposal, tight access, and wheelbarrow-only work are common reasons a simple patio estimate grows.
Step 6: Compact the Subgrade and Use Geotextile Where It Helps
After excavation, compact the subgrade with a plate compactor. The soil should feel firm underfoot without pumping, rutting, or bouncing. If the subgrade is wet and moving, stop and solve that condition before adding stone. Dumping aggregate over unstable soil hides the problem for a short time, then the patio settles later.
Geotextile fabric is useful where native soil is clayey, silty, or prone to pumping up into the aggregate base. It separates the soil from the crushed stone and helps preserve the base structure. Fabric does not replace excavation depth, drainage planning, or compaction. Think of it as separation, not strength.
For constrained lots, confirm where water exits. A patio between a house, fence, and planting bed may need a drain, swale, daylight outlet, or redesigned grading. Do not trap water against the foundation or behind edging.
Step 7: Place and Compact the Aggregate Base in Lifts
Install angular crushed stone or road base in lifts of 3 to 4 inches. Rake each lift to the planned slope, lightly dampen if needed, and compact it thoroughly before adding the next lift. Compacting a 6 inch base all at once is a common shortcut that leaves loose material at the bottom.
Professional pavement guidance often references aggregate base compaction around 98 percent Standard Proctor density for pedestrian and residential pavement bases. Most homeowners will not run density tests on a backyard patio, but the field practice still matters: use the right aggregate, place it in thin lifts, make several passes with a plate compactor, and re-check grade after each lift.
At this stage, correct low areas with more compacted aggregate, not loose bedding sand. Bedding material should fine-tune the stone setting, not compensate for a bad base. The finished compacted base should be firm, smooth, and pitched exactly where water needs to go.
Rank #3

- Electric Plate Compactor: This electric plate compactor delivers 5000N force, penetrating 3.9 in into loose soil for solid base preparation. No gas, no fumes, and its lightweight design ensures easy maneuverability for all your compaction needs
- High Efficiency Compaction: Our plate compactor covers up to 500 sq ft in 10 minutes with 3450 VPM vibration and 52.5 ft/min travel speed. Optimized for landscaping, paver installation, and driveway repair, it ensures fast, reliable results
- Heavy-Duty Base Plate: Built with a 4.2 mm thick steel plate, this compactor generates strong centrifugal force for even performance on rough surfaces. Sturdy construction supports long-term use in gardens, patios, and walkway projects
- Backyard & DIY Ready: Designed as a versatile compactor machine, it handles sand, gravel, soil, and small aggregates with ease. Ideal for patios, garden paths, and asphalt patching, helping homeowners save on costly equipment rentals
- 33 ft Power Cord: The long reach makes this a professional compactor for residential projects. Its 1.6A motor delivers consistent operation for soil compaction, walkway prep, or paver installation without frequent outlet changes
Step 8: Screed the Bedding Layer and Set the Flagstones
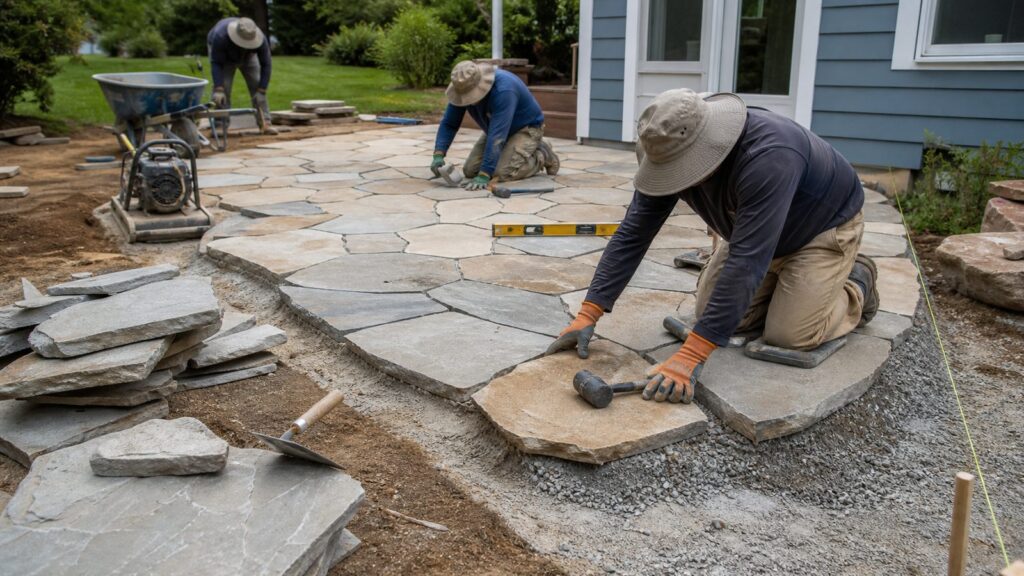
Spread about 1 inch of bedding material over the compacted base. Stone dust, screenings, or coarse sand are common choices depending on local practice and drainage goals. Do not use a thick, loose bedding layer to make leveling easier. Too much loose material allows stones to settle, rock, and move.
Dry-fit the patio before final setting. Place larger anchor stones at corners, entrances, step transitions, and furniture zones, then infill with smaller pieces. Blend pallets or crates as you work so color and thickness variation looks intentional instead of patchy. Keep joints consistent. Tight, intentional joints look more finished and reduce filler loss. Very wide joints can work, but only if the joint filler is selected for that width or the joints are deliberately planted or filled with aggregate.
Quick wins for a faster PC:
Clear out junk files and repair common Windows errorsFree Scan →Scan for outdated or missing drivers - takes under a minuteDriver Scan →Set each stone into the bedding layer and tap it with a rubber mallet or dead-blow hammer. Check for rocking by standing on opposite corners. Lift and adjust as needed. The goal is full, stable support under each piece, not a stone balanced on high points. Keep checking slope with a level or straightedge. A patio can look good stone by stone and still fail if the overall pitch is wrong.
Independent reader supportYour contribution helps us test, update, and keep practical guides available for everyone.Step 9: Fill Joints, Clean the Surface, and Maintain the Patio
Joint filler should match the patio system. Stone dust or decomposed granite drains well, is repairable, and suits many dry-laid flagstone patios. Polymeric sand can stabilize joints, but it is sensitive to installation conditions. It can fail, crack, wash out, or leave haze when used in overly wide joints, damp joints, dirty joints, shaded freeze-thaw areas, or when the wetting sequence is rushed. Mortar belongs with a rigid concrete or slab system, not a flexible gravel base.
Sweep the joint material into the joints in thin passes. Blow or sweep the stone faces clean before wetting any polymeric product. Follow the product label exactly for water volume and timing. Polymeric haze is much easier to prevent than remove.
After the joints are filled, run a hose test. Water should move away from the house without birdbaths. Check that stones do not rock, edges are restrained, joints are filled to the proper depth, and water exits to a safe location. Expect light maintenance. Dry-laid joints may need topping off after the first few rains and again seasonally depending on traffic and runoff.
Quality Checks Before You Call the Patio Done
Use this field checklist before putting furniture on the patio:
- No rocking stones under foot pressure at corners or edges.
- Finished slope confirmed, commonly 1/8 to 1/4 inch per foot, with 1/4 inch per foot preferred near the house.
- No birdbaths after a hose test.
- Water drains away from the foundation and does not discharge onto a neighbor’s property.
- Base was compacted in 3 to 4 inch lifts, not placed loose in one deep layer.
- Edges are restrained so stones and bedding cannot creep outward.
- Joint material matches joint width, drainage conditions, and the flexible dry-laid system.
- Door thresholds, siding, vents, and steps have safe clearance from finished grade.
When to DIY and When to Hire a Pro
A homeowner with patience, good access, and rented compaction equipment can often handle a small dry-laid flagstone patio of 80 to 150 square feet. Expect several days of hard labor, especially if soil must be hauled by wheelbarrow. The work is physically demanding: flagstone pieces are awkward, base stone is heavy, and precise layout takes time.
Hire a professional when the patio is large, close to the house, tied into steps or retaining walls, located on clay or wet soil, built in a freeze-thaw climate, or designed with tight joints and a furniture-grade finish. Also hire help if drainage is unclear. A pro crew should be able to explain finished elevations, base depth, compaction method, edge restraint, joint material, and where the water will go.
When comparing bids, do not shop on square-foot price alone. Ask what depth will be excavated, what aggregate will be used, how the base will be compacted, what slope will be built, what joint filler is included, and how demolition or disposal is handled. A low patio price that skips base preparation is not cheaper after the stones start rocking.
Rank #4

- 196cc engine creates up to 3350 pounds of force at 5700 blows per minute
- Single-direction plate travels up to 125 feet per minute
- Included wheel kit and lifting handles make transportation and storage a breeze
- Low-oil shutdown, vibration dampers, and powder-coated finish for durability
- Backed by a two-year residential (90-day commercial) warranty
Common Flagstone Patio Mistakes to Avoid
The most common failure is building the patio level or sloping it toward the house. That creates ponding, foundation moisture risk, slippery algae growth, and joint washout. The second is excavating only for the stone thickness and forgetting the base and bedding layer. A flagstone patio needs structure below the surface.
Other frequent mistakes include using pea gravel as the structural base, failing to compact the subgrade, compacting too thick a lift, relying on 2 or 3 inches of loose sand to level stones, and using thin uneven pieces in dining areas where chairs will wobble. Wide joints can also become a maintenance headache when the wrong filler is used.
Good flagstone work is slow because each layer matters. Plan the drainage, set the finished elevation, excavate enough, compact in lifts, fit the stones patiently, and choose a joint material that matches the system. Done that way, a dry-laid flagstone patio can feel natural, drain properly, and stay serviceable for years.
Frequently Asked Questions
How much does it cost to lay a flagstone patio in 2026?
A dry-laid flagstone patio commonly costs about $15 to $32 per square foot installed in 2026. A 200 square foot patio is roughly $3,000 to $6,400. Mortared or concrete-set flagstone can reach about $42 to $45 per square foot before extras.
Free tools Windows power users keep installed
One-click scans. No signup required.
Do you need a permit to build a flagstone patio?
Sometimes. Many at-grade patios do not need a building permit, but local rules may still regulate setbacks, easements, lot coverage, stormwater runoff, grading, retaining walls, and HOA approval. Always check before digging.
What is the best base for a dry-laid flagstone patio?
Use angular compactable crushed stone or road base, typically 4 to 6 inches compacted for pedestrian patios. Clay soils, wet sites, and freeze-thaw climates may need a deeper base and geotextile separation.
How much should a flagstone patio slope away from the house?
Use at least 1/4 inch per foot away from the house when the patio is near the foundation. That equals about 2 percent slope and helps meet common code and building-science guidance for drainage.
What should go between flagstone joints?
For dry-laid patios, stone dust or decomposed granite is repairable and drains well. Polymeric sand can work in suitable joints but can haze or fail if joints are too wide, damp, dirty, or exposed to freeze-thaw movement. Mortar should be used with a rigid slab system, not a flexible gravel base.
The Tool Desk
Outbyte PC Repair FREERepair Windows errors before they cause bigger problemsFix Now →Outbyte Driver Updater FREEFix the driver behind crashes, sound loss and screen glitchesFind Drivers →Can homeowners install flagstone themselves?
Yes, for small simple patios with good drainage and manageable access. Hire a pro for large patios, poor soils, freeze-thaw sites, tight joints, steps, walls, drainage corrections, or patios near door thresholds and foundations.
Quick Recap
Product prices and availability are accurate as of the date/time indicated and are subject to change. Any price and availability information displayed on Amazon at the time of purchase will apply.