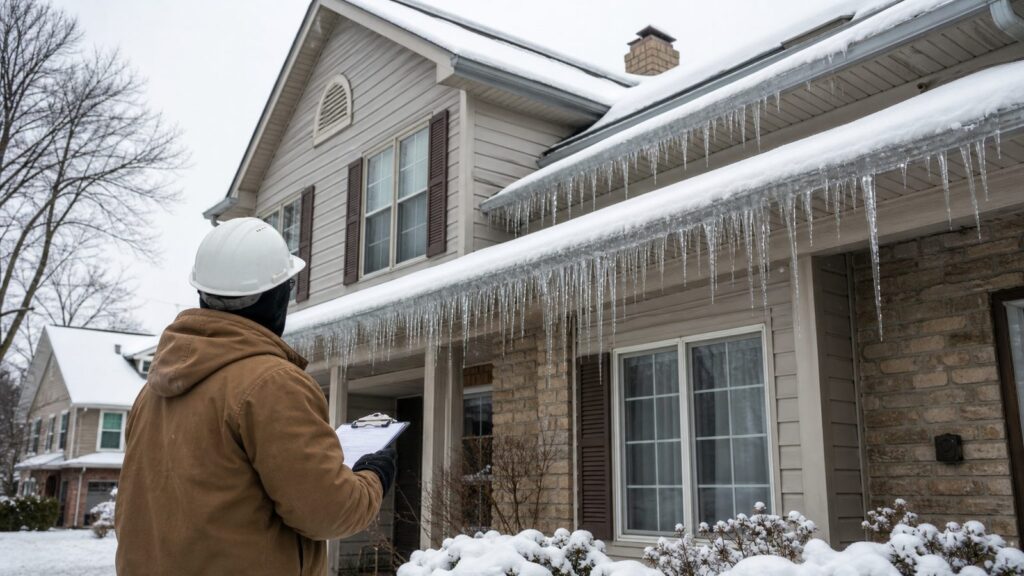
A few small icicles after a sunny winter afternoon do not automatically mean your house has a problem. But heavy icicles hanging from gutters, thick ice along the roof edge, or icicles that keep coming back in the same spots are worth taking seriously. In many homes, they are not really a gutter issue. They are a building-performance warning sign.
Ice dams form when heat escaping from the living space warms the roof deck, melts the underside of the snowpack, and sends water down toward the colder eave. Once that water reaches the overhang, gutter, or shaded roof edge, it refreezes. The visible icicles are often the overflow. The hidden risk is water backing up under shingles, soaking roof sheathing, staining ceilings, damaging insulation, and creating mold-prone wet cavities.
On our winter repair and remodeling jobs, the pattern is usually clear: the worst icicles show up below attic air leaks, thin insulation, blocked soffit vents, bath fans dumping warm humid air into the attic, recessed lights, chimneys, skylights, dormers, valleys, or complicated roof intersections. The permanent fix is rarely just knocking ice off the gutter. It is controlling heat, air, and moisture at the attic and roof assembly.
When Icicles Are Normal and When They Are a Warning
Start with a practical triage. Small, clear icicles after a warm sunny day and a cold night can happen even on a well-built house. Snow melts on sun-facing shingles, runs to the edge, and freezes. If the icicles are short, isolated, and disappear between storms, keep an eye on them but do not panic.
Do these 3 things before closing this tab:
1Clear out junk files and repair common Windows errors2Fix the driver behind crashes, sound loss and screen glitches3Repair Windows errors before they cause bigger problems#1 Best Overall

- The original USA-made Snow Roof Rake
- Rugged - made of the highest quality strong, yet lightweight aluminum
- Smart engineering - rollers prevent shovel head from touching your roof
- Easy to use - remove snow with ease
The concern rises when icicles are large, thick, persistent, or concentrated in specific locations. Icicles at the same gutter run after every snowfall, long spears below a valley, ice below a dormer cheek wall, or a roof edge packed with several inches of ice are classic ice-dam clues. So are uneven roof snow patterns. If your roof has bare or wet-looking areas while nearby houses still have a uniform blanket of snow, heat may be escaping through your attic or roof assembly.
Use these signs as your threshold for action:
- Low concern: a few small icicles after sun exposure, no roof-edge ice buildup, no ceiling stains, no interior moisture.
- Moderate concern: repeated icicles on one side of the house, uneven snow melt, gutter ice, or icicles below valleys and dormers.
- High concern: thick ice at the eave, water dripping behind gutters, wet soffits, ceiling stains, peeling paint, damp insulation, or active interior leaks.
One of the most useful things a homeowner can do is take photos after each snow event. Photograph the full roof from the ground, the worst icicles, any bare roof areas, and the same roof plane on neighboring homes if visible. Those photos help a roofer, insulation contractor, or building-performance specialist diagnose heat-loss patterns without guessing.
How Ice Dams Actually Form
An ice dam needs three conditions: snow on the roof, a warm upper roof surface, and a colder lower roof edge. Warm air leaking from the house into the attic raises the roof-deck temperature above freezing. Snow melts from below, even when the outdoor temperature is below 32 degrees. Meltwater runs downhill until it reaches the cold overhang, where there is no heated room below it. Then it freezes.
Once the frozen ridge forms, more meltwater pools behind it. Asphalt shingles are designed to shed water running downward, not to hold standing water. If water backs up far enough, it can work under shingles and through nail penetrations, seams, sidewall flashing, or weak underlayment details.
The most common causes we find are attic bypasses: gaps around plumbing stacks, chimney chases, electrical penetrations, top plates, attic hatches, dropped soffits, and recessed lights. Under-insulated attic floors make the problem worse. So do ducts in attics, leaky return boxes, bath fans that terminate in the attic instead of outdoors, blocked soffit vents, and poor intake-to-exhaust ventilation balance.
Roof shape matters too. Valleys collect snow and concentrate meltwater. Dormers create short, shaded roof sections and vertical wall transitions. Low-slope sections drain slowly. Finished attics, Cape Cod knee walls, and cathedral ceilings are especially tricky because the thermal boundary may zigzag through floors, walls, slopes, and small cavities instead of sitting neatly at a flat attic floor.
What to Do Right Now if You See Heavy Icicles
If there is no leak, your first job is observation and safe snow management. From the ground, you can use a roof rake to remove the lower 3 to 4 feet of snow from the roof edge after storms. Use a rake with wheels or bumpers if possible, and avoid scraping down to bare shingles. Do not climb onto an icy roof, and do not stand below heavy icicles while pulling snow.
If water is entering the house, treat it as an active water event. Move furniture, catch dripping water, relieve trapped water in bulging drywall only if you can do it safely, photograph everything, and call a roofer or ice-dam removal specialist. Interior water damage may be covered by homeowners insurance, while preventive ice removal, heat cables, insulation upgrades, or maintenance-related causes may not be. Document dates, temperatures, photos, invoices, and visible damage before cleanup.
For active dams, the goal is to create drainage channels through the ice so backed-up water can escape. Calcium-chloride socks can help in limited situations when placed perpendicular to the eave, crossing the ice dam to create a melt channel. Use calcium chloride, not rock salt, because rock salt can damage roofing, gutters, siding, landscaping, and masonry. This is temporary water management, not a cure.
For large ice dams, professional steam removal is the preferred method. Chipping can damage shingles, gutters, drip edge, and flashing. Steam costs more, but it removes established ice with less risk to the roof when handled by an insured crew.
2026 Cost Guide: Emergency Removal vs Permanent Fixes
Costs vary by region, roof height, roof pitch, ice thickness, access, storm urgency, and whether the work is emergency service. In cold-weather markets, the same job can cost much more during a severe freeze than it would during a quiet week.
Rank #2

- Angled blade offers more use in less space and is effective on low pitched roofs and two-story houses
- 21' reach with 7" x 24" blade provides superior snow removal
- Blade rollers protect your shingles while still providing a close shave
- Lightweight aluminum makes it easy to maneuver and protects against wear and tear
- Easy snap-button handle assembly and disassembly
| Project | Typical 2026 US Cost | Best Use |
|---|---|---|
| Professional ice dam removal | $200 to $2,400 nationally; severe or complex jobs can reach $3,000 to $4,000 | Active dams, heavy roof-edge ice, leak risk |
| Steam ice dam removal | Often $800 to $2,400; specialty crews may charge about $700 to $900 per hour in severe markets | Established dams where roof damage risk matters |
| Chipping ice | About $800 to $1,800 | Limited use; higher risk to shingles and gutters |
| Attic air sealing | Commonly $500 to $1,500 for targeted attic work; whole-house air sealing can run $1,500 to $3,000 | Stopping warm air leakage before adding insulation |
| Attic insulation | Usually $1,184 to $3,125; many full attic projects land around $1,500 to $3,500 | Reducing heat loss through the ceiling plane |
| Heat cable installation | Average around $6,082; most projects $3,489 to $8,676; complex roofs can exceed $15,000 | Managing drainage in chronic trouble spots |
| Electrical work for heat cables | Often $500 to $1,000 for GFCI outlets, controls, or circuit changes | Safe, code-compliant cable operation |
| Gutter cleaning | Often a few hundred dollars, depending on height, length, and debris load | Reducing overflow, but not solving attic heat loss |
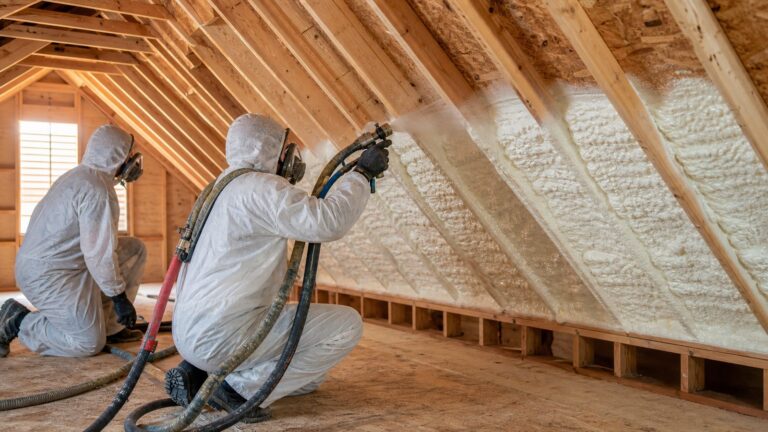
Insulation material affects cost. For a 1,000-square-foot attic, blown-in cellulose may run roughly $900 to $3,000, blown-in fiberglass about $1,000 to $3,000, open-cell spray foam about $2,200 to $4,100, and closed-cell spray foam about $3,000 to $6,000 or more. Removal of old insulation, air sealing, baffles, attic access improvements, ventilation corrections, and difficult work areas all raise the price.
Quick wins for a faster PC:
Fix the driver behind crashes, sound loss and screen glitchesFind Drivers →Repair Windows errors before they cause bigger problemsFix Now →Do not compare these costs as if they all solve the same problem. Emergency removal stops immediate water entry. Heat cable manages meltwater. Gutter cleaning improves drainage. Air sealing and insulation address the root heat-loss condition. Reroofing details reduce leak risk if ice forms again.
The Permanent Fix Starts in the Attic
The right sequence is air seal first, insulate second, ventilate correctly, then improve roof-edge water protection when reroofing. Skipping the sequence is expensive. Adding more insulation over open air leaks can hide the problem while warm air still escapes into the attic. Adding vents without air sealing can draw more conditioned air out of the house. Installing heat cables without fixing heat loss can leave you paying for electricity every winter while the attic problem remains.
Air sealing comes before insulation depth
Air sealing closes the leaks between the heated living space and the attic. Typical targets include plumbing penetrations, electrical holes, top-plate gaps, chimney chases, attic hatches, dropped ceilings, duct penetrations, and recessed fixtures. On our jobs, we look for dirty insulation, frost on nail tips, warm bypasses, and snow-melt patterns outside. A blower-door test and infrared camera during cold weather can find hidden leaks that a visual attic check misses.
ENERGY STAR estimates that homeowners can save about 15 percent on heating and cooling costs, or about 11 percent on total energy costs, by air sealing and adding insulation in attics, floors over crawl spaces, and accessible basement rim joists. Ice-dam prevention is often the urgent reason for the work, but comfort and utility savings are the long-term payoff.
What’s actually slowing this PC down?
Pick the symptom - the matching free tool is one click away.
Insulation needs the right R-value and full coverage
The National Weather Service guidance says attic insulation should generally be at least R-30, with R-38 preferable in northern climates. ENERGY STAR publishes higher recommendations for many cold climate zones, and local code or utility programs may call for more. The number matters, but coverage matters just as much. Thin insulation over exterior walls, wind-washed insulation near soffits, and gaps around attic hatches can create enough heat loss to form ice dams even when the middle of the attic looks deep.
Before adding blown-in insulation, install baffles at vented rafter bays so soffit air can move above the insulation. This is especially important at eaves, where the available insulation depth is often thinnest and where ice dams begin.
Ventilation must be balanced
Attic ventilation is not a substitute for air sealing, but it helps keep the roof deck closer to outdoor temperature. Most vented attics need intake ventilation at the soffits and exhaust ventilation near the ridge or high roof area. Common IRC-style ventilation rules use 1 square foot of net free ventilation area for every 150 square feet of vented attic area. That can often be reduced to 1:300 when qualifying balanced high/low ventilation or vapor-retarder conditions are met, depending on the locally adopted code and amendments.
Blocked soffit vents, too much exhaust without intake, mixed vent types that short-circuit airflow, or insulation stuffed tight into rafter bays can all undermine the system. A good contractor will check net free area, intake path, exhaust location, and whether the attic floor has been sealed before recommending more vents.
Recommended Free Tools
Ice-and-Water Shield Helps, But It Does Not Prevent Ice Dams
Ice-barrier underlayment is leak mitigation, not ice-dam prevention. It helps protect the roof deck if water backs up, but it does not stop heat from melting snow or ice from forming at the eave.
IRC-style provisions generally require an ice barrier in areas designated as having a history of ice forming along eaves. The barrier typically extends from the lowest roof edge to at least 24 inches inside the exterior wall line. Local jurisdictions can amend or expand that requirement, and roof geometry can justify more coverage at valleys, dormers, low-slope transitions, and complex eaves.
Rank #3

- EFFICIENT SNOW REMOVAL - Our roof rake revolutionizes the tedious task of roof snow removal with its innovative design and efficient performance. Engineered for ease of use, this winter shovel lets you keep both feet firmly on the ground, eliminating ladders. With a practical approach, our extendable shovel protects your roof against the snow loads that cause ice dams and features protective glide pads to prevent damage.
- TELESCOPIC REACH - This snow peeler is designed for convenience and efficiency with the adjustable 9m (30 ft.) telescopic handle, eliminating the need for precarious ladder use. With a sectional handle that allows you to add extensions as needed, our long snow shovel is a versatile solution for low-pitch roofs and challenging-to-reach valleys. This telescopic design is not only practical and user-friendly, but it is also a go-to tool for safeguarding your roof.
- ROOF PROTECTION - Our roof snow rake is not just a tool for snow removal; it's a safeguard for your roof. Engineered with precision and care, our large snow shovel snow rake prioritizes the protection of your home. With its unique design and robust commercial-grade aluminum blade, it effortlessly cuts through fresh and hard-packed snow, preventing the formation of ice dams that can threaten your roof's integrity.
- UNIQUE DESIGN - This roof shovel keeps safety and efficiency at the forefront, allowing users to clear snow effortlessly. Designed for durability and practicality, our snow rake for roof includes protective glide pads to safeguard your roof from damage and a tear-resistant 3m (10 ft.) slide for efficient snow clearance. This solution prevents ice dams and ensures a swift and secure snow removal experience.
- TEAR-RESISTANT SLIDE - This shovel keeps safety and efficiency at the forefront, allowing users to clear snow effortlessly. Designed for durability and practicality, our snowpeeler includes protective glide pads to safeguard your roof from damage. With our big snow shovel, you can confidently tackle snow-covered roofs, knowing that the tear-resistant slide delivers exceptional performance and durability, making snow removal a quick and efficient task.
This detail is easiest to verify during reroofing, before shingles go on. We advise homeowners to ask for the ice-barrier layout in writing, including eaves, valleys, sidewalls, penetrations, drip edge, flashing, and ventilation changes. Do not assume every roof was inspected thoroughly. Industry research has found a real code-enforcement gap, with more than half of surveyed jurisdictions not inspecting roof underlayments during new construction or reroofing. The practical takeaway is simple: verify the details while they are visible.
Heat Cables: Useful Tool, Not a Cure
Heat cables can help in specific trouble spots where drainage is hard to maintain, such as deep eaves, shaded valleys, low-slope transitions, or gutters that freeze before the roof can drain. They are not a substitute for attic air sealing and insulation.
The Tool Desk
Outbyte PC Repair FREEClear out junk files and repair common Windows errorsFree Scan →Outbyte Driver Updater FREEFix the driver behind crashes, sound loss and screen glitchesFind Drivers →A good heat-cable layout is designed to maintain a water path through the ice-forming zone. That often means routing through gutters and downspouts, not just installing zigzags on the shingles. If water melts at the shingle edge but refreezes in a frozen gutter, the cable has not solved the drainage problem.
Installed roof heating cable is often estimated at $5 to $15 per linear foot, but cold-market specialists may price $30 to $60 per running foot of eave for more robust systems. Full projects average around $6,082 in 2026, with many landing between $3,489 and $8,676. Small simple jobs may be closer to $800, while large, tall, complex roofs can exceed $15,000.
Electrical work matters. Heat cables should be connected to GFCI-protected power, and many homes need a dedicated exterior outlet, controller, sensor, or circuit evaluation. Budget another $500 to $1,000 in some markets for electrician work. Controls are worth it because cables should run during ice-forming conditions, not continuously all winter.
When to DIY and When to Hire a Pro
Some winter maintenance is reasonable for a careful homeowner. You can photograph roof patterns, check for ceiling stains, clear safe ground-level drainage, clean gutters before winter, and use a roof rake from the ground. You can also look into the attic for obvious issues: disconnected bath fans, blocked soffit vents, dirty insulation from air movement, frost on roof nails, or thin insulation at the eaves.
Free tools Windows power users keep installed
One-click scans. No signup required.
DIY becomes risky when it involves ladders on ice, walking on a snowy roof, chopping ice, opening wet electrical areas, or guessing at attic ventilation changes. Do not use a hammer, axe, torch, pressure washer, or open-flame device on roof ice. The repair bill from damaged shingles, punctured gutters, or scorched materials can exceed the ice removal cost.
Hire a professional when you have active leaks, ice several inches thick, a two-story or steep roof, repeated ice dams in the same areas, finished attic spaces, cathedral ceilings, Cape Cod knee walls, complex dormers, or suspected mold and wet insulation. Hire an electrician for new heat-cable circuits, GFCI protection, controller installation, or panel-capacity questions. Hire a building-performance contractor when the issue appears to be air leakage, insulation continuity, or pressure imbalance rather than simple roof maintenance.
Independent reader supportYour contribution helps us test, update, and keep practical guides available for everyone.Special Cases: Finished Attics, Dormers, and Complex Rooflines
Finished attics and Cape Cod-style homes deserve special attention. In these houses, the insulation and air barrier may run across attic floors, knee walls, sloped rafters, collar ties, and small triangular attic spaces. A single missing air barrier behind a knee wall can dump heat into the roof cavity and create ice dams even if the main attic has good insulation.
Cathedral ceilings are another case where standard attic-floor advice may not apply. If there is no accessible attic, the fix may involve dense-pack insulation, spray foam, vent-channel work, or roof-deck improvements during reroofing. Dormers add sidewalls, valleys, short roof planes, and flashing transitions that concentrate water. These assemblies need careful diagnosis before anyone starts adding vents or cables.
On complex roofs, we usually separate the problem into two questions: where is heat escaping, and where does meltwater need to drain? The first question points to air sealing, insulation, and ventilation. The second points to valleys, gutters, downspouts, flashing, ice barrier, and sometimes heat cable. Solving only one side of the problem often leads to another winter of callbacks.
Rank #4

- COMPLETE 16' ROOF RAKE SYSTEM — Ready to Clear Snow Right Out of the Box Includes the EZ Smart Adjustable Snow Roof Rake, 16-foot sectional extension pole, and mesh storage bag. Everything you need to start clearing roof snow safely from the ground in one complete package.
- PATENTED ADJUSTABLE DESIGN — Adapts to Changing Roof & Snow Conditions Unlike traditional fixed-width roof rakes, the EZ Smart patented umbrella-style adjustable design lets you smoothly adjust the blade from 3 to 36 inches wide without tools. Open it wide to move more snow in a single pass or narrow it for greater control around valleys, chimneys, skylights, and other roof obstacles.
- HELPS PREVENT ICE DAMS — Remove Roof Snow Safely from the Ground Regular roof snow removal helps reduce snow buildup that can contribute to damaging ice dams. The EZ Smart Roof Rake helps you clear problem areas while keeping your feet safely on the ground instead of climbing onto snowy roofs.
- BUILT TO LAST — The Snow Roof Rake You May Never Need to Replace Designed for years of demanding winter use, the durable roof-safe blade resists bending and breakage that shorten the life of many traditional roof rakes. Built with long-term durability in mind, it may just be the last snow roof rake you'll ever need to buy.
- COMPACT STORAGE — Full-Size Performance, Surprisingly Small Storage The complete 16-foot roof rake system collapses into the included mesh storage bag for compact storage in your garage, workshop, vehicle, or cabin. A full-size roof rake that stores where traditional roof rakes simply can't.
A Practical Winter Inspection Checklist
After the next snowfall, walk the property from the ground and look for patterns. A good inspection takes 20 to 30 minutes and gives you useful information before you call anyone.
- Photograph each roof plane before sun exposure changes the snow pattern.
- Look for bare or wet roof areas surrounded by snow.
- Check whether icicles are concentrated below valleys, dormers, skylights, chimneys, or one room.
- Look for ice behind or above gutters, not just hanging from them.
- Inspect ceilings, window heads, exterior walls, and attic access areas for stains or dampness.
- Confirm bath and kitchen fans exhaust outdoors, not into the attic.
- Check whether soffit vents are open and whether insulation blocks the eaves.
- Measure insulation depth in several places, especially near exterior walls.
- Record dates, temperatures, storm depth, and any dripping or staining.
If the same pattern repeats after two or three snow events, it is time for a more serious diagnosis. The earlier you address the heat-loss source, the less likely you are to spend money on emergency ice removal, drywall repairs, repainting, wet insulation removal, and roof-edge damage.
The Bottom Line for Homeowners
Icicles are a signal, not a diagnosis. Small, short-lived icicles can be normal. Heavy, recurring icicles at eaves, gutters, valleys, dormers, or one roof section usually mean the house is losing heat where it should not, draining meltwater poorly, or both.
The best long-term fix is not cosmetic. Stop active leaks first. Remove dangerous ice safely. Then diagnose the attic or roof assembly. Air seal the ceiling plane, bring insulation up to the right R-value, keep soffit-to-ridge ventilation balanced, and verify ice-barrier and flashing details when the roof is replaced. Heat cables can help manage chronic drainage areas, but they should be designed, controlled, and powered correctly.
A house that handles winter well does not rely on luck at the gutter line. It keeps heat inside, keeps the roof deck cold, and gives water a clear path off the roof.
Frequently Asked Questions
Do icicles always mean I have an ice dam?
No. Small icicles after sun exposure can be normal. Thick, recurring icicles with roof-edge ice, uneven snow melt, ceiling stains, or water behind gutters are stronger warning signs of ice-dam conditions.
What is the best permanent fix for ice dams?
The best long-term fix is usually attic air sealing first, then proper insulation depth, balanced ventilation, and correct ice-barrier detailing during reroofing. Gutters and heat cables alone do not solve attic heat loss.
Windows Errors? Fix Them Before They Spread
Repair common Windows errors and clear accumulated junk for a smoother, more stable PC - no reinstall needed.Free scan · no reinstallCrashes, No Sound, or Screen Glitches?
Random freezes, missing sound and display glitches usually trace back to one bad driver. Find and replace yours safely.Free scan · under a minuteHow much does ice dam removal cost in 2026?
Professional ice dam removal commonly costs $200 to $2,400 nationally. Steam removal often runs $800 to $2,400, and severe or complex emergency jobs can reach $3,000 to $4,000 or more.
Are heat cables worth installing?
Heat cables can be useful for chronic drainage trouble spots, especially valleys, gutters, downspouts, and shaded eaves. They are not a cure for air leaks or poor insulation and often require GFCI-protected electrical work.
Can I remove an ice dam myself?
You can safely rake snow from the ground and use calcium-chloride socks in limited cases. Avoid climbing icy roofs, chopping ice, using torches, or pressure washing. Hire a pro for active leaks, steep roofs, thick ice, or two-story access.
Will homeowners insurance cover ice dam damage?
Insurance often covers resulting interior water damage, but it may not cover preventive ice removal, heat cables, insulation upgrades, or maintenance-related causes. Photograph damage and check your policy language.
Do these 3 things before closing this tab:
1Repair Windows errors before they cause bigger problems2Scan for outdated or missing drivers - takes under a minute3Clear out junk files and repair common Windows errorsQuick Recap
Product prices and availability are accurate as of the date/time indicated and are subject to change. Any price and availability information displayed on Amazon at the time of purchase will apply.