Windows Errors? Fix Them Before They Spread
Repair common Windows errors and clear accumulated junk for a smoother, more stable PC - no reinstall needed.Free scan · no reinstallCrashes, No Sound, or Screen Glitches?
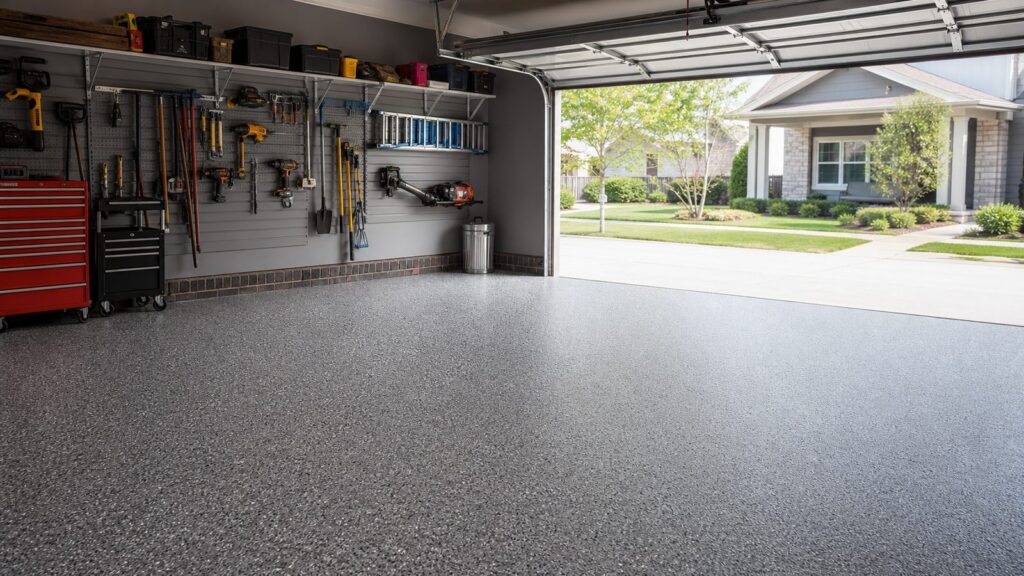
Random freezes, missing sound and display glitches usually trace back to one bad driver. Find and replace yours safely.Free scan · under a minutePainting a garage floor the right way starts before you open a can. The real decision is not just color. It is whether your slab needs a basic concrete floor paint, a two-part epoxy kit, or a professional epoxy, polyurea, or polyaspartic coating system.
On our job sites, most failed garage floors have the same story: the concrete was dirty, sealed, damp, too smooth, too cold, or put back into service too soon. The coating did not have a fair chance to bond. A good garage floor finish needs clean, sound, dry, porous concrete with the right surface profile and enough cure time before tires return.
For a typical two-car garage, assume about 400 to 576 square feet. In 2026, basic DIY garage floor paint often lands around $1 to $3 per square foot. DIY two-part epoxy materials are commonly about $1.50 to $2.50 per square foot before tools and prep rentals. Professional epoxy systems commonly range from about $2 to $12 per square foot, while professional polyaspartic or polyurea systems usually run about $5 to $12 per square foot. For many two-car garages, installed coating projects fall around $1,800 to $3,500 or more, depending on repairs, prep, flakes, topcoat, and warranty.
If you want the short answer: use basic paint only for a low-cost cosmetic refresh. Use a quality two-part epoxy only on a clean, dry, sound slab where you can control prep and cure time. Hire a professional for daily vehicle traffic, hot tires, road salt, UV exposure near the garage door, previous coating failure, moisture concerns, or a floor you want to last.
Quick wins for a faster PC:
Fix the driver behind crashes, sound loss and screen glitchesFind Drivers →Clear out junk files and repair common Windows errorsFree Scan →Scan for outdated or missing drivers - takes under a minuteDriver Scan →#1 Best Overall
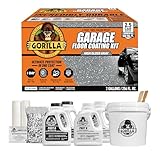
- Ultimate Protection in One Coat: 2-part 100% solids epoxy delivers, incredibly durable, exceptional resistance to chemicals, abrasions, salt, oil, gas, and hot tire peel-up that is ideal for garages, basements, workshops, & more.
- High Gloss Finish: Achieve a showroom-quality finish that is crack resistant, peel proof, low VOC, while enhancing the appearance and performance.
- Covers up to 550 sq. ft.: Includes two gallons of premium material – enough for a thick, long-lasting coat on a standard 2.5-car garage floor.
- Drive on After 1 Day: Quick curing epoxy resin and hardener allows you to use your space 24 hours after application.
- 12 Pc DIY Kit: Epoxy resin, epoxy hardener, decorative gray blend flakes, concrete etch for proper surface prep, mixing buckets, stir sticks, roller covers, decorative and easy-to-follow pictured with printed instructions as well as how-to video guides for a seamless application.
First, Decide What “Painting” Means
Homeowners use the word paint for several different garage floor products. They do not perform the same way.
1-Part Concrete or Garage Floor Paint
This is the lowest-cost option. It rolls on like thick paint and can make an old garage look cleaner in a weekend. It is best for storage areas, workshops with light use, or a house being prepared for sale.
The downside is durability. In a working garage with vehicles, wet tires, oil drips, hot rubber, and road salt, basic concrete paint is the most likely option to peel, wear through, or show tire marks. Many homeowners see visible wear in 1 to 3 years under car traffic.
2-Part DIY Epoxy Kits
Two-part epoxy kits are a step up. You mix resin and hardener, then roll the material within the pot life listed on the technical data sheet. Epoxy bonds better than basic paint when the slab is properly prepared, and it has better resistance to abrasion and chemicals.
What’s actually slowing this PC down?
Pick the symptom - the matching free tool is one click away.
DIY epoxy is still unforgiving. Once mixed, the clock is running. If the slab is sealed, oily, damp, dusty, too smooth, or too cold, the coating can blister, peel, or lift under hot tires. Many kits also have strict temperature ranges, often around 60 to 85 degrees Fahrenheit, and require the slab to stay above the dew point during application and cure.
Professional Epoxy, Polyurea, and Polyaspartic Systems
Professional systems usually combine mechanical concrete preparation with higher-build coatings. A common premium garage floor system uses an epoxy base coat, broadcast Decorative flakes, and a polyaspartic or polyurea topcoat. Epoxy provides strong build and adhesion. Polyaspartic and polyurea topcoats cure faster, resist UV better, and handle garage abuse well when installed correctly.
These systems cost more because the crew is paying for surface grinding or shot blasting, dust control, crack repair, high-solids materials, trained labor, and warranty risk. The result is usually a thicker, tougher, better-looking floor than a simple roll-on paint.
2026 Garage Floor Coating Cost Comparison
The coating price per square foot matters more than the price of one box or kit. A two-car garage is often 20 by 20 feet at the low end, or closer to 24 by 24 feet in larger homes. That puts the floor in the 400 to 576 square foot range before stem walls, steps, closets, or apron areas.
The Tool Desk
Outbyte PC Repair FREEClear out junk files and repair common Windows errorsFree Scan →Outbyte Driver Updater FREEFix the driver behind crashes, sound loss and screen glitchesFind Drivers →| System | Typical 2026 Cost | Best Use | Expected Tradeoff |
|---|---|---|---|
| Basic concrete or garage floor paint | About $1-$3 per sq. ft. DIY | Low-cost cosmetic refresh, light storage, short-term improvement | Most vulnerable to hot-tire pickup, peeling, and wear under vehicles |
| DIY 2-part epoxy kit | About $1.50-$2.50 per sq. ft. for materials; more with tools, repair products, PPE, and grinder rental | Sound, dry, bare concrete where the homeowner can prep carefully | Better durability than paint, but prep and timing mistakes are common |
| Professional epoxy system | Commonly about $2-$12 per sq. ft.; many quality systems fall in the middle of that range | Daily vehicle traffic, cleaner finish, better build, longer service life | Higher upfront cost and more scheduling coordination |
| Professional polyaspartic or polyurea system | Typically about $5-$12 per sq. ft.; many two-car garages land around $1,800-$3,500+ | Fast return to service, UV resistance, hot tires, salt, decorative flake systems | Short working time makes it less forgiving for DIY installation |
Budget separately for concrete repair. Hairline cracks are one thing. Spalls, scaling, salt damage, hollow concrete, or structural slab movement are another. Resurfacing can add $1,000 to $5,000 on some projects, and structural or foundation repairs can run several thousand dollars more. Coating a bad slab does not make it a good slab. It only hides the problem briefly.
Audit the Slab Before You Buy Materials
Before our crews coat concrete, we look at the slab like a substrate, not a blank canvas. A garage floor has to accept and hold a coating. That means it needs to be clean, sound, dry, and porous.
Rank #2

- 2-PART EPOXY COATING: Water-based epoxy kit finishes concrete garage floors in good, sound condition with a gloss, color-flecked finish
- READY FOR VEHICLES IN 3 DAYS: Light foot traffic ready in 12-16 hours, normal use in 24-48 hours, full vehicle traffic in 3 days
- COMPLETE KIT INCLUDED: Burst pouch coating, decorative chips and concrete etch are included for a full application
- EASY ROLLER APPLICATION: Apply with a synthetic nap roller in 4x4 foot sections and scatter chips onto the wet coating as you go
- OPTIONAL CLEAR TOPCOAT AVAILABLE: Pair with EpoxyShield Clear Finish Coating Kit for additional protection and shine
Start with these checks:
- Age: New concrete generally needs at least 28 days of cure before coating, unless the specific manufacturer allows otherwise.
- Moisture: Look for dark areas, damp edges, efflorescence, musty odor, or previous coatings that blistered.
- Porosity: Drip water on several areas. If it beads up, the slab may have sealer, curing compound, oil, or a dense hard-troweled surface.
- Oil and grease: Dark stains under parked vehicles need aggressive cleaning. Coatings do not bond well to petroleum contamination.
- Existing coatings: Loose paint, unknown sealers, and old epoxy need evaluation. If they are not bonded, your new coating will fail with them.
- Cracks and spalls: Map cracks, chipped joints, pitted concrete, and salt-damaged areas before estimating materials.
- Slope and drainage: Standing water near the overhead door or low spots can shorten coating life and create slip hazards.
- Attached garage conditions: Plan ventilation carefully, especially when using products with stronger odors or higher VOC content.
A simple DIY moisture check is to tape a 2-foot by 2-foot plastic sheet tightly to bare concrete for 24 hours. If condensation appears under the plastic or the concrete darkens, stop and investigate. Professional contractors may use calcium chloride testing or in-situ relative humidity testing when moisture vapor is a real concern.
Surface Prep Is the Job
The coating step gets the attention, but surface preparation determines the result. Garage floor coatings fail when they cannot mechanically bond to concrete. The surface must be free of oil, grease, loose paint, dust, laitance, curing compounds, sealers, silicone contamination, and weak concrete.
Do these 3 things before closing this tab:
1Repair Windows errors before they cause bigger problems2Scan for outdated or missing drivers - takes under a minute3Clear out junk files and repair common Windows errorsCleaning Is Not the Same as Profiling
Degreasing removes contamination. Profiling creates texture. You usually need both.
Concrete surface profile, often called CSP, is a way of describing roughness. The scale runs from very light CSP 1 to very rough CSP 10. Homeowners do not need to memorize the scale, but the idea matters: the floor should feel like fine-to-medium sandpaper for many garage coating systems, not polished glass and not deeply gouged. The product data sheet controls the target profile.
Grinding vs. Acid Etching
Acid etching is common in DIY instructions because it is inexpensive and accessible. It can work for some bare, porous slabs when the manufacturer allows it. But it is overused as a cure-all.
Acid does not remove oil, sealers, curing compounds, silicone, old coatings, or weak concrete. It can also leave residue if it is not neutralized, rinsed, and dried properly. In a garage, that is a serious limitation.
For long-life coatings, mechanical profiling is the professional default. Diamond grinding or shot blasting opens the surface more reliably, removes weak surface paste, and gives the coating a better bond. If the garage has an old coating, hard-troweled concrete, unknown sealer, or hot-tire pickup history, grinding is usually the right conversation.
Plan the Work Before Mixing Anything
Garage coating work rewards boring preparation. Once a two-part product is mixed, you may have 20 to 60 minutes of usable pot life depending on the product, temperature, humidity, and batch size. Hot weather shortens working time.
Before coating day, empty the garage completely. Do not plan to shuffle boxes from one side to the other while the floor is wet. Remove base trim if needed, protect drywall, mask the slab edge, and decide whether you will coat the first few inches of concrete stem wall or curb. Coating vertical concrete edges improves the finished look and makes cleaning easier, but it adds labor and material.
Stage everything before the first mix:
- Degreaser, scrub brushes, and rinse plan
- Crack filler or concrete repair material compatible with the coating
- Concrete grinder or approved etching materials
- Vacuum and dust control
- Roller frames, extension poles, brushes, cut-in tools, and lint-free covers
- Spiked shoes if the system requires walking onto wet coating
- Decorative flakes and anti-slip additive
- Respirator, gloves, eye protection, and ventilation fans
Divide the garage into manageable sections. Pre-cut the edges. Mix only what can be placed inside the working time. Maintain a wet edge so roller marks and lap lines do not telegraph through the finish.
Rank #3
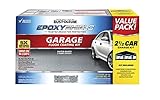
- Durable, 2-part epoxy formula works on interior concrete surfaces, such as garage floors, workshops, basements and more
- Professional glossy finish is easy to clean and provides a long lasting protection that is 5X harder than 1-part epoxy floor paint
- Walk on ready in 24 hours, vehicle and drive-on ready in 3 days
- Superior adhesion coating ensures no hot tire pickup and protects against gasoline, antifreeze, motor oil, and salt
- Low odor, low VOC gloss finish provides a show room shine
Application Conditions Matter
Read the technical data sheet before buying, not after the floor is prepped. Manufacturer instructions control the job. Pay attention to temperature range, slab temperature, humidity, dew point, spread rate, recoat window, pot life, foot traffic time, vehicle return time, and full cure.
Many concrete coatings need the air and surface temperature to stay above about 50 degrees Fahrenheit during application and cure. Some retail epoxy kits specify narrower ranges, commonly around 60 to 85 degrees Fahrenheit. The slab also needs to be above the dew point. If moisture condenses on the concrete during application, adhesion and finish quality can suffer.
Local climate changes the priorities. Northern garages need salt and slush resistance, plus traction for wet tires and snowmelt. Hot climates need hot-tire resistance and UV stability near the garage door. Humid and coastal areas require more discipline around moisture, dew point, and cure windows.
How to Coat a Garage Floor Step by Step
The exact sequence changes by product, but the professional logic is consistent.
1. Empty and Inspect
Remove everything from the garage. Check the slab in full light. Mark oil stains, cracks, spalls, previous coating edges, and low spots. If the slab has active moisture, major settlement, or structural cracking, solve that before coating.
2. Degrease and Clean
Scrub oil-prone areas with a concrete-safe degreaser. Rinse as directed. Repeat until water no longer beads from contamination. Let the concrete dry thoroughly. Dust, soap residue, and cleaner residue can all interfere with bond.
3. Repair Cracks and Spalls
Use a repair material compatible with the coating system. Do not fill moving control joints with a rigid patch unless the system specifically calls for it. Grind repaired areas flush after cure where needed.
4. Profile the Surface
Grind, shot blast, or etch according to the product requirements. For most durable garage systems, mechanical grinding is the better bet. Vacuum thoroughly afterward. The floor should be clean enough that a wiped hand or clean cloth does not pick up dust.
5. Test Conditions
Confirm slab temperature, air temperature, humidity, and dew point. Do not coat a slab that is too cold, too damp, or outside the product range. Check that the garage can stay within range through the cure period, not just during the first hour.
6. Mix Correctly
Measure and mix exactly as directed. Scrape the sides and bottom of the pail. Observe induction time if the product requires it. Do not stretch coverage beyond the listed spread rate to save material. Thin film build is one reason garage coatings disappoint.
Rank #4

- 10x Stronger Than Steel, Zero Shrinkage: Military-grade 100% solids epoxy bonds permanently to concrete, resisting cracks, peeling, and hot tire pickup - no more stains or tire marks ruining your garage.
- Complete 17 Pc DIY Kit for 300 Sq Ft: Includes etching solution, decorative flake mix, non-slip additive, roller, and squeegee - everything for a professional glossy finish without hiring contractors.
- Slip & Chemical-Proof for Workshops/Basements: 3-layer epoxy shields floors from oil, solvents, and spills. Textured finish prevents slips, even in wet automotive or retail spaces.
- Custom Flake Designs or Heavy Coverage: Start with medium broadcast flakes or add 3lb/6lb bags for full coverage - ideal for Airbnbs or car showrooms
- 24-Hour Cure, 72-Hour Vehicle Ready: Faster than cheap water-based epoxies! Apply in 3 steps ensuring long lasting and high gloss finish with no special skills - perfect for busy homeowners and contractors.
7. Cut In, Roll, and Broadcast
Cut edges first, then roll in sections. Keep a wet edge. If using decorative flakes, broadcast them while the base coat is wet. For full-flake systems, the floor is often broadcast to refusal, then scraped and vacuumed before topcoat.
8. Apply the Topcoat
Clear topcoats improve cleanability, abrasion resistance, and chemical resistance. They are also where slip resistance should be addressed. Decorative flakes add texture, but wet garages often benefit from a proper anti-slip additive or textured topcoat.
9. Respect Cure Windows
Dry to touch is not full cure. A floor may allow foot traffic in 12 to 24 hours, light use after 24 to 48 hours, and vehicle traffic after 3 to 7 days depending on the product. Fast-cure polyaspartic systems may allow quicker return to service, sometimes next day, but only when installed within specification. Full chemical cure can take longer.
Independent reader supportYour contribution helps us test, update, and keep practical guides available for everyone.Safety, VOC, and Code Notes
Garage floor coating is usually not a permitted residential project, but safety still matters. Attached garages share air with the house. Use ventilation, keep ignition sources away from flammable materials, and follow the respirator guidance on the product label and safety data sheet.
VOC rules vary by state and air district. Some regions, including California districts, have stricter architectural coating limits. Buy products legal for your location and use them as labeled. Low-odor does not mean no hazard. Water-based epoxy can still require gloves, eye protection, and ventilation.
Slip resistance is also a safety decision, not a decorative afterthought. Smooth glossy floors can be slick with snowmelt, rainwater, oil, or fine dust. For garages that see wet vehicles, specify traction.
Recommended Free Tools
When to DIY and When to Hire a Pro
DIY makes sense when the slab is bare, dry, sound, and lightly used; the homeowner has time to prep correctly; and expectations are realistic. A basic paint or DIY epoxy can improve a garage used mostly for storage, bikes, lawn equipment, and occasional parking.
Hire a professional when the floor sees daily vehicles, hot tires, road salt, heavy tools, or frequent washing. Also hire out the job if there is previous coating failure, unknown sealer, significant oil contamination, moisture concerns, spalling, or a tight return-to-service deadline.
When interviewing contractors, ask specific questions:
Best Value

- Durable 2-Part Epoxy Formula – Provides a long-lasting, professional-grade finish for garage floors, workshops, and basements. More resilient than traditional 1-part epoxy paints.
- Quick & Easy Application – Applies easily with a roller; walk-on ready in 24 hours and vehicle-ready in 72 hours for minimal downtime.
- Chemical & Hot Tire Resistant – Protects against oil, gasoline, antifreeze, salt, and hot tire pickup, making it ideal for high-traffic garage areas.
- High-Gloss Finish – Delivers a sleek, showroom-like finish that enhances the look of any indoor concrete surface.
- Low Odor & VOC Compliant – Safe for indoor use with low odor and low VOCs, ensuring a comfortable application environment.
- What surface prep method will you use: grinding, shot blasting, or etching?
- What CSP target does your coating system require?
- How do you handle cracks, spalls, control joints, and salt damage?
- Is moisture testing included?
- What exact product system are you installing?
- What is the expected mil thickness?
- Is the topcoat epoxy, polyaspartic, polyurethane, or polyurea?
- What does the warranty exclude?
- When can we walk on it, move storage back, and park vehicles?
A vague promise of “industrial grade epoxy” is not enough. Good contractors can explain their prep, materials, thickness, cure schedule, and warranty in plain language.
Free tools Windows power users keep installed
One-click scans. No signup required.
Common Mistakes That Ruin Garage Floor Paint
The most common mistake is coating over contamination. Oil, dust, old sealer, curing compounds, and loose paint all create bond failure. The second is skipping surface profile. A smooth garage slab may look ready, but coatings need bite.
Other common failures include coating damp concrete, applying outside the temperature range, ignoring dew point, stretching material too thin, missing the recoat window, using the wrong roller cover, broadcasting flakes unevenly, leaving the floor too slick, and parking too soon.
Hot-tire pickup deserves special attention. Tires heat up during driving, then sit on the coating under vehicle weight. Basic paint is the most vulnerable. Two-part epoxy is better. A properly installed professional system with a durable topcoat is typically the strongest choice for garages that actually hold cars.
The Bottom Line
A garage floor coating is only as good as the slab preparation beneath it. For a low-cost visual cleanup, garage floor paint can be reasonable. For better durability on a clean, dry slab, a two-part epoxy kit can work if you follow the technical data sheet carefully. For a long-term garage floor that handles vehicles, hot tires, salt, stains, and regular cleaning, a professional epoxy with polyaspartic or polyurea topcoat is usually the better investment.
The right way is simple to describe and demanding to execute: inspect the slab, solve moisture and contamination, create the correct surface profile, apply the right system at the right thickness, build in traction, and wait the full cure window before putting the garage back to work.
Frequently Asked Questions
Is garage floor paint the same as epoxy?
No. Basic garage floor paint is usually a one-part coating and is mainly cosmetic. Epoxy is a two-part resin system that cures harder and bonds better when the concrete is properly prepared.
How much does it cost to coat a two-car garage floor in 2026?
For a 400-576 square foot two-car garage, basic DIY paint may cost about $400-$1,700 in materials. DIY epoxy often starts around $600-$1,400 before tools and repairs. Professional epoxy or polyaspartic systems commonly land around $1,800-$3,500 or more.
Should I grind or acid etch my garage floor?
For long-term durability, grinding is usually the better prep method. Acid etching can work for some bare porous slabs and DIY kits, but it does not remove oil, sealer, curing compounds, old coatings, or weak concrete.
Free tools Windows power users keep installed
One-click scans. No signup required.
How long before I can park on a newly coated garage floor?
It depends on the product. Some systems allow foot traffic in 12-24 hours, storage in 24-48 hours, and vehicle traffic after 3-7 days. Fast-cure polyaspartic systems may be quicker, but the manufacturer’s cure schedule controls.
Why do garage floor coatings peel?
Most peeling comes from poor bond. Common causes include moisture vapor, oil contamination, dust, old sealer, smooth concrete, weak surface paste, coating too thin, cold application conditions, or parking vehicles before cure.
Quick Recap
Product prices and availability are accurate as of the date/time indicated and are subject to change. Any price and availability information displayed on Amazon at the time of purchase will apply.




