PC Slower Than It Used to Be?
A free scan shows the junk files, broken settings and background clutter dragging Windows down - then fixes them in one click.Free scan · Windows 10 & 11Crashes, No Sound, or Screen Glitches?
Random freezes, missing sound and display glitches usually trace back to one bad driver. Find and replace yours safely.Free scan · under a minuteCamellias are some of the best flowering evergreen shrubs for the right American landscape: glossy leaves, clean structure, and winter-to-spring color when many beds look bare. The catch is that camellias are picky about the basics. Most failures we see around homes come from planting too deep, poor drainage, too much afternoon sun, alkaline soil, or irrigation that keeps the root zone wet.
If you want the short version: plant camellias in acidic, organic, well-drained soil; give them filtered light or morning sun with afternoon shade; set the root ball 1 to 2 inches above surrounding grade; mulch 2 to 3 inches deep without covering the crown; and water deeply during dry periods for the first 1 to 2 years. In most of the United States, camellias perform best in USDA Zones 7 to 10, with some cold-hardy cultivars stretching into protected Zone 6 sites.
Because Bettesworth Construction looks at yards through both a landscape and building-access lens, we also care where the plant sits in relation to foundations, siding, meters, windows, drainage paths, and buried utilities. A camellia can live for decades. Treat it like a permanent feature, not a seasonal decoration.
Start With the Site, Not the Flower Color
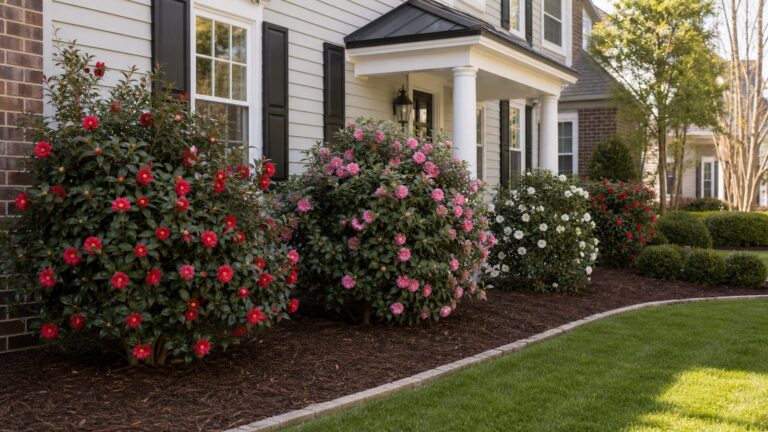
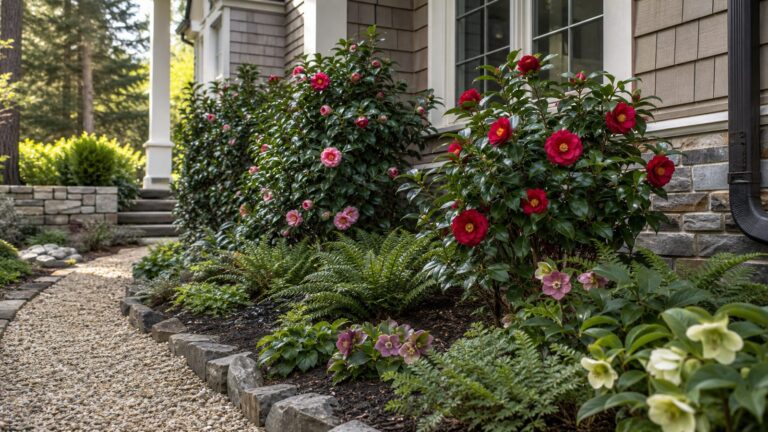
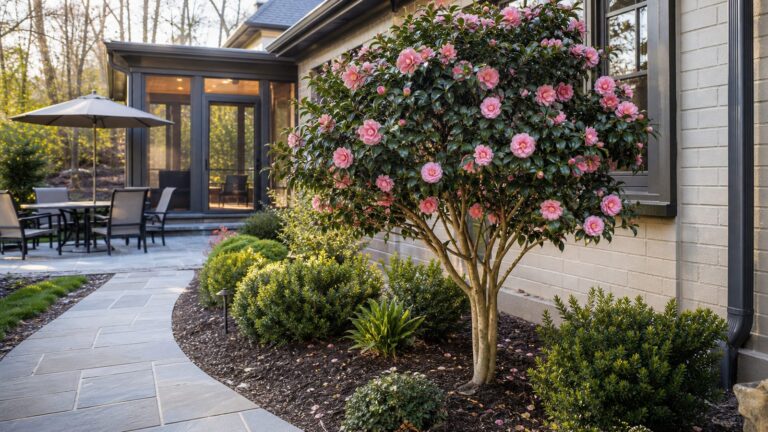
The best camellia for your yard is not always the prettiest tag at the garden center. Pick the planting site first, then choose a cultivar whose mature size, bloom season, and sun tolerance fit that site. Many camellias look compact in a 3-gallon pot but mature into shrubs 6 to 12 feet tall and wide, depending on type and cultivar. Some can become small trees over time.
On our job sites, we treat camellias as structural shrubs in the landscape plan. That means we check four things before planting: light, drainage, clearance, and maintenance access. If any one of those is wrong, the plant may survive for a few years but slowly decline.
#1 Best Overall
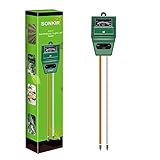
- Kindly NOTE: This soil tester can not be applied to test pH value of any other liquid. If the soil is too dry the indicator will not move, and water it before testing.
- 3 METERS IN ONE: Soil moisture level, Soil pH value and Sunlight level could be tested easily according to your need by switching the function button of this soil meter.
- NO BATTERY NEEDED: Simply insert the meter into soil, wait few minutes, accurate test results will be displayed on the readout panel. No battery is needed.
- STURDY AND SCIENTIFIC DESIGN: Reliable materials and upgraded technology used for this soil meter make it advanced and high-quality for long-term use.
- MULTIPURPOSE SOIL TEST KIT: Portable and compact design enables you to use this soil meter for house garden, farm, lawn and any other soil & plant analysis. Ideal for indoor and outdoor use.
Best Light for Camellias
Camellias generally prefer filtered light, high shade, or morning sun with afternoon shade. Hot south- and west-facing exposures can scorch leaves, stress roots, and dry the plant out faster than the shallow root system can keep up. Reflected heat from brick, stucco, concrete, light-colored siding, and driveways can make a site harsher than it looks on paper.
For a protected planting near a home, east-facing beds are often ideal. North-facing beds can work if they still get bright indirect light. A west wall that bakes from 2 p.m. to sunset is usually a poor choice unless the plant is protected by larger trees, a porch, or another shade source.
Sasanqua vs. Japonica Camellias
For many homeowners, the choice comes down to sasanqua or japonica. Sasanqua camellias usually bloom in fall into winter, have a looser habit, and often tolerate a little more sun once established. They are useful for informal hedges, screening, and transitional planting along walks or property edges.
The Tool Desk
Outbyte Driver Updater FREEFix the driver behind crashes, sound loss and screen glitchesFind Drivers →Outbyte PC Repair FREERepair Windows errors before they cause bigger problemsFix Now →Japonica camellias commonly bloom from winter into spring and tend to prefer more protected, shaded locations. They make excellent specimen shrubs near entries, patios, woodland edges, and foundation beds where they have room to mature.
Do not rely on type alone. Always read the cultivar tag for mature height and width. A plant that matures 8 feet wide should not be installed 24 inches off a walkway unless you plan to prune constantly.
Camellia Climate, Soil, and Drainage Requirements
Most camellias are best suited to USDA Zones 7 through 10. In colder Zone 6 locations, cold-hardy varieties can work in the right microclimate, but placement matters. Choose a sheltered site protected from winter wind and avoid spots where frozen leaves get hit by direct morning sun. Rapid thawing after a freeze can increase injury.
Soil is the other major requirement. Camellias need acidic, organic, well-drained soil. They do not like heavy, compacted, waterlogged beds. If water stands in the planting area after rain, fix that before you buy the plant.
How to Check Drainage Before Planting
A simple field test tells you a lot. Dig a hole about 12 inches wide and 12 inches deep in the planned planting area. Fill it with water and let it drain. Fill it again and watch how long the second fill takes to disappear. If water is still sitting there after several hours, the bed needs drainage work, a raised planting area, or a different plant.
Clay soil is not automatically a deal breaker, but digging a tight planting hole in clay can create a bathtub effect. Water enters the amended hole, then cannot move into the surrounding native soil. That is why we prefer a wide, shallow planting area and slight high planting instead of a deep, narrow hole full of soft amendment.
Soil pH and Testing
Camellias prefer acidic soil. A basic soil test is cheap compared with replacing a failed shrub. In 2026, many basic mail-in soil tests run about $11 to $30 plus mailing. Some state extension programs vary by season; for example, standard garden tests may be around $25 in some states, while other states subsidize residential nutrient and pH testing outside peak periods.
Do not guess with lime, sulfur, or fertilizer. Yellowing leaves may come from high pH, poor drainage, root damage, nutrient issues, or pests. A soil test gives you a starting point and can prevent unnecessary amendments.
Rank #2
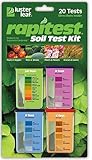
- Quick, at home results for Soil pH, Nitrogen, Phosphorous and Potash Innovative and inexpensive soil test kit features an easy-to-use capsule system and patented color comparators
- Contains all components needed for 20 tests. 5 for each of pH, N, P and K
- Contains all components needed to test all variables in several spots in the yard or garden
- Simple, detailed instructions included. Great for beginners and experienced gardeners alike.
- Soil pH preference list for over 450 plants included
Planning Around Foundations, Utilities, and Hardscape
This is where many garden guides come up short. A camellia planted beside a house has to coexist with the building. Before digging, look at the wall, roofline, grading, downspouts, crawlspace vents, windows, hose bibs, meters, condenser units, cleanouts, and walkways.
Call 811 before digging, even for shrubs. Utility depth is not something to assume, and landscape beds often contain electric, gas, cable, irrigation, or lighting lines. Submit the ticket early enough for local marking timelines. For hand planting a single 3-gallon shrub, people often skip this step. That is a bad habit. A shovel can still find the wrong line.
How Far From the House Should a Camellia Be?
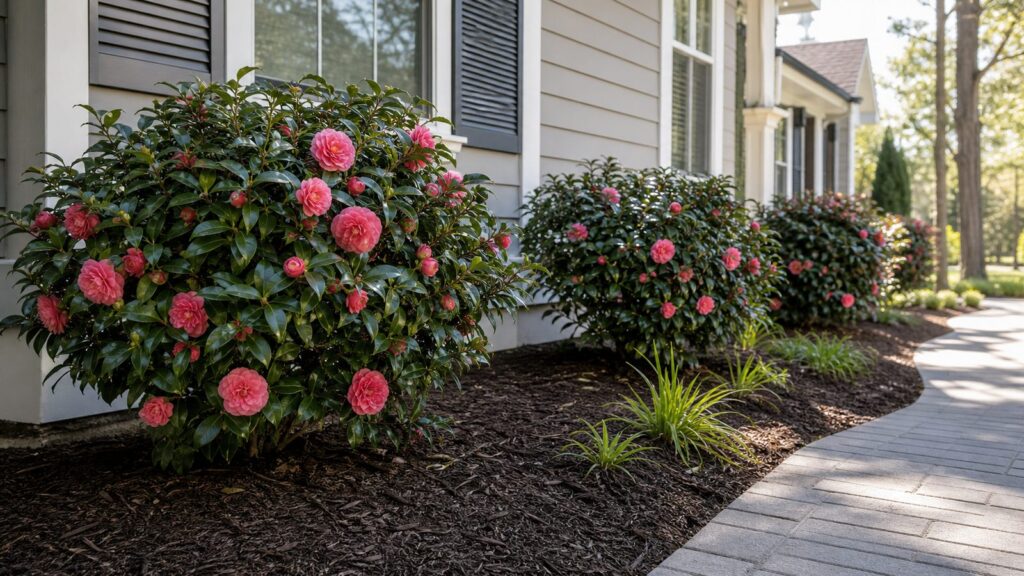
Use mature width, not container size. As a practical rule, place the center of the plant at least half its mature width away from the wall, then add working clearance. For a camellia expected to reach 8 feet wide, the center should usually be at least 4 feet from the wall, and 5 to 6 feet is often better in a foundation bed.
Leave enough room to paint, clean windows, inspect siding, service meters, clear vents, and maintain drainage. Do not block crawlspace vents or trap moisture against walls. Keep the finished mulch surface sloping away from the foundation, and do not pile soil or mulch above weep screeds, siding clearances, brick ledges, or termite inspection zones.
Do these 3 things before closing this tab:
1Clear out junk files and repair common Windows errors2Scan for outdated or missing drivers - takes under a minute3Repair Windows errors before they cause bigger problemsSite-Assessment Checklist
- Sun exposure: morning sun, filtered light, or high shade preferred.
- Drainage: no standing water after rain and no soggy low pockets.
- 811 ticket: utilities marked before digging.
- Mature clearance: enough space for the full-grown shrub, not just the nursery pot.
- Soil pH: tested before major amendments.
- Irrigation pattern: no constant spray into dense foliage or against the house.
- Maintenance access: clear path to windows, meters, vents, hose bibs, and siding.
How Much It Costs to Plant a Camellia in 2026
Camellia planting can be inexpensive as a DIY shrub job or part of a larger landscape renovation. The plant itself may be a small share of the final price if drainage, irrigation, grading, or hardscape work is involved.
For a typical homeowner planting one shrub, expect roughly $50 to $160 or more for the plant, depending on size and cultivar. Current retail pricing varies widely: a 3-gallon camellia may be listed around $53 at a large retailer, while specialty 7-gallon camellias can run around $160. Larger 7- and 15-gallon plants are often special-order items at local garden centers.
| Item | Typical 2026 Cost | Notes |
|---|---|---|
| 3-gallon camellia | About $50 to $80 | Common size for DIY planting and garden centers. |
| 7-gallon camellia | About $120 to $180+ | Higher immediate impact; heavier to transport and set. |
| Basic soil test | $11 to $30 plus mailing | Useful for pH and nutrient guidance. |
| Mulch material | $25 to $100 per cubic yard | Bagged mulch costs more per cubic yard but works for one or two shrubs. |
| Professionally installed mulch | $50 to $150 per cubic yard | Varies with access, volume, and local labor. |
| Shrub planting labor | $25 to $85 per shrub | Labor minimums may apply. |
| Landscaper hourly labor | $50 to $100 per hour | Many 2026 national averages fall around $50 to $65 per hour. |
| One-shrub professional install | $150 to $400+ | Includes plant, labor, mulch, amendments, trip charge, and site conditions. |
Cost jumps when the job becomes construction-adjacent. Regrading, correcting downspout discharge, removing compacted fill, cutting hardscape, rerouting irrigation, adding edging, or fixing a retaining condition can make the camellia itself the least expensive line item.
How to Plant a Camellia Step by Step
The best planting seasons are fall or early spring. In warm climates, fall is often the better window because roots can establish before summer heat. In colder areas, early spring planting gives the shrub a growing season before winter.
Recommended Free Tools
1. Prepare the Planting Area
Clear weeds and turf from a planting area at least 3 to 5 feet wide for a small camellia. Wider is better for larger plants. Avoid planting into compacted construction fill without loosening the surrounding soil. If the bed is tight against new construction, check for buried debris, concrete washout, gravel pockets, and poor grading.
2. Dig Wide, Not Deep
Dig a hole 2 to 3 times as wide as the root ball and no deeper than the root ball height. Camellias are shallow-rooted. They decline when buried. The goal is a broad area for roots to move outward, not a deep pocket.
Rank #3

- Accurate Soil pH Testing: Dewildetradingco Soil pH Test Strips offer measurements of soil pH levels (pH 3.5-9). As an essential tool for every gardener and grower, these test strips help determine the optimal pH for various plants, such as outdoor plants, indoor plants, gardens, grass lawns, fruit trees, flowers, vegetables, and forest shrubs.
- User-Friendly Testing Procedure: The testing process is simple and efficient. Mix the sample soil with water, let the solution sit for 30 minutes, dip one strip into the solution for 3 seconds, and then hold it horizontally for 60 seconds. Compare the results against the provided color chart on the bottle for quick and reliable readings.
- Cost-Effective and Versatile: With 100 Soil PH checker strips included in each package, Dewildetradingco provides a cost-effective solution for soil testing. It caters to various planting needs, offering valuable insights for a wide range of horticultural applications.
- Optimize Plant Health and Growth: Maintaining the correct pH is crucial for optimal plant growth and bountiful yields. Dewildetradingco Soil pH Test Strips enable gardeners and growers to adjust their soil conditions, ensuring nutrient availability and preventing wasteful spending on ineffective amendments.
- Convenient On-the-Go Monitoring: The Dewildetradingco Soil pH Test Strips are designed for portability, allowing gardeners to perform quick soil testing in various locations. As an essential tool in every gardener's soil tester kit, these pH strips help ensure thriving plant life and efficient resource management.
Set the plant so the top of the root ball sits 1 to 2 inches above the surrounding soil grade. This slight high planting helps prevent crown burial and reduces waterlogging risk. In heavy clay, avoid over-amending only the hole. Blend modest organic matter into the broader bed if needed, but do not create a soft bowl surrounded by hard clay.
3. Set the Plant and Backfill Correctly
Remove the container and inspect the roots. If roots are circling, loosen them gently and make several shallow vertical cuts through the outer mat if needed. Set the plant on firm native soil so it does not settle later.
Backfill with the soil you removed, lightly firming as you go. Do not stomp the soil hard. Build a shallow watering ring outside the root ball, not against the trunk. Water thoroughly to settle the soil and eliminate air pockets.
4. Mulch Without Burying the Crown
Apply 2 to 3 inches of organic mulch over the root zone. Pine bark, pine straw, shredded hardwood, or leaf mold can all work, depending on region and bed style. Keep mulch several inches away from the trunk and do not pile it over the top of the root ball. The crown needs air exchange.
For one small shrub, bagged mulch is usually simplest. For a full bed, bulk mulch is more economical. One cubic yard covers about 108 square feet at 3 inches deep.
Watering and Fertilizing Camellias
Water deeply after planting, then keep the root zone evenly moist but not soggy. During the first growing season, check soil moisture at least twice a week in hot or dry weather. The goal is deep watering when needed, not frequent shallow watering every day.
What’s actually slowing this PC down?
Pick the symptom - the matching free tool is one click away.
For the first 1 to 2 years, camellias need attention during dry spells. Once established, they are more resilient, but they still do not like extended drought. Drip irrigation or low-volume watering is better than overhead spray. Sprinklers that soak leaves, flowers, and the area near the foundation can increase disease pressure and create building moisture problems.
How Much Water Is Enough?
For a newly planted 3-gallon camellia, a slow watering of several gallons at a time is usually more useful than a quick splash. In sandy soil, water moves quickly and may need more frequent checks. In clay soil, water moves slowly and overwatering becomes the bigger risk. Push a finger or small trowel 3 to 4 inches into the soil. If it is dry at that depth, water. If it is wet, wait.
Fertilizer Timing
Do not fertilize a stressed, wilted, newly planted, or drought-stricken camellia as a first response. Correct water, planting depth, drainage, and pH first. Once the plant is established and actively growing, use a fertilizer labeled for acid-loving shrubs if a soil test supports it. Overfertilizing can burn roots and push tender growth at the wrong time.
Pruning Camellias Without Losing Next Season’s Blooms
Prune camellias after flowering and before summer bud set. A practical rule is to finish pruning after blooms fade and before July, with exact timing depending on the variety and local climate. If you shear or cut heavily after buds form, you remove next season’s flowers.
Free tools Windows power users keep installed
One-click scans. No signup required.
Most camellias do not need aggressive annual pruning. Remove dead, damaged, crossing, or awkward branches first. Then thin crowded interior growth lightly to improve airflow and reduce pest and disease pressure. This is better than repeatedly shearing the outside into a dense shell.
For foundation plantings, keep the shrub off walls, windows, vents, and walkways. If a camellia requires hard pruning every year to fit the space, the plant is probably too large for that location.
Rank #4

- 【4 in 1 function】This is a 4-in-1 multifunctional soil tester.Our soil tester fastly to measure soil moisture, pH, temperature and sunlight to help you take better care of flowers and plants.You can know when you need to water your soil by measuring moisture and pH & Temperature value of the soil and sunlight level of plants with it.
- 【Large Screen & Backlight LCD Display】The Soil Tester uses a large LCD screen and white backlight to conveniently display and read digital parameter in day or dark.Use AAA1.5V * 4 batteries (not included),it will alert when the battery is low.
- 【Quick Accurate measurement】The latest probe detection technology in 2026 can quickly and accurately measure the pH, moisture and temperature in the soil,with the light intensity of the light sensor analysis on the instrument, it can allow you to know when to water, to control the pH and temperature acidity, and determine whether the plants have enough light to better cultivate the plants more scientifically.
- 【Easy to use】Just simply plug the probe into the soil about 4 inches(10cm) , wait 10 seconds to read intuitive data,and you will get an accurate and precise reading immediately.(This soil tester cannot be used directly to test any liquid. When measuring the soil, if the soil is too dry, do not insert it into dry and hard soil. Before testing, please water the soil test area and wait for 10 minutes, otherwise the testing machine will be damaged.)When testing soil pH and moisture, you need to read data from at least 5 locations in the soil. The average value of all the data will be the final soil pH and moisture.
- 【More convenient to read】The screen content adopts visual content design, which helps you read the data through specific values and easy to understand graphics, so that even novice growers can easily understand your soil conditions. The 45° rotating head design allows you to bend your head 0°-45°, allowing you to easily view the screen content without bending over.
Common Camellia Problems and What They Usually Mean
Camellias usually tell you when the site is wrong. The challenge is reading the symptom correctly. Leaves turning yellow, brown, or spotted can come from multiple causes, so inspect the plant, soil, and irrigation pattern before treating.
Yellow Leaves
Yellowing can point to high soil pH, nutrient imbalance, poor drainage, root damage, or normal older-leaf shedding. If the whole plant looks pale and growth is weak, start with soil pH and drainage. If only older interior leaves yellow and drop seasonally, that may be normal.
Quick wins for a faster PC:
Fix the driver behind crashes, sound loss and screen glitchesFind Drivers →Clear out junk files and repair common Windows errorsFree Scan →Scan for outdated or missing drivers - takes under a minuteDriver Scan →Brown Leaf Edges or Sunburn
Brown edges and scorched patches often come from too much sun, reflected heat, drought stress, or winter injury. West-facing walls, driveways, and light masonry can intensify heat. Move young plants or add shade before the damage becomes chronic.
Bud Drop
Bud drop can result from inconsistent watering, freeze injury, excessive shade, stress, or heavy bud set. A newly planted camellia may drop buds while it adjusts. Keep moisture consistent and avoid fertilizing as a panic response.
Tea Scale, Aphids, Spider Mites, and Sooty Mold
Inspect the undersides of leaves before buying and during maintenance. Tea scale is a common camellia pest and can cause yellow stippling on leaves. Aphids and other sucking insects can lead to sticky honeydew and sooty mold. Dense, unpruned shrubs with poor airflow are harder to inspect and treat.
Flower Blight, Dieback, and Root Rot
Flower blight can cause blooms to brown and collapse quickly. Remove and dispose of blighted blooms rather than leaving infected petals around the plant. Dieback and canker may show as wilting, dead twigs, or sunken stem areas. Root rot is strongly associated with wet, poorly drained soil and can be fatal.
Sanitation, correct watering, drainage, and airflow often matter more than spraying after a disease is established. If a camellia is planted too deep in wet soil, no product will make that a good site.
Independent reader supportYour contribution helps us test, update, and keep practical guides available for everyone.When to DIY vs. When to Hire a Pro
Planting one 3-gallon camellia in a prepared bed is a reasonable DIY project for many homeowners. The work is straightforward if the site drains well, utilities are marked, soil is workable, and the plant can be placed with proper clearance.
DIY makes sense when you are planting a small container shrub, the bed is already shaped, no drainage correction is needed, and you can transport and handle the plant safely. Expect to spend roughly $50 to $160 or more for the plant, $11 to $30 for a soil test, and a modest amount for mulch and amendments.
Hire a pro when the plant is large, the soil is compacted, the bed has drainage problems, the site is sloped, utilities or irrigation lines complicate digging, or the shrub is part of a foundation redesign. A 7-gallon camellia is heavy, awkward, and easier to plant too deep if the hole is not prepared correctly. Professional installation commonly lands around $150 to $400 or more for a one-shrub job, especially when service minimums, delivery, mulch, and soil preparation are included.
Quick wins for a faster PC:
Scan for outdated or missing drivers - takes under a minuteDriver Scan →Clear out junk files and repair common Windows errorsFree Scan →Fix the driver behind crashes, sound loss and screen glitchesFind Drivers →Bring in a construction or landscape professional if the planting area affects grading, downspouts, basement or crawlspace moisture, retaining edges, pavement, or irrigation routing. Those are not just gardening details. They affect the building.
Best Value

- ✅ 1Dial & 1 LCD Screen - Replace/install all 3 batteries each time. Put button to %RH/°F to - Turn On, and put to LIGHT to - Turn Off. Read the LCD results in 3-5 mins. (Not Water Moisture Meter, so, please don't test liquid)
- 7Meter-in1 Comprehensive Maintenace: Specially designed for beginners, the built-in 1.6" chips board, can meet all your needs for measuring soil moisture, pH/fertility/temp/light/indoor temp&humidity. Simply switching modes on 1 button, can quickly result in a more accurate reading of various aspects of data of soil! Moreover, LCD screen can clearly display soil temp, air temp&humidity. helps you to plant lush and healthy plants, while it can also help you cultivate seedlings scientifically.
- Design Patented US & Utility Patented US: Origin Dual-Dial Design -combined with both soil meter and LCD-display soil/air temperature and humidity meter. This helps you to monitor soil moisture/pH/fertility/sunlight and soil temperature/air humidity and temperature in your garden/house all in one unit. Our 7 Soil Tester allows you to get a more comprehensive and direct understanding of your plants/ the key information for scientific seedlings.
- Effective Probe Based On 3 Metals: The soil pH tester has been with 3 kinds of quality metal material, which is accurate, strong, and durable for long-term use, length of about 6.8" and can be used for medium to large potted plants. it can analyze the soil more quickly, get to know the plant soil condition, and obtain more accurate data, furthermore, single probe design plant water meter is less harmful to the plant root system and won't bring out more soil of the plants after the test.
- Easy To Use & Wide Range: Simply insert the plant moisture meter more than 3" into the soil and switch the function button to obtain test results immediately or test the mini hygrometer thermometer in 3 mins. This moisture meter for house plants can be widely used in both outdoor &indoor gardens, farms, lawns, flowers, potted, and vegetable plants, etc., A great gardening gift for plant-lover friends, coworkers, and family.
Camellia Planting Mistakes to Avoid
The most expensive camellia mistake is planting too deep. Keep the top of the root ball 1 to 2 inches above grade and keep mulch off the trunk. The second big mistake is ignoring drainage. Camellias want moisture, but they do not want wet feet.
Do not plant in full afternoon sun just because the nursery plant looked healthy in a pot. Do not bury the crown with mulch. Do not let sprinklers hit dense foliage every day. Do not fertilize before solving soil and water problems. Do not prune late in the season and then wonder why the plant did not bloom.
Finally, do not plant a long-lived shrub where it will block access to the house. A camellia should make the property better for decades. Give it enough room to do that without fighting the building, the walkway, or the maintenance crew.
Outdated Drivers Are Slowing You Down
One free scan finds every outdated or missing driver and matches the right update for your exact hardware.Free scan · exact hardware matchPC Slower Than It Used to Be?
A free scan shows the junk files, broken settings and background clutter dragging Windows down - then fixes them in one click.Free scan · Windows 10 & 11The Bottom Line
A good camellia planting is mostly decided before the shovel goes in the ground. Choose the right cultivar for the mature space, confirm filtered light or morning sun, test the soil, check drainage, call 811, and keep the shrub clear of building systems. Then plant high, mulch properly, water deeply during establishment, and prune after bloom.
Handled that way, camellias are not fussy plants. They are precise plants. Give them the site they are built for, and they can become one of the most dependable evergreen features in the landscape.
Frequently Asked Questions
When is the best time to plant camellias in the United States?
Fall or early spring is best. In warmer climates, fall planting is often ideal because roots can establish before summer heat. In colder areas, early spring gives the plant a full growing season before winter.
Do camellias need sun or shade?
Camellias usually prefer filtered light, high shade, or morning sun with afternoon shade. Hot afternoon sun, especially near south- or west-facing walls, can cause leaf scorch and drought stress.
How deep should I plant a camellia?
Set the root ball slightly high, with the top 1 to 2 inches above surrounding soil grade. Camellias are shallow-rooted and often decline when planted too deeply or buried under mulch.
How far from a house should camellias be planted?
Use the mature width of the cultivar. As a practical rule, place the center of the shrub at least half its mature width from the wall, plus extra room for painting, windows, vents, meters, and drainage access.
How much does it cost to plant a camellia in 2026?
A DIY planting may cost about $50 to $160 or more for the plant, plus $11 to $30 for a soil test and additional mulch or amendment costs. A small professional install often lands around $150 to $400 or more depending on plant size, labor minimums, access, soil, and drainage conditions.
When should camellias be pruned?
Prune after flowering and before summer bud set, commonly after blooms fade and before July. Late pruning can remove next season’s flower buds.
What’s actually slowing this PC down?
Pick the symptom - the matching free tool is one click away.
Quick Recap
Product prices and availability are accurate as of the date/time indicated and are subject to change. Any price and availability information displayed on Amazon at the time of purchase will apply.