Do these 3 things before closing this tab:
1Fix the driver behind crashes, sound loss and screen glitches2Clear out junk files and repair common Windows errors3Scan for outdated or missing drivers - takes under a minuteA ratgdo is one of those small home-system upgrades that makes you wonder why the garage door stayed dumb for so long. For roughly $50 to $90 for the board, plus a few dollars in low-voltage wiring supplies, many homeowners can add reliable local smart control to an opener they already own. The catch is that the garage door is not a lamp, thermostat, or camera. It is a heavy moving assembly with springs, tracks, rollers, photo eyes, force settings, emergency release hardware, and code requirements behind it.
Used in the right situation, ratgdo is a very good retrofit. It can give you real door status, local control through platforms such as Home Assistant, HomeKit, ESPHome, or MQTT, and automations that do not depend on a cloud service for ordinary open, close, and status functions. That is a major reason homeowners moved away from cloud-only garage apps: they want the door to keep working when a vendor changes an API, a subscription model changes, or the internet is down.
From a construction and service standpoint, the question is not only “Can I wire this board?” The better question is: “Is this opener and door assembly worth smartening up?” On our job sites, we separate those decisions. A sound modern opener with working photo eyes, a balanced sectional door, a grounded garage receptacle, and good Wi-Fi is a candidate for a smart controller. A 25-year-old opener with failing reversal, missing safety sensors, a damaged spring, or a questionable ceiling outlet is a repair or replacement conversation first.
What ratgdo does that a basic smart relay cannot
Most basic smart garage controllers act like a wireless finger pressing the wall button. They close a dry contact for a moment, the opener receives a pulse, and the door moves. That works on some openers, but it is crude. It may not know whether the door is open, closed, stopped halfway, obstructed, locked out, or already moving unless you add separate contact sensors. On some Chamberlain and LiftMaster Security+ openers, a simple dry-contact relay does not communicate correctly with the wall-control circuit at all.
#1 Best Overall

- Product Name: Door Magnetic Sensor Switch
- Sensing distance: 10mm-15mm
- Product size: 29*15.5*9mm Wire length: 33cm
- Sensing distance: 10mm-15mm Service life: 1000000 times
- Working current: 0.5A/Working voltage: 100V (1-100V)/Maximum power: 10W
Ratgdo was built for that gap. It is a small Wi-Fi control board designed to interface with many residential garage door openers, especially Chamberlain and LiftMaster Security+ models. Depending on the opener and ratgdo version, it can communicate with the opener more intelligently than a relay pulse. That means better reporting of door state, light status, obstruction events, and control behavior in compatible setups.
The practical benefit is confidence. If a homeowner wants an alert at 10:00 p.m. that the garage door is still open, the system should be checking a real state, not guessing from the last command. If an automation closes the door after everyone leaves, it should preserve the opener’s safety logic and report whether the close actually happened. If the smart-home system is offline, the wall button, remotes, keypad, photo eyes, and emergency release still need to work normally.
Where ratgdo fits in a real garage system
A garage door opener is only one part of the system. The door itself can weigh 130 to 350 pounds depending on size, material, insulation, glass, and hardware. The torsion or extension springs counterbalance that weight. The opener should guide a balanced door; it should not be dragging a bad door through the track every morning.
Before adding smart control, we treat the garage like any other home system: check the mechanical baseline first. A controller can make a good system more convenient. It cannot fix a cracked top section, weak spring, bent track, failing rollers, misaligned photo eyes, or an opener that needs excessive force to move the door.
Windows Errors? Fix Them Before They Spread
Repair common Windows errors and clear accumulated junk for a smoother, more stable PC - no reinstall needed.Free scan · no reinstallOutdated Drivers Are Slowing You Down
One free scan finds every outdated or missing driver and matches the right update for your exact hardware.Free scan · exact hardware matchFor a typical two-car sectional door, a useful pre-install check takes 15 to 30 minutes. With the door closed, inspect the springs, cables, drums, hinges, rollers, brackets, and track fasteners. Pull the emergency release with the door down, then raise the door by hand to about waist height. A reasonably balanced door should stay close to that position without racing down or shooting upward. If it falls hard, binds, feels unusually heavy, or will not stay halfway, stop and call a garage-door professional. Spring work is not a homeowner tune-up item.
Good candidates for a ratgdo retrofit
Ratgdo makes the most sense when the opener is already modern enough to keep. That usually means a residential sectional door, working photo eyes mounted near the floor, functional force reversal, clean travel limits, a grounded opener receptacle, and an opener brand/protocol supported by the board you plan to buy. Many Chamberlain and LiftMaster Security+ openers are in this category, but model verification matters. Check the opener’s label, wall-button type, learn-button color or technology generation, and the ratgdo compatibility notes before ordering parts.
It is also a strong fit for homeowners already running a local smart-home platform. If you use Home Assistant, ESPHome, MQTT, or HomeKit and want local garage control, ratgdo’s value is obvious. You get the convenience of remote alerts and automations without making the garage door dependent on a vendor cloud for routine operation.
Poor candidates for a smart-controller-only fix
We would not start with ratgdo on an opener that is missing photo eyes, fails the reversal test, has damaged wiring, trips a GFCI receptacle, hums but will not move the door, or is installed on a questionable one-piece door setup. We also would not use a smart controller to work around a bad wall button, a locked-up rail, a failing logic board, or a door that is out of balance.
Quick wins for a faster PC:
Clear out junk files and repair common Windows errorsFree Scan →Scan for outdated or missing drivers - takes under a minuteDriver Scan →Older openers without modern monitored entrapment protection are replacement candidates. Automatic garage door openers in modern residential code are tied to UL 325 listing and labeling requirements. Federal safety material also recognizes unattended-operation accessories, including wireless or internet-connected activation, as part of the garage-door operator safety conversation. In plain English: if you are going to close a garage door from an app or automation, the opener’s safety system needs to be intact.
Cost: ratgdo retrofit versus replacing the opener
The strongest argument for ratgdo is that it can be inexpensive when the existing opener is worth keeping. In 2026, the board itself commonly falls in the sub-$100 smart-controller category, roughly $50 to $90-plus depending on version, enclosure, shipping, and accessories. DIY incidentals usually add $10 to $50 for low-voltage wire, lever connectors, adhesive mounts, clips, strain relief, labels, and a small enclosure if one is not included.
A professional low-voltage or smart-home service visit often lands around $100 to $250 or more when no line-voltage work is needed. That price can rise with ceiling height, multiple doors, weak Wi-Fi, platform configuration, Home Assistant or MQTT setup time, and return trips for compatibility troubleshooting.
Rank #2

- Zinc Alloy Contact Set: Wired magnetic contact for garage doors, overhead doors, roll-up shutters and gates; zinc alloy housings with an adjustable L bracket are used for surface-mounted installation
- NC Contact Logic: With the magnet aligned near the switch, the circuit is closed; when the magnet moves away from the switch, the circuit opens for use with a compatible external alarm or automation input
- Measure Before Ordering: Magnetic door switch measures 4.13 x 1.85 x 0.35 in and magnet 4.17 x 0.63 x 0.59 in; listed sensing distance is up to 1.97 in; 15 in armored cable section for mounting and wire-routing planning
- System Requirements: For compatible low-voltage wired alarm, access-control or automation inputs; maximum switching ratings are 100 VDC, 0.5 A and 10 W; not for direct 110/120/220 V AC mains
- Package Includes: Includes 1 switch, 1 magnet, 1 adjustable L bracket, mounting hardware and printed guide; controller, power supply, extension wire, connectors and tools are not included
Replacing the opener is a different scale. HomeAdvisor’s June 20, 2026 update lists professional garage door opener installation at $218 to $540, with an average around $379. Networx lists a broader 2026 installed range of about $300 to $900-plus for standard units, with a mid-range average around $500. In some markets, trade-reported replacement pricing can run about $650 to $1,250, especially for belt-drive or DC motor units, battery backup, rail extensions, travel, warranty, and correction of door balance or hardware issues.
| Option | Typical 2026 Cost | Best For | Watch For |
|---|---|---|---|
| DIY ratgdo retrofit | $75-$150 total | Compatible opener, good door condition, homeowner comfortable with low-voltage wiring | Compatibility, cable routing, enclosure, Wi-Fi strength, safety testing |
| Assisted smart-home retrofit | $150-$300+ | Homeowner wants local control but needs help with setup or integration | Trip charges, platform configuration time, multiple doors |
| New opener installed | $300-$900+ common range | Old, noisy, unreliable, unsafe, or incompatible opener | Rail length, battery backup, warranty, door condition, opener horsepower class |
| Electrical correction | Varies by site | No proper receptacle, missing GFCI protection, ungrounded or damaged wiring | Permit, electrician labor, finished ceiling or wall repair, panel distance |
Here is the clean decision tree we use with homeowners: if the door and opener pass safety checks and the opener is compatible, a $75 to $150 DIY smart retrofit is reasonable. If the hardware is fine but the homeowner wants help with Home Assistant, Wi-Fi, or clean wiring, budget $150 to $300-plus. If the opener is outdated, unsafe, loud, or failing, put the money toward a new opener. If the electrical supply is wrong, correct that separately before treating the smart board as the project.
Safety checks before and after installation
The opener’s safety features are not optional features to preserve if convenient. They are the reason smart control is acceptable in the first place. A garage door can injure a person, damage a vehicle, or crush stored items if it closes when it should not. Any retrofit should leave the factory wall control, handheld remotes, exterior keypad, photo eyes, force reversal, travel limits, and emergency release working as designed.
LiftMaster’s safety guidance gives two simple field checks homeowners should understand. Photo eyes should be mounted no higher than 6 inches off the floor. If the beam is blocked while the door is closing, the door should stop closing and reverse or refuse the close command. The door should also reverse when it contacts an obstruction at least 1.5 inches high. A common field method is to place a 2×4 flat on the floor under the door path, because a nominal 2×4 is about 1.5 inches thick.
Run those tests before you install the controller and again afterward. If the opener fails either test, fix the opener or door before adding unattended control. Do not solve a nuisance reversal by moving photo eyes higher, taping them together, increasing force until the motor wins, or bypassing wiring. Those are safety defects, not tuning tricks.
Unattended closing deserves stricter judgment
There is a difference between opening the door while standing in the garage and closing it from a phone when nobody is looking at the opening. UL 325 requirements for unattended-operation accessories exist because a remote command can happen when the person pressing the button cannot see the door. DASMA guidance also states that unattended operation, such as smartphone closing, is not permitted for one-piece garage doors under UL 325.
For sectional residential doors with modern monitored photo eyes, unattended closing can be appropriate when installed correctly. Still, use conservative automation. A reminder that the door is open is low risk. Automatically closing after a fixed time is higher risk and should be paired with reliable state feedback, working obstruction detection, and household agreement about when the garage may be closing. We prefer alerts first, automations second.
Electrical and permit issues homeowners miss
A ratgdo installation is usually low-voltage accessory wiring. That does not make the whole garage exempt from electrical rules. If you are only connecting the board to the opener’s low-voltage terminals and powering it from an approved low-voltage source as designed, many homeowners treat it like adding a smart accessory. Once the work touches the 120-volt receptacle, branch circuit, breaker, GFCI device, ceiling outlet, or opener power cord, it becomes electrical work. Depending on the authority having jurisdiction, that may require a permit and a licensed electrician.
Modern garages generally require GFCI protection for receptacles. The 2020 NEC also requires at least one receptacle outlet per vehicle bay, mounted no more than 5.5 feet above the floor. A ceiling outlet for the opener does not count as that required vehicle-bay receptacle. This matters during garage remodels, opener replacements, and inspections because many older garages have a single ceiling receptacle and little else.
Free tools Windows power users keep installed
One-click scans. No signup required.
Do not plug an opener into a loose adapter, run an extension cord across the ceiling, or power a permanent garage opener from a questionable outlet. If the receptacle is ungrounded, cracked, warm, intermittently dead, or repeatedly trips GFCI after the opener starts, stop and have the electrical side diagnosed. A smart controller should not be the neat new part attached to an unsafe power setup.
How we would install it cleanly
The exact wiring depends on the opener model and ratgdo version, so follow the board documentation for the terminals used. The clean-install principles are consistent. Mount the controller where it can be reached without leaning into moving parts, hot motor components, the belt or chain, or the rail. Keep it close enough for short, tidy low-voltage runs but not buried under the opener housing where service becomes difficult.
Rank #3
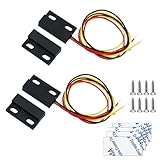
- Cable Definition: Black for common; Yellow for NO; Red for NC
- NC&NO Contact Type:NC&NO Combined,Normally Closed Open,using Normally Open or Normally Closed freely.(Please look at the working mode in the Third picture to see if it is the switch you need.)
- Rated Power: 5W, Max Voltage: 12V, Max Current:0.25A,Transmitting Distance: 0-15mm
- Package: 2 sets of black magnetic door contact reed switches + 4 pieces stickers + 8 pieces screws Product Size: 23*14*6mm (L * W * H);Mounting Hole Size:3mm
- Application: Magnetic door contact reed switch ideal for door alarm sensors, alarms, LED switches, relays, GPS low voltage devices, etc., effective for theft deterrent. Ideal for wooden doors or windows security
Use appropriately sized low-voltage wire, typically bell wire or comparable low-voltage conductors suited to the terminals. Avoid loose flying splices. Lever connectors, strain relief, adhesive mounts, and cable clips are cheap compared with the time lost troubleshooting a wire that vibrates loose. If the board did not come in an enclosure, add one. A garage ceiling sees dust, vibration, heat swings, and stored items being moved around. Bare electronics dangling by wires is not a professional installation.
Label the low-voltage conductors at the board and near the opener terminals. Take photos before and after. Record the opener model, ratgdo board version, firmware, Wi-Fi network name, terminals used, safety-test date, and smart-home entity names in the home-maintenance file. That documentation takes 10 minutes and saves real time later when a homeowner changes routers, sells the house, replaces the opener, or asks another technician to troubleshoot it.
The Tool Desk
Outbyte PC Repair FREEClear out junk files and repair common Windows errorsFree Scan →Outbyte Driver Updater FREEFix the driver behind crashes, sound loss and screen glitchesFind Drivers →Wi-Fi is part of the installation
Garages are often bad Wi-Fi rooms. They sit behind masonry, foil-faced insulation, metal doors, appliances, cars, freezers, and electrical panels. A smart controller mounted above a motor housing may have worse signal than a phone held at chest height in the open doorway. Before blaming the board, check signal strength at the opener location with the garage door both open and closed.
If signal is weak, fix the network instead of accepting unreliable garage control. That may mean moving an access point, adding a wired access point nearby, or choosing a better 2.4 GHz layout. Many smart-home devices still perform best on 2.4 GHz because it travels farther through building materials than 5 GHz. Avoid placing the controller’s antenna tight against metal brackets or the opener housing.
Local control versus cloud control
The practical reason people like ratgdo is local control. A cloud-only garage app can work fine until it does not. The failure might be an internet outage, a vendor API change, an account issue, a service interruption, or a policy shift. For a door that protects tools, vehicles, and access into the house, homeowners do not want basic open, close, and status functions to depend on a remote server every time.
Local control does not mean careless remote access. Do not expose garage control directly to the internet. Route remote access through a secured smart-home platform with multi-factor authentication, a VPN, or equivalent protections. The garage is often a secondary entrance into the home. Treat it like a lock-adjacent system, even though it is technically an opener.
Good automations are boring and specific. Send a notification if the door remains open for 15 minutes after sunset. Turn on garage lights when the door opens after dark. Pause a close automation if the obstruction sensor reports a problem. Confirm closed status at bedtime. Avoid clever routines that trigger from weak assumptions, such as closing every time a phone leaves the geofence without checking whether someone else is still home.
Independent reader supportYour contribution helps us test, update, and keep practical guides available for everyone.When to DIY versus when to hire a pro
A careful homeowner can handle many ratgdo installs if the work stays low voltage, the opener is compatible, the garage is safely accessible, and the door passes baseline tests. Plan on 60 to 120 minutes for a first installation if you are reading the documentation carefully, mounting the board cleanly, and configuring the smart-home side. A second door usually goes faster once you know the opener family and platform workflow.
Hire a pro if the ladder setup is unsafe, the ceiling is high, the opener wiring is damaged, the door is heavy or unbalanced, the photo eyes are missing or unreliable, the opener fails reversal testing, or the job requires adding or relocating a receptacle. Also bring in help if you want the controller integrated with Home Assistant, MQTT, or other local systems but do not want to spend a weekend debugging Wi-Fi, firmware, and entity naming.
Call a garage-door company, not a general handyman, for spring tension, cable replacement, bent track, cracked door sections, opener rail issues, force-limit problems that do not respond to normal adjustment, or full opener replacement. Call a licensed electrician for new 120-volt garage wiring, GFCI correction, ceiling receptacle work, dedicated circuits, or recurring breaker and GFCI trips. Those two trades solve different parts of the system.
What’s actually slowing this PC down?
Pick the symptom - the matching free tool is one click away.
When not to DIY
Do not DIY a smart garage retrofit if the opener is old enough that it lacks modern reversing protection, if photo eyes are missing or mounted above the allowed range, if the door is a one-piece type and you intend unattended smartphone closing, if springs or cables are visibly damaged, if the opener is powered by an extension cord, if the ceiling receptacle is ungrounded or loose, if GFCI protection is tripping, or if you need to add or alter 120-volt power. In those cases, the smart controller is the small part of the job. The real work is making the garage door system safe and code-consistent.
Rank #4

- Package: 3 sets of black magnetic door contact reed switches + 6 pieces stickers + 12 pieces screws.
- Size (approx. ): 29 x 15 x 9 mm; cable length: 30 cm.
- It can control DC 3V, 5V, 9V, 12V, 24V, 36V, 48V, Maximum switching voltage: 100V; Maximum switch current: 0.5 amps, maximum switch power: 10W.
- NC&NO Combined, Use Normally Open or Normally Closed freely. Cable definition: Blue for common; Black for NC; White for NO.
- Application Magnetic door contact reed switch, ideal for door alarm sensors, alarms, LED switches, relays, GPS low voltage devices, etc., effective for theft deterrent. Yes, ideal for wooden doors or windows.
Common mistakes that make a good upgrade frustrating
The first mistake is buying before confirming compatibility. Garage opener branding is not enough. Chamberlain, LiftMaster, Craftsman, and related openers span different control generations and wall-button behaviors. Check the exact model, production era, Security+ generation, terminals, and ratgdo documentation before ordering.
The second mistake is assuming door movement from a command. A garage system should report actual open and closed states. Verified feedback is what makes notifications and automations trustworthy. Without it, you risk a false sense of security: the app says “closed” because it sent a command, while the door actually reversed on a broom handle, a bike tire, or a misaligned photo eye.
The third mistake is hiding the controller in a place nobody can service. A board taped to the top of an opener may work for a month and become a nuisance later. Use a small enclosure, secure the wiring, and mount it where the next person can see what was done.
Recommended Free Tools
The fourth mistake is over-automating. Start with status alerts, remote viewing if you have a camera, and manual remote control through a secure platform. Add automatic closing only after the safety system has been tested, the door-state reporting is reliable, and everyone in the house understands the behavior.
Bottom line
Ratgdo is a smart upgrade when the garage door system underneath it is already sound. For a compatible opener, it can deliver local control, dependable status, and useful automations for a fraction of the cost of replacing the opener. A realistic DIY budget is $75 to $150. A service-assisted install may run $150 to $300-plus. A new opener commonly falls in the $300 to $900-plus installed range, and some markets see $650 to $1,250 when higher-end equipment, warranty, travel, or door corrections are included.
The best result comes from treating ratgdo as part of the garage system, not as a shortcut around it. Confirm compatibility, test the door mechanically, preserve UL 325 safety functions, keep physical controls working, respect garage electrical rules, and document the installation. Do that, and the garage door becomes what homeowners wanted all along: locally controlled, predictable, serviceable, and still safe.
Frequently Asked Questions
What is ratgdo and how does it do?
Ratgdo is a small Wi-Fi control board for many residential garage door openers, especially compatible Chamberlain and LiftMaster Security+ models. It can provide local smart-home control and door-state feedback through systems such as Home Assistant, ESPHome, HomeKit, or MQTT.
How much does it cost to add ratgdo to a garage door opener?
In 2026, the board commonly costs about $50 to $90-plus. A clean DIY installation with wire, connectors, labels, mounts, and an enclosure often totals about $75 to $150. Hiring low-voltage or smart-home help commonly brings the project to about $150 to $300-plus when no electrical work is needed.
Should I install ratgdo or replace the opener?
Install ratgdo if the opener is compatible, the door is balanced, the photo eyes work, force reversal passes, and the electrical supply is sound. Replace the opener if it is old, unsafe, noisy, unreliable, missing modern safety features, or not compatible with the controller you want.
Can a smart garage controller bypass safety sensors?
It should not. A smart controller must leave photo eyes, force reversal, wall controls, remotes, keypads, and the emergency release working as designed. If the opener fails obstruction or reversal testing, repair the garage door system before adding smart control.
Do I need a permit to install ratgdo?
A simple low-voltage accessory installation may not require a permit in many areas, but local rules vary. Adding, relocating, or repairing a 120-volt receptacle, branch circuit, breaker, GFCI protection, or opener power supply is electrical work and may require a permit and licensed electrician.
Is local garage door control better than a cloud app?
Local control is usually more resilient because ordinary open, close, and status functions do not depend on a vendor cloud or internet connection. Remote access should still be secured through a trusted smart-home platform with multi-factor authentication, VPN access, or equivalent protection.
Quick Recap
Product prices and availability are accurate as of the date/time indicated and are subject to change. Any price and availability information displayed on Amazon at the time of purchase will apply.