The Tool Desk
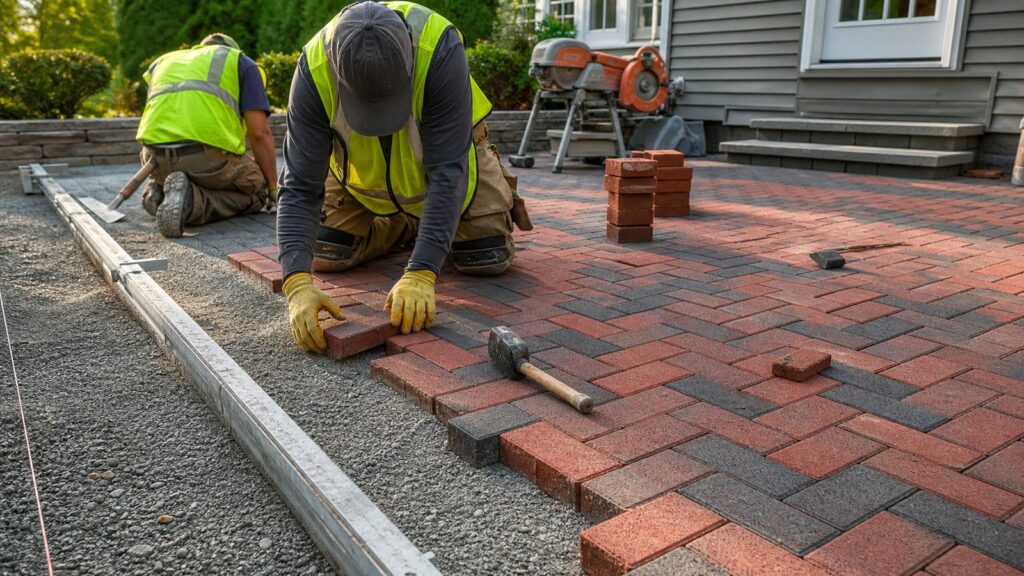
Outbyte Driver Updater FREEFix the driver behind crashes, sound loss and screen glitchesFind Drivers →Outbyte PC Repair FREEClear out junk files and repair common Windows errorsFree Scan →A herringbone brick pattern is one of the strongest and sharpest-looking ways to lay brick pavers for a patio, walkway, stoop, or light-duty driveway. The pattern works because each brick turns against the next at a right angle, creating a zigzag bond that helps spread horizontal movement across the pavement. That is why herringbone is common in high-traffic hardscapes and driveway work, not just decorative garden paths.
The basic installation is simple to describe: excavate, build a compacted base, screed a 1 inch bedding layer, set a square reference line, lay the herringbone field, cut the edges, restrain the perimeter, sweep joint sand, and compact the surface. The difference between a patio that stays flat for years and one that settles after the first freeze is in the details: drainage, base depth, compaction, joint consistency, edge restraint, and cut planning.
On our job sites, we treat the herringbone pattern as the last step of the system, not the first. If the finished elevations are wrong, water runs toward the house. If the base is loose, the prettiest brick layout will still rut, rock, and spread. This guide walks through the full process the way a builder should think through it.
What a Herringbone Brick Pattern Is
A herringbone pattern uses rectangular bricks or pavers laid in alternating right-angle pairs. One brick runs lengthwise, the next turns 90 degrees into it, and the pattern repeats to create a continuous zigzag. The most common paver modules are close to a 2:1 ratio, such as 4 by 8 inches, because the length of one brick equals the width of two bricks plus joints. That ratio keeps the pattern clean and repeatable.
Free tools Windows power users keep installed
One-click scans. No signup required.
#1 Best Overall
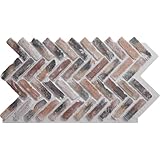
- FAST DIY INSTALLATION: Our lightweight polyurethane panels are designed for quick and easy installation, saving you time and professional labor costs. Unlike heavy real brick, these panels are easy to handle and can be installed by a single person using basic tools—perfect for a weekend DIY project.
- LOW MAINTENANCE & DURABLE: Made from high-quality urethane material, this faux brick siding offers lasting beauty with minimal upkeep. It is UV-resistant and water-resistant, ensuring a long-term solution for both interior accents and exterior wall cladding that stands up to the elements.
- SEAMLESS INTERLOCKING DESIGN: Each panel is molded with realistic clarity to emulate authentic stacked brick. Featuring a clever tongue and groove system, the panels interlock for a seamless, professional finish that hides joints and creates a continuous stone accent wall or foundation wrap.
- VERSATILE ARCHITECTURAL UPGRADES: Perfect for transforming modern homes, commercial businesses, and retail spaces. These panels provide a high-end brick look for restaurant interiors, office lobbies, or home porches. Whether you are creating a professional TV backdrop, or upgrading exterior foundation walls, these panels offer a sophisticated finish that fits any residential or commercial project.
- PREMIUM BRICK LOOK: Achieve the high-end appearance of real masonry without the cost or weight. Our panels feature authentic 3D textures and natural color tones that look and feel like genuine brick. It is the easiest way to add immediate character and value to any residential or commercial project.
For residential paving, herringbone usually falls into two layout families: 90-degree herringbone and 45-degree herringbone. Both use the same brick relationship, but the field is rotated differently inside the border.
90-Degree Herringbone
A 90-degree herringbone layout starts square to the patio, walkway, wall, step, or border. The zigzag runs parallel and perpendicular to the main edges. This layout is usually the cleaner choice for rectangular patios and straight walks because it creates fewer perimeter cuts, wastes less material, and is easier to keep aligned.
If you are laying a 10 by 20 foot rectangular patio, a 90-degree pattern is often the practical choice. The outside cuts are more predictable, the border looks crisp, and the pattern is easier to correct as you work.
45-Degree Herringbone
A 45-degree herringbone layout rotates the field diagonally inside the border. It creates movement, makes narrow spaces feel wider, and gives patios a more custom look. The tradeoff is extra cutting. Diagonal layouts can push paver waste from about 10 percent to 15 percent or more, especially with curved edges, steps, or multiple borders.
Quick wins for a faster PC:
Scan for outdated or missing drivers - takes under a minuteDriver Scan →Clear out junk files and repair common Windows errorsFree Scan →We use 45-degree herringbone when the visual payoff is worth the extra labor, such as a formal entry walk, a driveway apron, or a large patio where the diagonal field helps break up a boxy shape.
Tools, Materials, and Planning Numbers
Before ordering brick, confirm the surface use. A pedestrian patio or walkway is not the same design problem as a driveway. For clay paving brick, pedestrian and light-traffic work commonly uses ASTM C902 pavers. In freeze-thaw regions, specify the proper weathering class, commonly Class SX where pavers may freeze while saturated. Heavier vehicular applications may require ASTM C1272 clay pavers, thicker concrete pavers, a deeper base, and a stronger edge design.
For most patios and walks, plan around these working numbers:
- Brick or paver size: commonly 4 by 8 inches, or another true 2:1 module.
- Joint width: generally about 1/16 inch to 3/16 inch for interlocking concrete pavers.
- Bedding sand: a uniform uncompacted layer about 1 inch thick.
- Pedestrian base depth: commonly 4 to 6 inches of compacted aggregate after excavation, adjusted for soil and climate.
- Driveway base depth: commonly 8 to 12 inches or more of compacted aggregate, depending on soil, drainage, loads, and local practice.
- Slope near foundation: impervious surfaces within 10 feet of a building should slope at least 2 percent away from the foundation under the 2024 IRC.
- Waste factor: about 10 percent for a straightforward 90-degree patio, and 15 percent or more for diagonal herringbone, curves, borders, or reclaimed brick.
A basic tool list includes stakes, mason’s string, tape measure, square, level or laser, marking paint, shovel or excavator access, plate compactor, screed rails, screed board, wheelbarrow, rake, broom, rubber mallet, masonry saw or wet saw, hearing and eye protection, dust protection, and gloves. For a small weekend walkway, hand tools may be enough. For a 300 square foot patio, the plate compactor and saw are not optional if you want a professional result.
Do these 3 things before closing this tab:
1Scan for outdated or missing drivers - takes under a minute2Clear out junk files and repair common Windows errors3Fix the driver behind crashes, sound loss and screen glitchesLayout Comes Before Excavation
The layout should be solved on paper and with string before the first shovel cut. Start by marking the finished outside dimensions, door thresholds, step faces, downspouts, utility boxes, cleanouts, existing concrete, bed lines, and lawn transitions. Then decide where the water goes.
A patio that touches the house should generally pitch away from the foundation at no less than 2 percent where the surface is impervious. That means a drop of 1/4 inch per foot. Over an 8 foot patio depth, that is 2 inches of fall. Over 12 feet, that is 3 inches. If the yard cannot accept that slope, the design needs drainage: a swale, area drain, channel drain, permeable section, dry well where allowed, or regrading plan.
For public-facing walks, commercial entries, multifamily common routes, and municipal sidewalk work, accessibility can control the layout. ADA walking surfaces generally have a maximum 1:20 running slope and 1:48 cross slope. That does not mean every private backyard patio is an ADA route, but it does mean a contractor should recognize when accessibility rules may apply.
Once drainage is set, plan the herringbone module. Dry-lay two or three square feet of brick with the intended joint width. Measure the real module, not just the nominal brick size. Clay brick, reclaimed brick, and tumbled pavers can vary enough to affect the final cuts. Then check how the field lands against borders. The goal is to avoid tiny slivers at the perimeter. A 1 inch wedge along a patio edge looks weak, is hard to lock in, and tends to break or loosen.
PC Slower Than It Used to Be?
A free scan shows the junk files, broken settings and background clutter dragging Windows down - then fixes them in one click.Free scan · Windows 10 & 11Outdated Drivers Are Slowing You Down
One free scan finds every outdated or missing driver and matches the right update for your exact hardware.Free scan · exact hardware matchRank #2

- Straight from a popular Chicago neighborhood, this redefined classic is tough to beat. Well-worn, textured masonry in herringbone layout. Slight brick undulations for authentic surface presentation.
- Incredible unique variation found from no other manufacturer. Professional concrete stamping tools which provide the best natural detail in the industry. Sturdiest polyurethane stamp material and toughest handles available on the market (and they come with a lifetime warranty).
- Dimensions: 24"x 31”. Mildly weathered bricks with 1/4" joints. Even depth joints make it very suitable for overlay.
- Perfect or driveways, patios, sidewalks, walkways, courtyards, outdoor kitchens - anywhere you want a rustic city brick feel.
- Set Includes: 6 rigid stamps, 1 floppy/flex mat, and a touch-up skin. Also available in singles - Just check our Amazon brand store! All concrete stamps will require the use of a release agent, either liquid or powder, to prevent them from sticking to the concrete.
Cost to Install a Herringbone Brick Patio in 2026
For 2026 planning, professionally installed brick or paver patios in the United States commonly fall around $8 to $35 per square foot, depending on market, material, excavation, access, base depth, drainage, demolition, pattern complexity, borders, and sealing. Brick patio-specific guides commonly cite about $10 to $30 per square foot installed. Higher-cost markets, premium clay brick, complex cuts, poor access, and drainage work can exceed those ranges.
Herringbone costs more than a running bond or simple stacked pattern because the layout must be controlled and the perimeter cuts take time. One Los Angeles contractor guide lists complex patterns such as herringbone as adding about $2 to $4 per square foot in labor over standard patterns. That is consistent with what we see in practice: the pavers themselves may not change, but the field layout, border integration, saw work, and alignment checks add labor.
| Project Item | Typical 2026 Planning Range | Notes |
|---|---|---|
| Installed paver or brick patio | $8 to $35 per sq. ft. | Broad national range for professional work, with market variation. |
| Brick patio installation | $10 to $30 per sq. ft. | Common range for clay brick or brick-style paver patios. |
| 200 sq. ft. patio | $2,000 to $7,000 | Realistic planning range before premium site conditions. |
| 400 sq. ft. patio | $4,000 to $12,000+ | A 20 by 20 foot patio can exceed this in high-cost markets. |
| Herringbone pattern labor premium | $2 to $4 per sq. ft. | Often tied to layout complexity and extra cuts. |
| Demolition and removal | $1 to $3 per sq. ft. | Depends on concrete thickness, access, and haul-off. |
| Base prep and gravel | $2 to $6 per sq. ft. | Varies with depth, soil, geotextile, and compaction requirements. |
| Polymeric sand or sealer | $0.50 to $1.50 per sq. ft. | Often itemized separately. |
For material takeoff, calculate field area, add border linear footage, and then apply waste. A 12 by 16 foot patio is 192 square feet. With 4 by 8 inch pavers, each paver covers about 0.222 square foot before waste, so the field requires roughly 865 pavers. Add 10 percent for a straightforward 90-degree herringbone and you are near 952 pavers. Add 15 percent for diagonal herringbone and you are near 995 pavers. If the project uses reclaimed brick, order more because chipped corners, size variation, and sorting losses are real.
Step-by-Step: How to Lay a Herringbone Brick Pattern
1. Mark the Patio or Walkway
Set stakes outside the work area and pull mason’s string to define the finished edges. Check square using the 3-4-5 method or a larger multiple, such as 6-8-10 or 9-12-15. Measure diagonals on rectangular patios; equal diagonals mean the layout is square. Mark the finished surface elevation at the house, steps, and adjoining paving.
Do not start with the excavation depth first. Start with finished height. Brick pavers should finish below door thresholds and should not trap water against siding, trim, stucco, or framing. At transitions, account for the paver thickness, 1 inch bedding layer, compacted base, and any geotextile.
2. Excavate to the Correct Depth
Excavation depth equals paver thickness plus bedding sand plus compacted base depth, with room for compaction. A typical pedestrian patio using a 2 3/8 inch paver, 1 inch bedding sand, and 6 inches of compacted aggregate needs roughly 9 3/8 inches below finished grade, plus adjustment for soil compaction and final tolerance.
Excavate beyond the finished edge by 6 to 12 inches so the base and edge restraint can support the perimeter. A common amateur failure is stopping the base at the visible brick edge. The outside course then has nothing stable to push against and begins to spread.
3. Compact the Subgrade
After excavation, compact the soil subgrade. Remove soft organic material, roots, and loose pockets. If the subgrade pumps under the compactor or stays spongy, do not bury the problem. Overexcavate and stabilize it with appropriate aggregate, geotextile, drainage correction, or engineering input for larger work.
On freeze-thaw sites, water management is the priority. Trapped water expands, lifts pavers, weakens joints, and carries fines through the base. Clean aggregate, proper slope, and a free-draining edge condition do more for long-term performance than any surface pattern.
4. Install and Compact the Aggregate Base in Lifts
Place aggregate in lifts, usually 2 to 3 inches at a time for small compactors, and compact each lift before adding the next. Do not dump 6 inches of stone and compact only the top. The surface may feel hard, but the lower layer can remain loose and settle later.
Use a level, string line, or laser to shape the base to the intended slope. The bedding sand should be uniform; it should not be used to correct a wavy base. If one area needs 2 inches of sand and another needs 1/4 inch, the base is wrong and should be reworked.
5. Screed a 1 Inch Bedding Layer
Set screed pipes or rails on the compacted base and pull clean bedding sand to a uniform 1 inch thickness. Screed only the area you can cover with pavers before disturbing it. Avoid walking in the screeded sand. If it gets rutted, loosen and rescreed it.
Rank #3

- Straight from a popular Chicago neighborhood, this redefined classic is tough to beat. Well-worn, textured masonry in herringbone layout. Slight brick undulations for authentic surface presentation.
- Incredible unique variation found from no other manufacturer. Professional concrete stamping tools which provide the best natural detail in the industry. Sturdiest polyurethane stamp material and toughest handles available on the market (and they come with a lifetime warranty).
- Dimensions: 24"x 31”. Mildly weathered bricks with 1/4" joints. Even depth joints make it very suitable for overlay.
- Perfect or driveways, patios, sidewalks, walkways, courtyards, outdoor kitchens - anywhere you want a rustic city brick feel.
- Set Includes: 3 rigid stamps, 1 floppy/flex mat, and a touch-up texture skin. Also available in singles - Just check our Amazon brand store! All concrete stamps will require the use of a release agent, either liquid or powder, to prevent them from sticking to the concrete.
Bedding sand is a setting bed, not a structural base. Thick sand holds moisture and allows pavers to rock, settle, and creep. This is one of the most common reasons a DIY patio looks good on day one but uneven by the next season.
6. Set the Border or Reference Edge
For herringbone, the first reference matters. You can set the border course first, or you can establish a rigid straightedge and add the border after the field cuts are made. We often use a soldier course, with bricks standing perpendicular to the edge, or a sailor course, with bricks running parallel to the edge. Both frame the herringbone field and contain cut pieces.
If the patio touches a house wall, do not assume the wall is straight or square. Snap or string your own control line. Older houses, poured stoops, and existing walks can be out of square by an inch or more across a short run.
7. Start a 90-Degree Herringbone Pattern
For a 90-degree start, place the first brick tight to the reference edge with its long side running along the baseline. Place the second brick at a right angle against the end of the first brick. Continue alternating bricks so each new paver forms an L with the previous one. After the first few pieces are set, the pattern will create a stair-step edge that repeats across the field.
Pull string lines across the work every few feet. Herringbone can drift slowly, and the drift may not be obvious until the cuts at the far edge become uneven. Keep joints consistent, usually around 1/16 inch to 3/16 inch for interlocking concrete pavers, unless the paver manufacturer specifies otherwise.
8. Start a 45-Degree Herringbone Pattern
For a 45-degree pattern, snap or string a diagonal control line at 45 degrees to the border. Start with a pair of bricks forming a clean V or L along that line, then build outward in both directions. Dry-lay the first six to ten bricks before committing. Those first bricks control the entire field.
Expect more triangular perimeter cuts. Keep cut pieces large enough to remain stable. As a working rule, avoid slivers smaller than about one-third of a brick where possible. If the layout creates tiny pieces, shift the starting line or adjust the border before you cut.
9. Cut the Edges
Once the field is laid, mark cuts against the border, steps, walls, and curves. Use a wet saw or masonry saw for clean work. Wear eye protection, hearing protection, gloves, and appropriate dust protection. Silica dust is a real hazard when cutting masonry, especially with dry saws.
For straight edges, mark several pavers at once and keep the cut line consistent. For curves, use a flexible hose, layout paint, or a template to mark the arc, then cut gradually. A border course can hide small variations, but it will not hide a wandering saw line.
10. Install Edge Restraints
Every unrestrained edge needs a restraint. Plastic, aluminum, concrete, or mortar-set edge systems may be appropriate depending on the project. The restraint keeps the herringbone field from spreading under foot traffic, furniture movement, carts, or vehicle loads.
For driveways and aprons, edge restraint is not a detail to treat lightly. Turning tires create horizontal forces. Herringbone helps distribute those forces, but it still needs a base and edge system designed for vehicles.
11. Sweep Joints, Compact, and Finish
Sweep joint sand across the surface until the joints are full. Then compact the pavers with a plate compactor fitted with a protective pad when required by the paver manufacturer. The compactor seats the pavers into the bedding layer and helps lock the joints. Sweep more sand and compact again as needed until the joints stay filled.
What’s actually slowing this PC down?
Pick the symptom - the matching free tool is one click away.
Rank #4

- Includes 5 Pieces per Case | 8.7 Square Ft. Per Case | Case Weight 34.4 lb |TILE SIZE: 12.5 in. W x 25.5 in. L x 0.5 in. T
- Material: Clay Brick mosaic, mounted on mesh backing for easy installation
- Finish: Tumbled finish with slight variation in tone
- Application: Suitable for fireplace facades, living room accent walls, mudroom floors, and patio surfaces
- Water Performance: Water-resistant; appropriate for wet areas such as kitchens and bathrooms, natural stone requires sealing
Polymeric sand can help reduce washout and weeds when installed correctly, but it is not a fix for poor drainage or loose edges. Follow the manufacturer’s instructions for dry surface conditions, watering rate, temperature, and cleanup. Haze and hardened residue are difficult to remove once they cure.
Common Mistakes That Ruin Herringbone Pavers
The first mistake is starting without a fixed baseline. Herringbone rewards precision and punishes drift. A pattern that is off by 1/8 inch every few courses becomes a visible problem across a 16 foot patio.
The second mistake is using bedding sand as fill. If the excavation is too deep in one spot, fix the aggregate base. Do not make the sand bed thicker. A uniform 1 inch bedding layer is the target for most interlocking paver work.
The third mistake is underbuilding the edge. Cut pieces along a herringbone border need support. Without a proper restraint, the perimeter opens, joint sand washes out, and the field starts to creep.
Recommended Free Tools
The fourth mistake is ignoring water. A patio that drains toward the house, holds water at the border, or catches downspouts without a discharge plan will fail early. Within 10 feet of a foundation, plan for at least 2 percent fall away from the building or provide a drain or swale where slope is constrained.
The fifth mistake is treating driveways like patios. A driveway needs the right paver classification, thicker base, better compaction, and stronger edge restraint. Herringbone is a good pattern for vehicle areas because it distributes horizontal forces, but the pattern alone does not make a driveway pavement.
Independent reader supportYour contribution helps us test, update, and keep practical guides available for everyone.Permits, Codes, and Site Conditions
Permit requirements vary by city, county, HOA, and floodplain status. Many small patios at grade do not need a building permit, but that is not a rule you should assume. Permit triggers can include changing drainage, working in a floodplain, connecting to storm systems, building steps or retaining walls, expanding impervious area, altering a driveway apron, working in the public right-of-way, or changing an accessible route.
Floodplain development is broader than many homeowners expect. FEMA uses the term for improvements and construction activity in mapped floodplain areas, and local floodplain administrators decide what approvals are required. If your property is near a creek, coastal area, mapped flood zone, or regulated drainage corridor, check before excavation.
The Tool Desk
Outbyte PC Repair FREERepair Windows errors before they cause bigger problemsFix Now →Outbyte Driver Updater FREEScan for outdated or missing drivers - takes under a minuteDriver Scan →Utility location is also part of responsible work. Call 811 before digging. Irrigation lines, low-voltage lighting, gas lines to grills, electrical conduits, and drainage pipes often run exactly where a patio seems easiest to place. On professional projects, we also look at access for equipment, haul-off path, stockpile location, protection of lawns and finished surfaces, and where rainwater will go during construction.
When to DIY and When to Hire a Pro
A herringbone brick walkway or small patio can be a reasonable DIY project if the area is simple, access is good, drainage is obvious, and you are comfortable renting a compactor and saw. A 40 to 100 square foot walk is a manageable starting point. Expect a full weekend for a small walk and two to four weekends for a 200 square foot patio if you are working carefully with limited help.
DIY cost is not just pavers and sand. You may need a plate compactor, wet saw, screed pipes, wheelbarrow, level or laser, tamper, safety gear, disposal, delivery, and extra base stone. Tool rental and delivery can narrow the gap between DIY and professional work, especially if the project is large enough that a crew would finish in two or three days.
Hire a pro when the patio touches the house and drainage is tight, when the site has poor soil, when the area is larger than about 250 to 300 square feet, when there are steps or walls, when the project connects to a driveway, when the pavement must meet accessibility requirements, or when the work is in a floodplain or public right-of-way. Also hire a pro if you want a 45-degree herringbone with multiple borders, curves, or premium clay brick. The layout and cuts are where experienced crews earn their keep.
Best Value

- The timeless & clean look of pavers, but with the durability and stamina of concrete. Tight-fitting common pavers in a herringbone layout. Great for indoor and outdoor applications. Mild texture and joints are perfect when surface texture and safety are a concern. Distinct v-shaped weaving pattern.
- Stamp Dimensions: 24” x 28”; Brick Dimensions: 8.25" x 4”. Butt joint, little to no "grout lines”. Overlay friendly. Approx. 3/4" thick mats; floppy is 1/2”.
- Incredible unique variation found from no other manufacturer. Professional concrete stamping tools which provide the best natural detail in the industry. All concrete stamps will require the use of a release agent, either liquid or power, to prevent sticking.
- Perfect stamp for patios, sidewalks, driveways, courtyards, walkways, parking lots, and anywhere where you want a classic and elegant brick pattern look.
A failed base or drainage error can cost more to rebuild than the original installation. If a contractor’s price is much lower than the rest, ask about excavation depth, compacted base thickness, aggregate type, edge restraint, drainage plan, paver specification, joint sand, compaction sequence, and warranty. Cheap paver work usually removes cost from the parts you cannot see after the bricks are down.
Maintenance After Installation
After installation, keep the joints filled. Inspect the surface after the first heavy rain and again after the first season. If joint sand drops, sweep in more compatible sand. Do not pressure wash aggressively into joints, because removing the joint material weakens the interlock.
Clean leaves, soil, and mulch off the edges so water can exit the pavement. Keep downspouts from dumping directly onto the field unless the drainage system was designed for it. If a paver settles, lift that small area, correct the bedding and base issue, and reset it before the dip grows.
Sealing is optional on many patios, but it can help with color enhancement and stain resistance. It also adds maintenance. If sealing is included, confirm the pavers are clean, dry, compatible with the sealer, and old enough for the manufacturer’s recommendation. Poor sealer timing can trap moisture or create blotchy results.
Do these 3 things before closing this tab:
1Repair Windows errors before they cause bigger problems2Fix the driver behind crashes, sound loss and screen glitches3Clear out junk files and repair common Windows errorsThe Bottom Line
To lay a herringbone brick pattern correctly, start with the structure: drainage, finished elevations, compacted subgrade, aggregate base, uniform bedding sand, and edge restraint. Then choose the layout. Use 90-degree herringbone for rectangular patios and walks when you want efficient installation and fewer cuts. Use 45-degree herringbone when the diagonal look justifies the extra saw work and waste.
For 2026 budgeting, most professionally installed brick or paver patios land somewhere around $8 to $35 per square foot, with brick patio work commonly around $10 to $30 per square foot. Herringbone can add roughly $2 to $4 per square foot in labor on complex jobs. Order about 10 percent extra pavers for a straightforward herringbone layout and closer to 15 percent or more for diagonal patterns, curves, borders, or reclaimed brick.
The pattern is only as good as what supports it. When the base is compacted in lifts, the slope moves water away, the border contains the field, and the first few courses are set from true reference lines, herringbone brick paving is durable, stable, and worth the extra layout effort.
Frequently Asked Questions
Is 45-degree or 90-degree herringbone better for a brick patio?
Use 90-degree herringbone for most rectangular patios and walks because it usually needs fewer cuts and wastes less material. Use 45-degree herringbone when you want a stronger diagonal visual effect and are comfortable paying for extra cutting and layout labor.
What’s actually slowing this PC down?
Pick the symptom - the matching free tool is one click away.
How much extra brick should I order for herringbone?
Plan about 10 percent extra for a straightforward 90-degree herringbone patio. Use 15 percent or more for 45-degree layouts, curves, multiple borders, small edge cuts, or reclaimed brick with size and condition variation.
Can I lay herringbone brick directly on sand or dirt?
No. For a lasting patio or walkway, brick pavers need compacted subgrade, compacted aggregate base, a uniform bedding sand layer about 1 inch thick, edge restraints, joint sand, and final compaction. Dirt or thick loose sand will settle and shift.
How much does a herringbone brick patio cost in 2026?
Professionally installed brick or paver patios commonly run about $8 to $35 per square foot in 2026, with brick patio work often around $10 to $30 per square foot. Herringbone can add roughly $2 to $4 per square foot in labor on complex layouts.
Do I need a permit for a brick paver patio?
Many small at-grade patios do not need a building permit, but local rules vary. Permits may be required if the project changes drainage, expands impervious area, affects a driveway apron, includes steps or walls, is in a floodplain, or touches a public right-of-way.
Why is herringbone recommended for driveways?
Herringbone spreads horizontal forces better than many simple patterns, which helps resist creep from tires, turning, carts, and traffic. Driveways still need the proper paver rating, thicker compacted base, drainage, and strong edge restraint.
Quick Recap
Product prices and availability are accurate as of the date/time indicated and are subject to change. Any price and availability information displayed on Amazon at the time of purchase will apply.




